logotype
  • About
  • Residential
    • Special Cleaning
    • Carpet Cleaning
    • Window Cleaning
    • Deep Cleaning
    • Apartment Cleaning
      • Sofa Cleaning
      • Yard Cleaning
      • Roof Cleaning
      • Carpet Cleaning
    • Duct Cleaning
    • Upholstery Cleaning
    • Pool Cleaning
    • After Party Cleaning
  • Commercial
    • Office Cleaning
    • Hotel Cleaning
    • Hospital Cleaning
    • Mall & Shops Cleaning
    • Industrial Cleaning
    • Pharmacy Cleaning
    • Premises Cleaning
    • School Cleaning
  • Our Locations
    • Montréal
    • Westmount
    • Ottawa
    • Toronto
  • Contact
CALL US TODAY
  • About
  • Residential
    • Special Cleaning
    • Carpet Cleaning
    • Window Cleaning
    • Deep Cleaning
    • Apartment Cleaning
      • Sofa Cleaning
      • Yard Cleaning
      • Roof Cleaning
      • Carpet Cleaning
    • Duct Cleaning
    • Upholstery Cleaning
    • Pool Cleaning
    • After Party Cleaning
  • Commercial
    • Office Cleaning
    • Hotel Cleaning
    • Hospital Cleaning
    • Mall & Shops Cleaning
    • Industrial Cleaning
    • Pharmacy Cleaning
    • Premises Cleaning
    • School Cleaning
  • Our Locations
    • Montréal
    • Westmount
    • Ottawa
    • Toronto
  • Contact
logotype
logotype
  • About
  • Residential
    • Special Cleaning
    • Carpet Cleaning
    • Window Cleaning
    • Deep Cleaning
    • Apartment Cleaning
      • Sofa Cleaning
      • Yard Cleaning
      • Roof Cleaning
      • Carpet Cleaning
    • Duct Cleaning
    • Upholstery Cleaning
    • Pool Cleaning
    • After Party Cleaning
  • Commercial
    • Office Cleaning
    • Hotel Cleaning
    • Hospital Cleaning
    • Mall & Shops Cleaning
    • Industrial Cleaning
    • Pharmacy Cleaning
    • Premises Cleaning
    • School Cleaning
  • Our Locations
    • Montréal
    • Westmount
    • Ottawa
    • Toronto
  • Contact
woman cleaning the kitchen
Blog Cleaning Idea Home Cleaning House Cleaning Hygiene News
By Fin Dittimi January 18, 2023

How to Clean Your Kitchen Appliances.

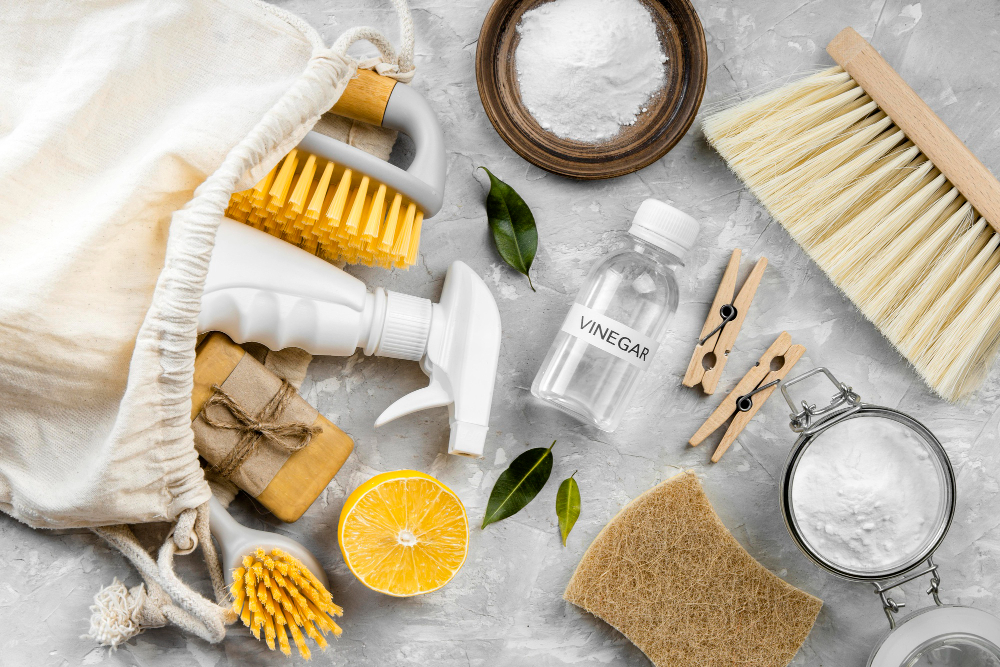
Cleaning your kitchen appliances may seem like a daunting task, but it’s important to keep them in good condition to ensure they last for years to come. Here are some tips for cleaning your kitchen appliances:
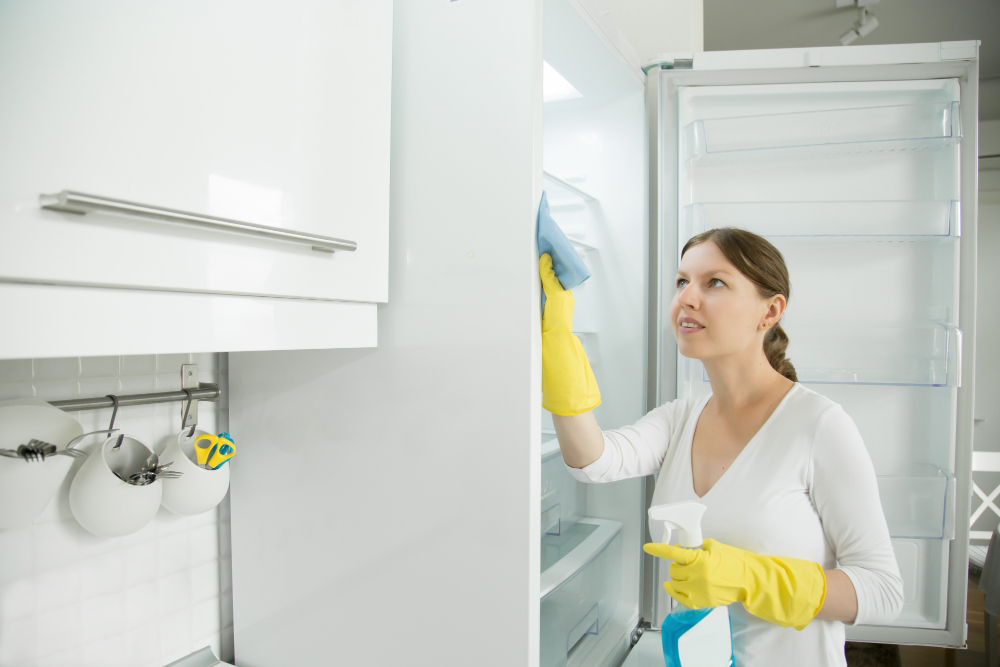
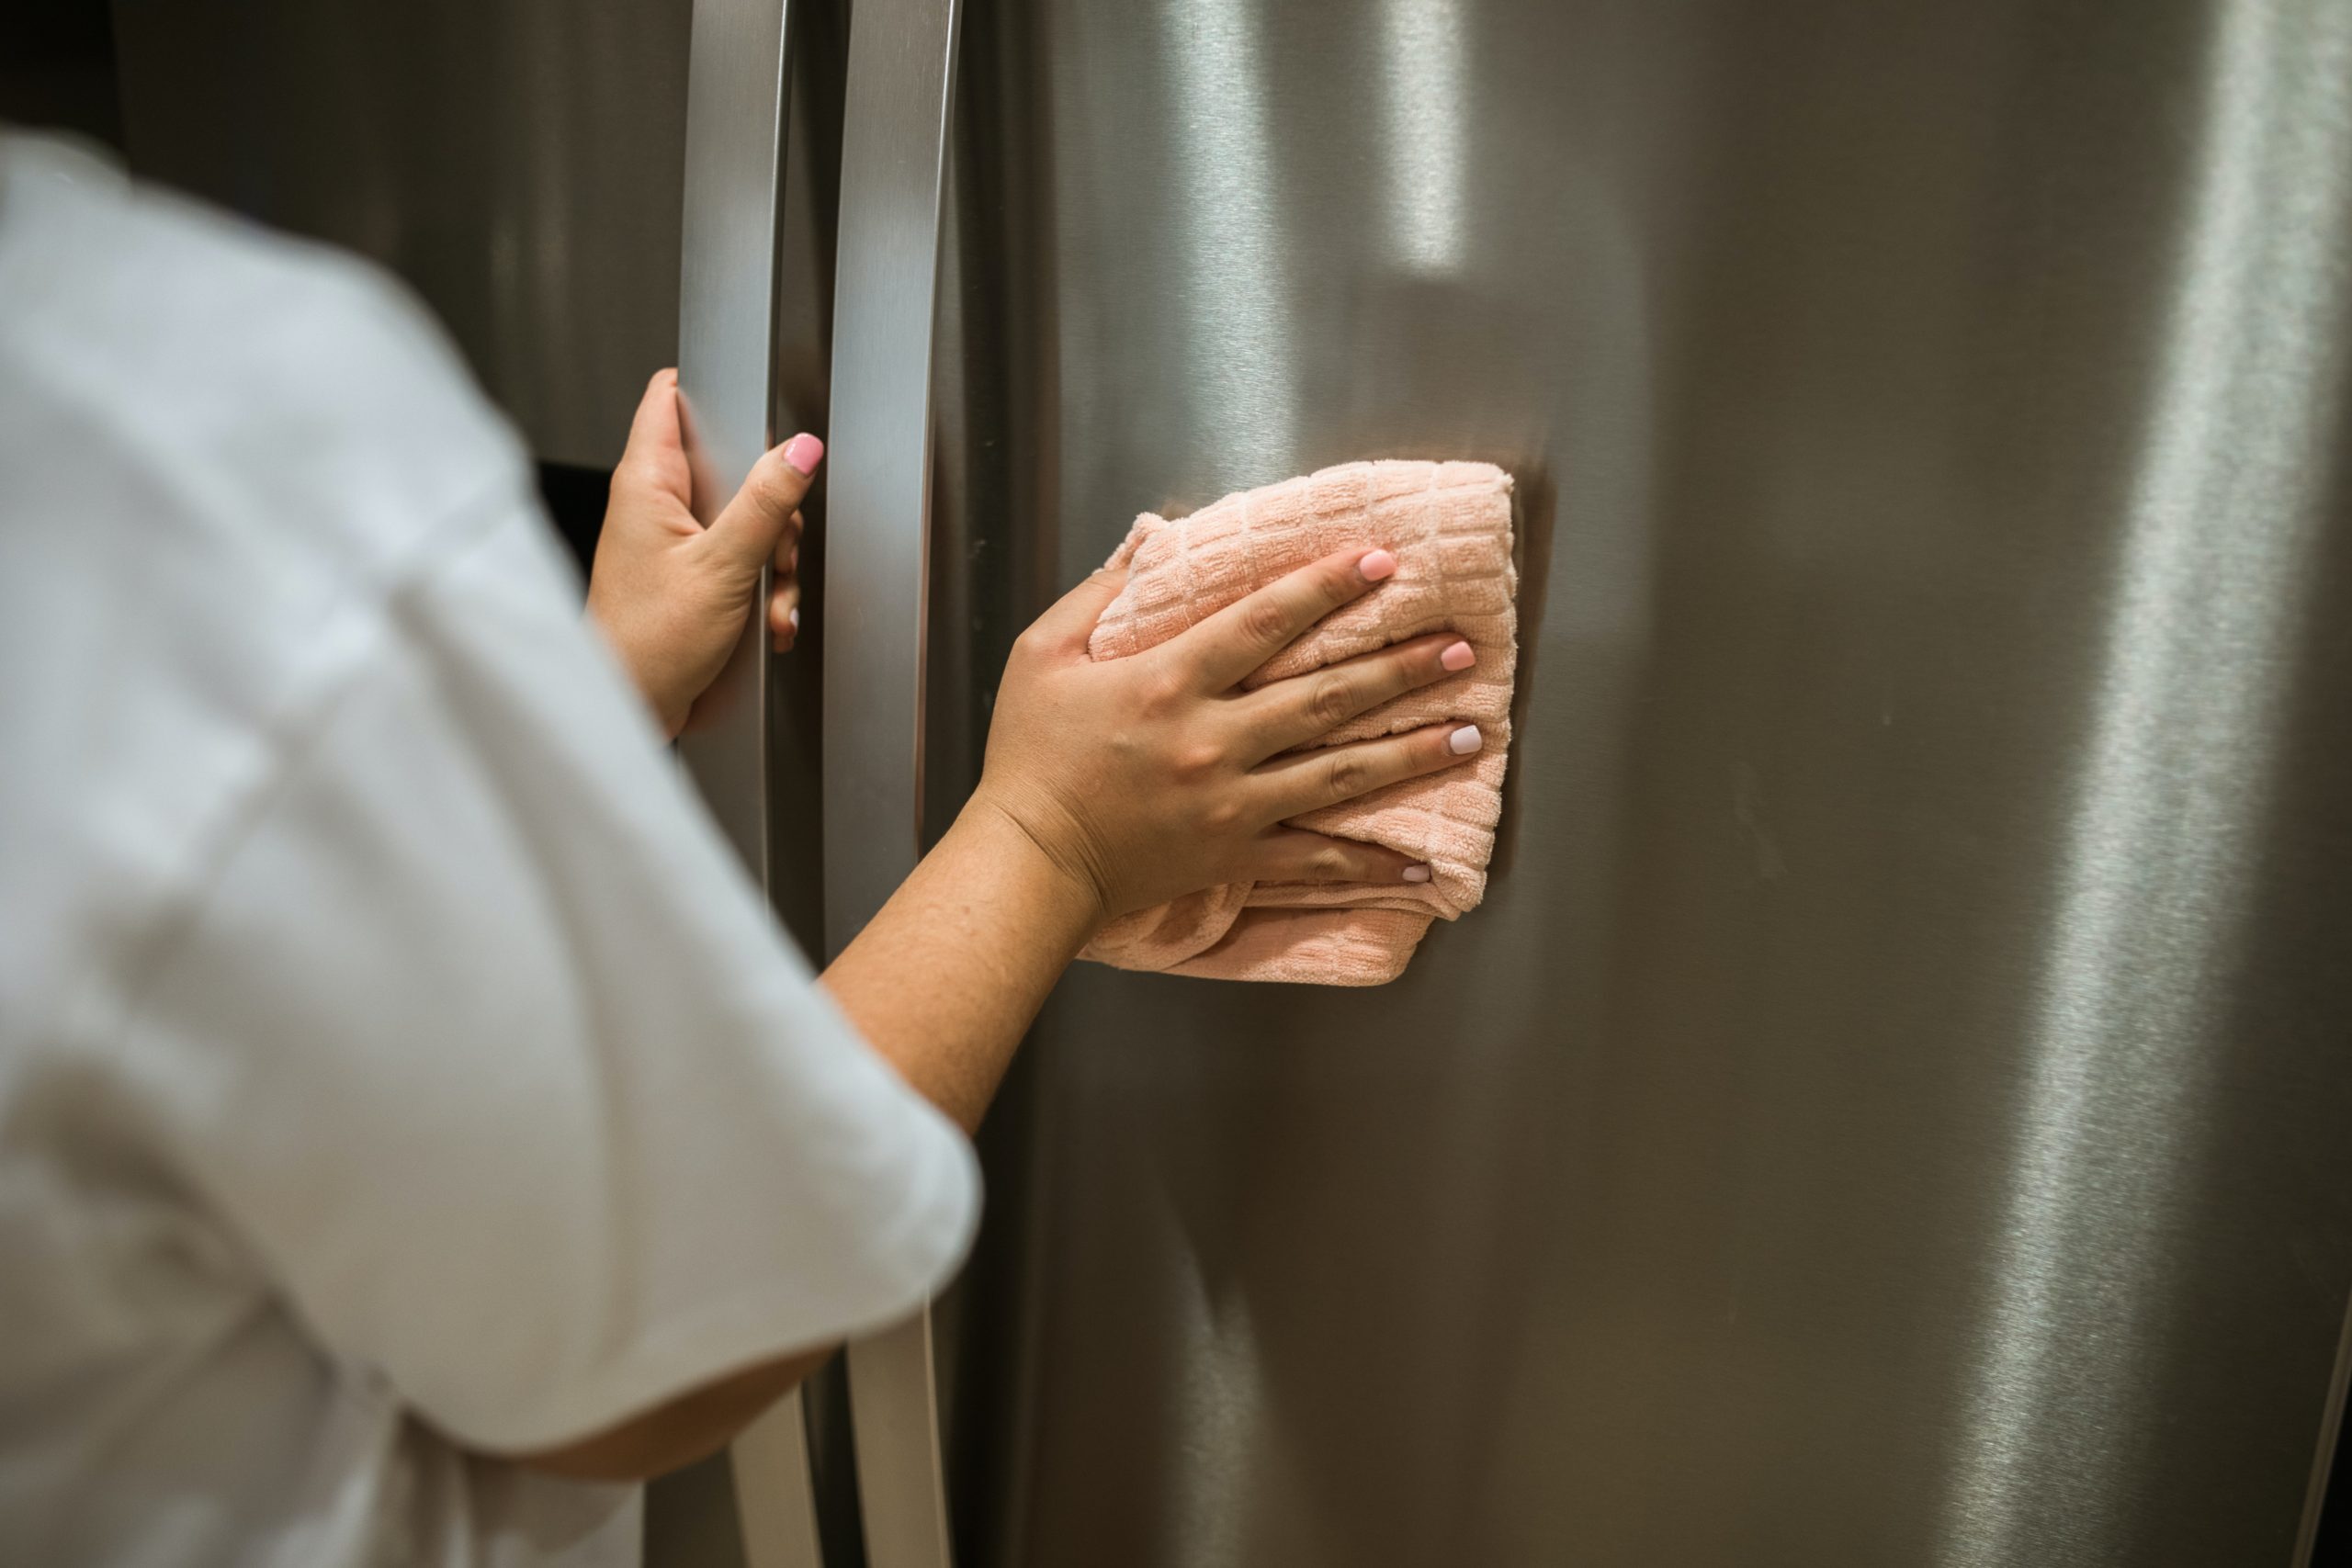
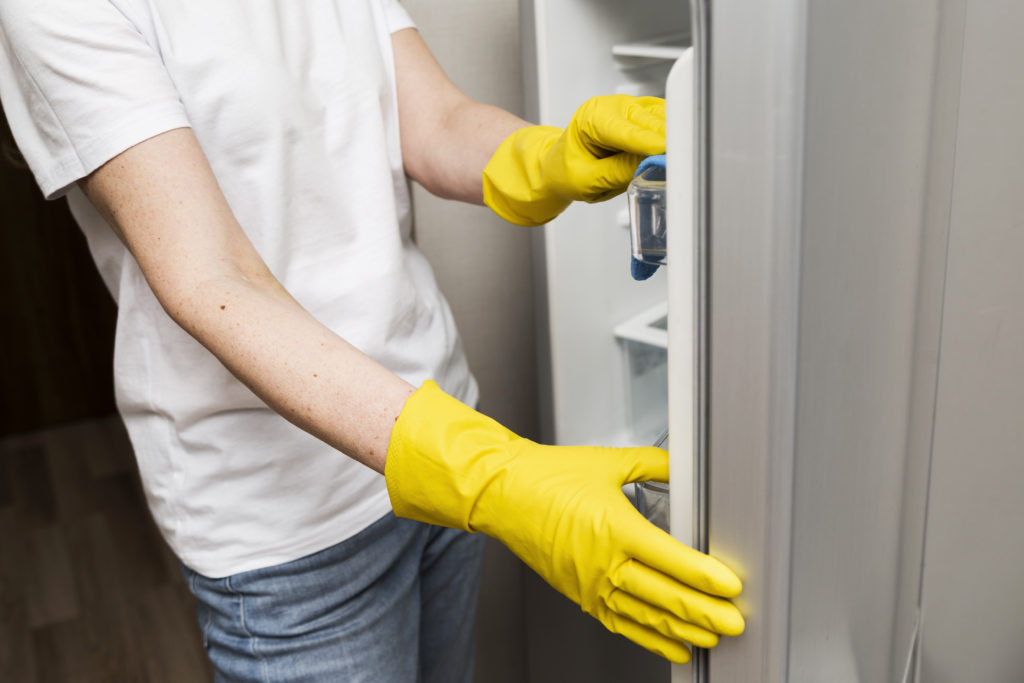
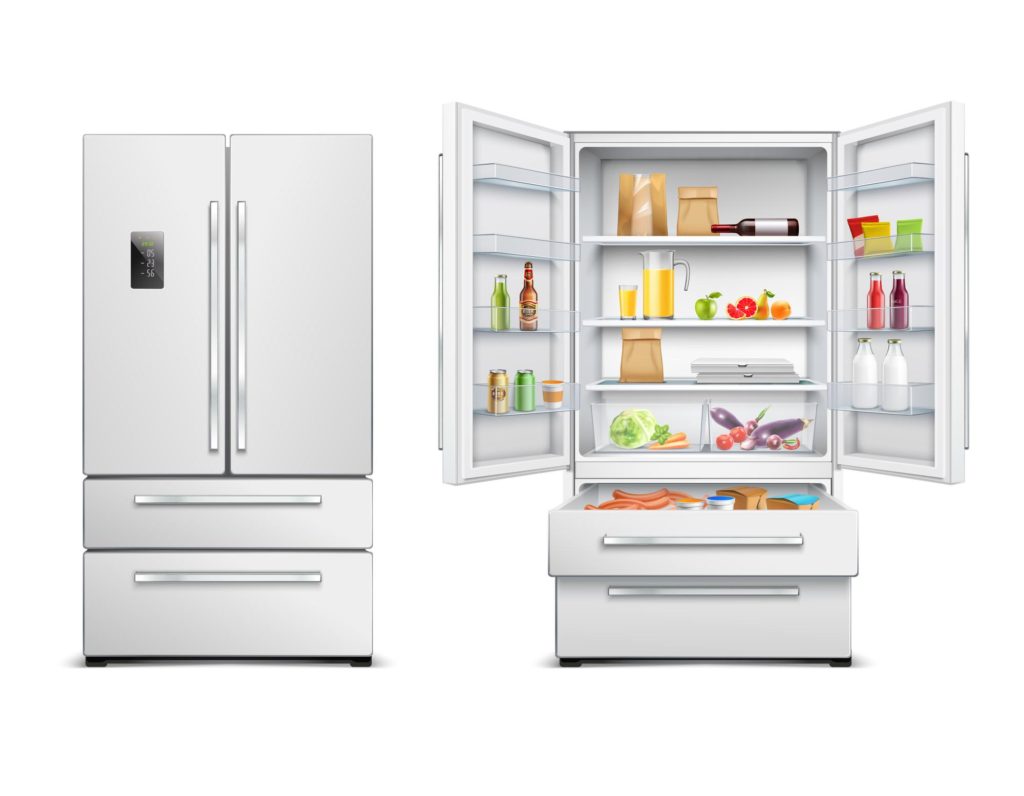
Refrigerator:

Start by emptying the fridge and wiping down the shelves and interior with a solution of warm water and mild detergent. Pay attention to the door seals and gaskets, as these can easily collect food particles and become sticky. Once you’ve cleaned the interior, move on to the exterior, wiping it down with a damp cloth.
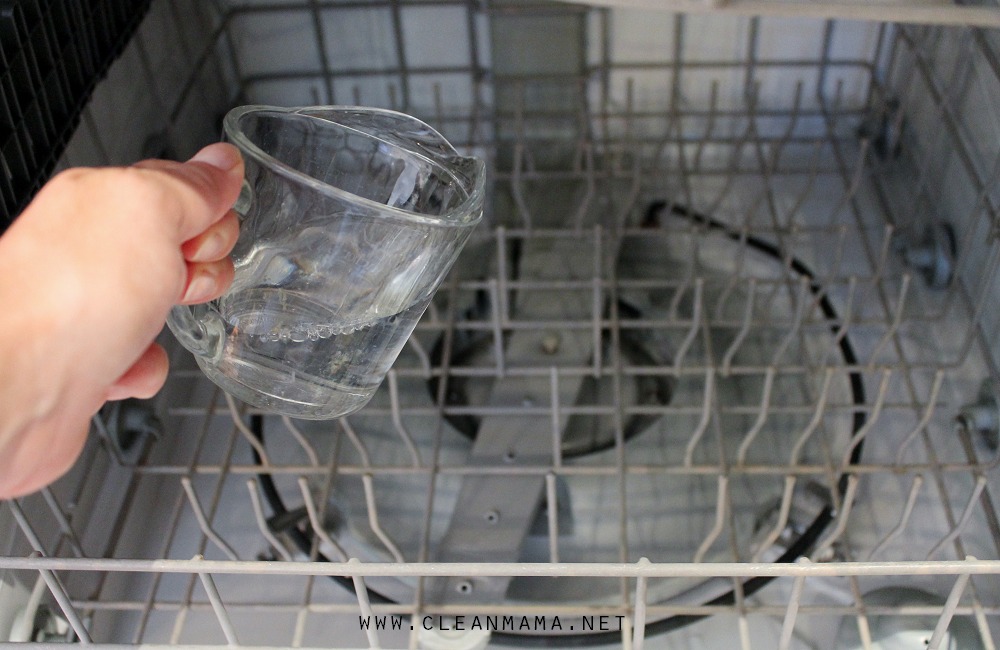
Dishwasher:

Run a cycle with a cup of white vinegar in the bottom of the dishwasher to remove any built-up grime and eliminate any bad odors. Once the cycle is complete, wipe down the interior, including the door seal, with a damp cloth.
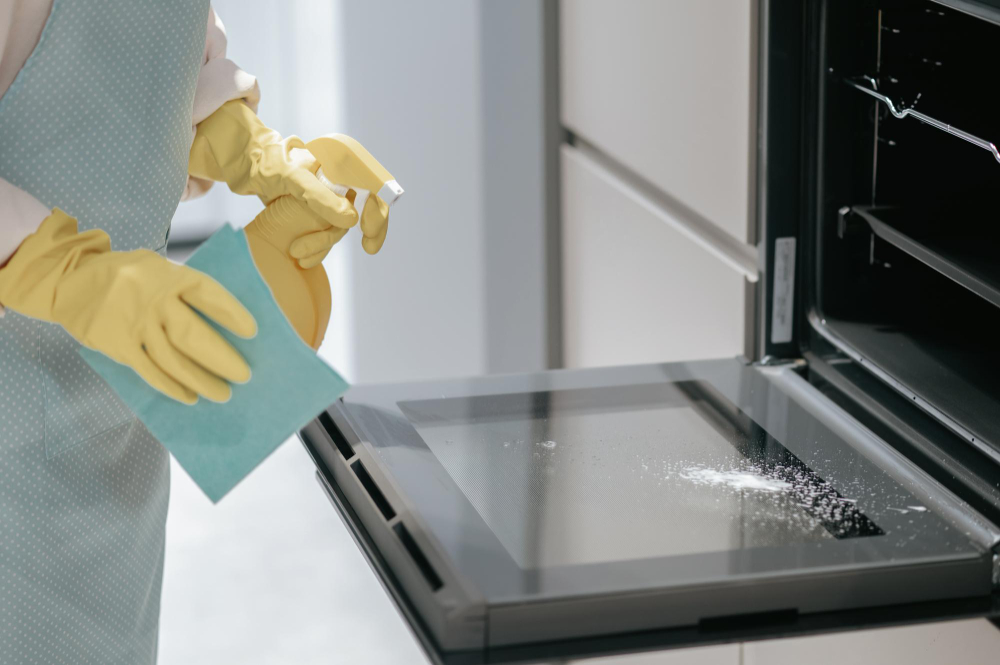
Oven:

For a self-cleaning oven, simply run the self-cleaning cycle according to the manufacturer’s instructions. For a regular oven, remove the racks and soak them in warm, soapy water. Then, spray the interior of the oven with an oven cleaner and let it sit for the recommended amount of time. Use a sponge or cloth to wipe away the cleaner and any built-up grime.
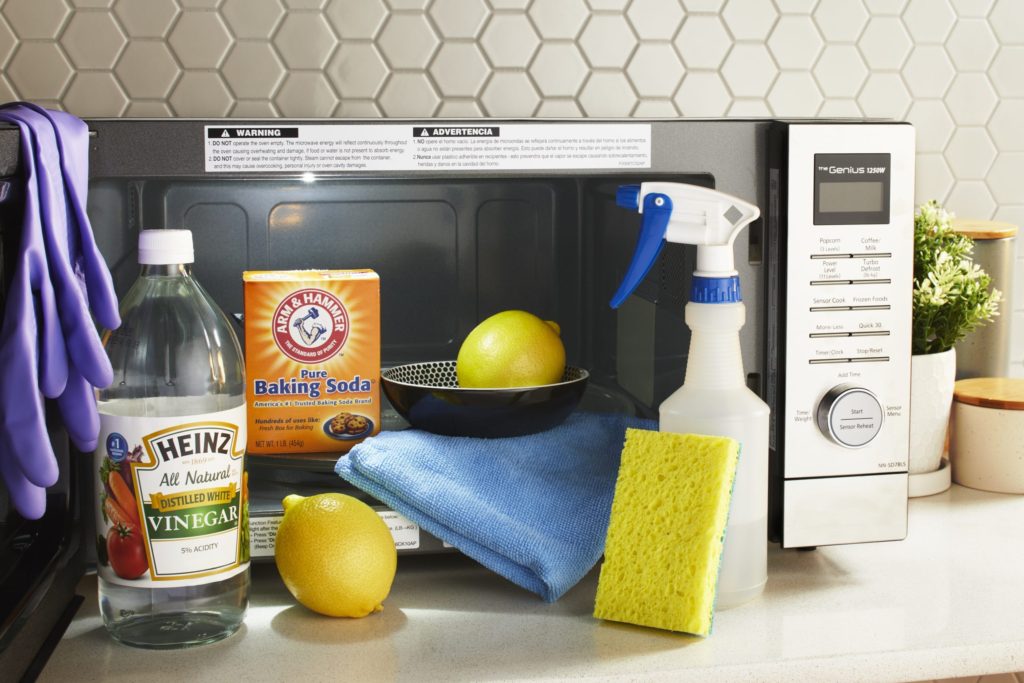
Microwave:

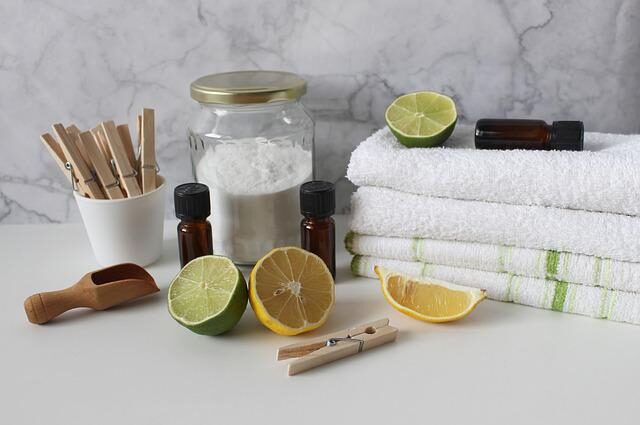
Fill a bowl with 1 cup of water and 1 tablespoon of lemon juice or vinegar. Place the bowl in the microwave and run it on high for 5 minutes. The steam from the water and acid from the lemon juice or vinegar will help loosen any food particles and make it easier to wipe down the interior.
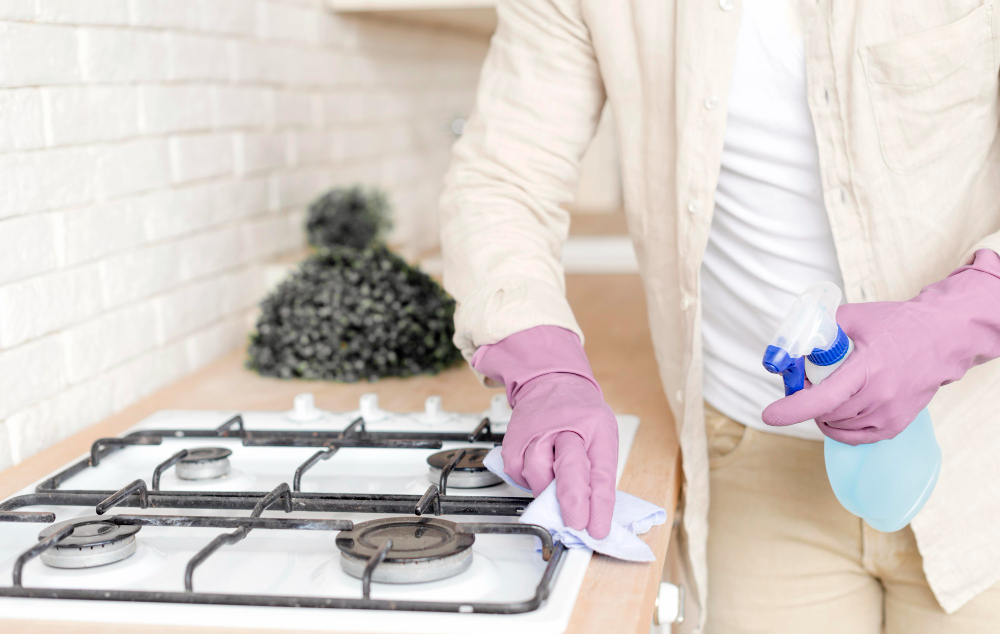
Stovetop:

Depending on the type of stove you have, the cleaning process will vary. For a gas stove, remove the burner grates and soak them in warm, soapy water. Use a stiff brush to scrub away any built-up grime. For an electric stovetop, wipe down the surface with a solution of warm water and mild detergent, being careful not to get water into the heating elements.
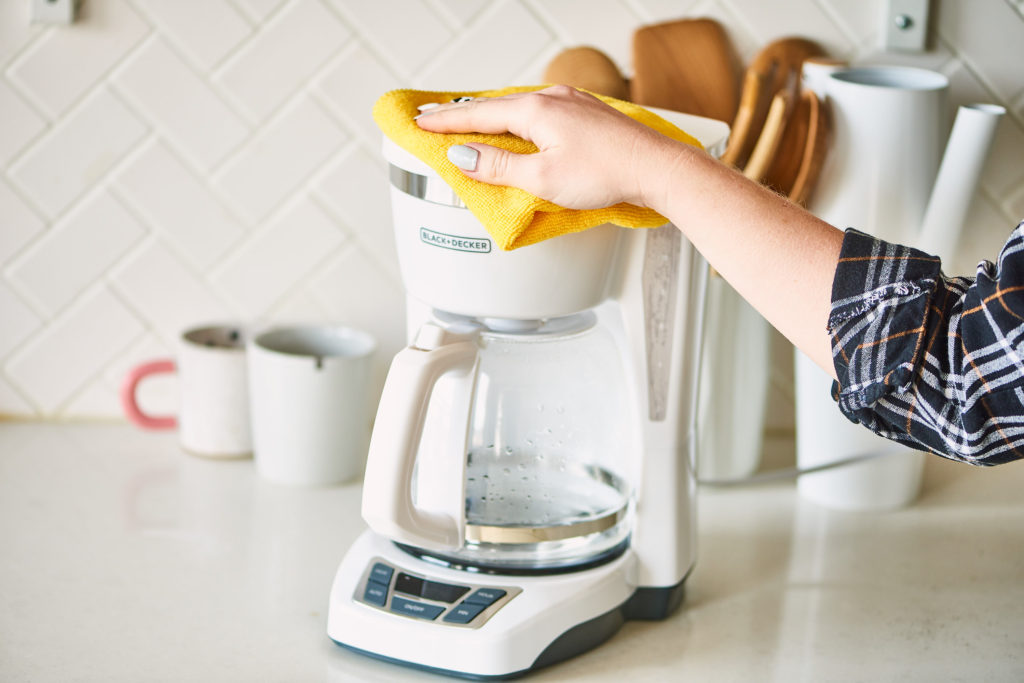
Coffee Maker:

Run a cycle of plain water to remove any coffee residue and mineral buildup. Then, run a cycle with a mixture of 1 part white vinegar to 3 parts water to remove any remaining buildup. Once the cycle is complete, rinse the coffee maker with plain water and wipe down the exterior with a damp cloth.

By following these tips, you can keep your kitchen appliances clean and in good working order. Remember to always refer to the manufacturer’s instructions for specific cleaning guidelines.

READ MORE
eco friendly products
Blog Cleaning Idea Home Cleaning House Cleaning Hygiene News
By Fin Dittimi January 17, 2023

The Benefits of Using Eco-Friendly Cleaning Products

Eco-friendly cleaning products are becoming increasingly popular as more and more people become aware of the negative impact that traditional cleaning products can have on the environment. These products are made from natural ingredients and do not contain harsh chemicals that can harm the environment or human health. In this blog post, we will discuss the benefits of using eco-friendly cleaning products and how they can help you maintain a clean and healthy home while also protecting the planet.

They are safer for the environment

Eco-friendly cleaning products are made from natural ingredients, such as plant-based oils and extracts, that do not contain harsh chemicals that can harm the environment. These products are biodegradable, which means that they can be broken down by natural processes, and they do not leave any harmful residue behind. This is in contrast to traditional cleaning products, which can contain ingredients such as chlorine, ammonia, and phosphates that can damage the environment and harm aquatic life.

They are safer for human health

Eco-friendly cleaning products are also safer for human health because they do not contain harsh chemicals that can cause irritation or allergic reactions. Traditional cleaning products can contain ingredients that can cause respiratory problems, skin irritation, and even cancer. Eco-friendly cleaning products are made from natural ingredients that are less likely to cause these types of reactions. This makes them a great choice for people with allergies or sensitivities, as well as for families with children or pets.

They are more effective

Many people assume that eco-friendly cleaning products are less effective than traditional cleaning products, but this is not the case. In fact, many eco-friendly cleaning products are just as effective, if not more so, than traditional cleaning products. This is because they are designed to target specific cleaning challenges, such as removing stains or breaking down dirt and grime, rather than relying on harsh chemicals to do the job.

They are more affordable

Eco-friendly cleaning products are often more affordable than traditional cleaning products because they are made from natural ingredients that are less expensive to produce. Additionally, because they are not as harsh as traditional cleaning products, they can be used in smaller quantities to achieve the same cleaning results. This means that you can save money in the long run by using eco-friendly cleaning products instead of traditional cleaning products.

They promote sustainability

Using eco-friendly cleaning products is an important step in promoting sustainability. These products are made from natural ingredients that are renewable, rather than from non-renewable resources. Additionally, they do not harm the environment, which helps to promote a healthy and sustainable planet.

In conclusion, eco-friendly cleaning products are a great choice for anyone looking to maintain a clean and healthy home while also protecting the environment. These products are made from natural ingredients that do not harm the environment or human health. They are just as effective as traditional cleaning products, and they are more affordable in the long run. By using eco-friendly cleaning products, you can promote sustainability and help to protect the planet for future generations.

READ MORE
laundry-4017609_640
Blog House Cleaning
By Fin Dittimi June 2, 2022

The Surprising Truth About Baking Soda: Can You Use It For Cooking?

Baking soda is one of those ingredients that most of us have in our pantry, but we’re not really sure what to do with it. We know it’s great for baking, but what else can it be used for?

As it turns out, baking soda has a lot of different uses, both in the kitchen and out. Here are some of the surprising ways you can use baking soda:

Make a natural cleaning solution.

Baking soda is a great natural cleaning agent. Just mix equal parts baking soda and water to create a paste, and use it to scrub away dirt and grime.

Unclog your drains.

If you’ve got a clogged drain, try pouring a cup of baking soda down it, followed by a cup of vinegar. Let the mixture sit for a few minutes, then flush with hot water.

Freshen up your laundry.

Add a cup of baking soda to your laundry load to help eliminate odors. You can also sprinkle some baking soda in your shoes to help absorb any unwanted smells.

Get rid of garden pests.

Mix together equal parts baking soda and flour, and sprinkle it around the base of your plants. This will help deter pests like slugs and ants.

Make a homemade fire extinguisher.

If you’ve got a small fire, you can extinguish it by pouring baking soda on it. Just make sure you have a box or two on hand, as you’ll need a lot of baking soda to put out a bigger fire.

Treat bug bites.

If you’ve been bitten by a mosquito or other insect, make a paste of baking soda and water and apply it to the bite. This will help to reduce swelling and itchiness.

Soothe sunburns.

Make a paste of baking soda and water and apply it to sunburned skin. This will help to relieve pain and irritation.

Deodorize your fridge.

If your fridge is starting to smell, place a bowl of baking soda inside. The baking soda will help to absorb any unwanted odors.

Clean your jewelry.

Make a paste of baking soda and water, and use it to clean your gold and silver jewelry. This will help to remove any build-up of dirt and grime.

whiten your teeth.

Mix together a small amount of baking soda and water, and use it to brush your teeth. This will help to remove any stains and whiten your teeth.

If you’re looking for a safe and natural way to clean your cooking tools and surfaces, baking soda can be a great option. It’s gentle enough to use on non-stick surfaces, and can even help to remove stubborn stains.

So, the next time you’re in the kitchen, don’t forget about baking soda. It’s a versatile ingredient that can help you create delicious, flavorful, and healthy dishes.

Ready to schedule a service? Call 514-629-0841 to speak with our friendly customer service representatives. Or SCHEDULE A FREE ESTIMATE today!

READ MORE
Blog House Cleaning
By Fin Dittimi June 2, 2022

can you use cleaning baking soda for baking

Cleaning baking soda is a great way to get your baking done quickly and easily. It is also a great way to get rid of any unwanted odors or tastes in your food. However, before you start using cleaning baking soda for baking, you should know a few things about it.

How to use cleaning baking soda for baking:

To use cleaning baking soda for baking, you will need to add it to your flour. You can add it to any type of flour, but you may want to start with a cup of flour and half a cup of baking soda. Once you have added the baking soda to the flour, you will need to mix it well. After the baking soda is mixed into the flour, you can start using it to bake.

Benefits of using cleaning baking soda for baking:

There are many benefits of using cleaning baking soda for baking. One of the biggest benefits is that it can help to speed up the baking process. Another benefit is that it can help to keep your food from sticking to the pan. Additionally, cleaning baking soda can help to absorb any unwanted odors or tastes in your food.

Tips for using cleaning baking soda for baking:

When you are using cleaning baking soda for baking, there are a few tips that you should keep in mind. First, you should always make sure that you mix the baking soda into the flour well. Second, you should start with a small amount of baking soda and increase it as needed. Third, you should always add the baking soda to the flour before you add any wet ingredients.

Conclusion:

Cleaning baking soda is a great way to get your baking done quickly and easily. It is also a great way to get rid of any unwanted odors or tastes in your food. However, before you start using cleaning baking soda for baking, you should know a few things about it.

Ready to schedule Best Cleaning Services in Montreal service? Call 514-629-0841 to speak with our friendly customer service representatives. Or SCHEDULE A FREE ESTIMATE today!

READ MORE
pexels-huseyn-kamaladdin-667838
Blog House Cleaning
By Fin Dittimi April 30, 2022

EASY WAYS TO FRESHEN UP YOUR HOME

Rather than diving into a full deep clean, we more often than not like to do small little cleaning spurts that freshen up our space without taking too much time or effort. It always seems the case that we have so much to do and so little time. There are so many distractions in our daily lives that can leave us in a vicious cycle that sometimes needs a change. Here are just a few easy ways we can freshen up our homes. Whether your living room, kitchen, bedroom, dining room, or laundry room is driving you absolutely nuts, here are some suggestions to freshen up the space;

Discover Storage Solution

No house can have too much storage. It’s much nicer to know that everything has its place and can easily be put away. But sometimes, we can struggle with finding sufficient storage in our homes. There are, however many tricks and tips to increase your storage and not waste any valuable space, including:

  • Always choose beds with storage. Whether it’s empty space under the bed or built-in storage, the bed is a great place to store your spare bedding, Christmas decorations, out-of-season clothes, or pretty much anything you would rather be out of sight.
  • Keep your baking trays in the oven. This saves valuable cupboard space for other kitchen appliances and food.
  • Use the inside of kitchen cupboards. Add hooks to attach cleaning clothes or attach a metal magazine rack to the inside of the door which is perfect for storing tin foil and cling film.
  • Use thin shelves to maximize your pantry storage – go for thinner shelves rather than thicker so that you can use the space more efficiently. You can also buy platforms to put inside kitchen cupboards which act as an extra shelf so that you are using all the space available.
  • Insert a slimline cabinet into unused bathroom spaces – there are loads of these that easily fit in bathrooms or ensuites. They are the perfect place to store your toiletries and cleaning supplies.
  • Buy multifunctional furniture – full-length mirrors can act as jewelry cabinets as well, keeping all of your accessories neat, tidy, and out of the way. Coffee tables can also become display cabinets, magazine racks, or extra storage.

Do Regular Clean Up Around The House

Focus on one room at a time. By using your to-do list, you can break up the jobs into manageable chunks which means you can do a little bit each day in between deeper cleans, rather than one massive clean of the whole home which you end up dreading. Here are some quick ideas on how to clean efficiently and quickly when you are in a rush but need an instant freshen-up. Remember, each room should take about 10- 20 minutes.

KITCHEN

  • Do the dishes (by hand or load the dishwasher)
  • Declutter
  • Clean the counters
  • Wipe down appliances (fridge, microwave and oven)
  • Clean the floor (start in the corner furthest from the door and work your way out)

LIVING ROOM

  • Declutter
  • Dust and clean any glass and mirrors
  • Vacuum

BEDROOMS

  • Declutter (and make the bed)
  • Dust
  • Vacuum

BATHROOM

  • Spray services with cleaner and leave to soak
  • Clean the toilet
  • Clean the mirror
  • Finish wiping down the surfaces
  • Clean the floor

Add Colour to your Home

Whenever you think a home needs an uplift, add some brightly colored cushions and a matching throw for an instant makeover. It’s really quick and easy to do, making such a visual impact, whilst saving you time and money on decorating the entire room. Once you get bored of that color, you can simply change it again! Keeping the walls a neutral color means that you can change the color schemes easily.

Declutter

It’s always good to do a regular decluttering, but usually, it’s something we avoid at all costs. The trick is to be brutal. In terms of clothes, if you haven’t worn something in over a year, you obviously don’t love it that much. Wedding dresses and formal attire are exceptions, but anything else you think you need to keep “just in case” you probably don’t. These things are taking up precious space in your wardrobe and could be used by someone else. Once it’s gone, you are more than likely going to forget you ever owned it. When decluttering your room, think about whether or not you really need it or if it’s just collecting dust. Once you’ve decided, do one of the following:

  • Tidy it away. It sounds simple but just putting everything away can make a room look fresher and make you feel better. Instead of folding things in piles in drawers, fold them in rectangles and place them next to each other. This means when you open wardrobes and drawers, you can see all your items at once making things easy to find.
  • Donate – There are many charities out there that will take your unwanted clothes, which can really help others. Also, ask around to see if you have friends that want anything.
  • Sell – If stuff is just sat that, why not try and make some money from it?
  • Throw Away – If none of the other options are suitable, then it’s time to say goodbye and move on.

Add Some Green Plant

Adding plants to your home is a great way to freshen up a room. Whether it’s a large potted plant, a tree, a small succulent, or a cactus, the options are endless. Not only do they add a burst of color, but they also look great and they emit oxygen which can filter and improve the air quality in the room.

READ MORE
pexels-rodnae-productions-5591930
Blog House Cleaning Uncategorized
By Fin Dittimi April 29, 2022

Easy Steps To Clean Your Fridge

Few large kitchen appliances get such frequent use as refrigerators, so it’s crucial to keep them clean. A fridge exterior can help brighten your whole kitchen, while a clean interior looks great, uses space more efficiently, and can help you keep food fresher. These are easy steps on how to clean your fridge inside and out. 

Step1: Take everything out of the refrigerator

In order to properly deep clean a refrigerator, it needs to be totally empty, which means taking everything,  Stash highly perishable foods like milk or raw chicken in a cooler, to avoid spoiling.

Once you’ve taken out the food, remove any detached shelves, drawers, and door inserts.

Step2: Throw out old and spoiled food

As you transfer food from the refrigerator to the cooler or freezer, check for spoiling and throw away anything that’s gone off, or that you simply know you will not use. If your refrigerator is home to a lot of leftovers in food storage containers, this is a good time to review the contents and throw out any food that you know you will not consume. Disposing of leftovers can be an unpleasant task, but donning a pair of rubber household gloves can help to make scooping old food out from storage containers a less disgusting job.

Step3: Wash shelves and drawers

Start by washing the shelves, drawers, and/or door inserts you removed from the refrigerator, which can be done just like you wash dishes, using a sponge and dish soap. If the refrigerator shelves are made of tempered glass, a bit of caution is required when cleaning them. Priyanka Rathore, a communication manager for KitchenAid, says, “It is important not to clean glass shelves or covers with warm water when they are cold. Shelves and covers may break if exposed to sudden temperature changes or impact, such as bumping.”

Step4: Clean the interior of the refrigerator

When it comes to choosing a solution for cleaning the interior of a refrigerator, there are a number of options, and personal choice should certainly play a role. If using a disinfectant like diluted bleach solution makes you feel more comfortable, that is a fine choice. If using bleach in the place where you store your food makes you feel uncomfortable, that is also okay.

There are, however, some products to avoid when cleaning a refrigerator, Rathore says. “Do not use abrasive or harsh cleaners such as window sprays, scouring cleansers, flammable fluids, cleaning waxes, concentrated detergents, or cleaners containing petroleum products on plastic parts, interior, and door liners or gaskets.” After scrubbing with a sponge, use a microfiber cloth or paper towels to give the interior of the refrigerator a going-over. Use an old toothbrush to reach tight or oddly-shaped parts and a thin cloth for cleaning the rubber seal around the door.

Step5: Treat stubborn spills and stains with these tricks

To remove a stubborn, stuck-on mess, wet a sponge or rag with very hot water, wring it out and press it on the spill just as you would a compress, repeating as needed and being careful not to burn yourself with the hot water. The heat and moisture will reconstitute the dried-on mess, making it pliable and easy to wipe up.

Young worker woman wearing rubber protective yellow gloves cleaning the fridge with rag and spray bottle detergent. Home, housekeeping concept. Lifestyle

Step6: Clean the exterior

The exterior of plastic refrigerators can be cleaned in the same way as the interior, using a microfiber cloth or sponge with a mild cleaning solution. Stainless steel refrigerators can be wiped clean using a microfiber cloth; very dirty exteriors may require a stainless steel cleaner, though typically one is not needed. If fingerprints and smudges often show up on your stainless steel appliances, a wax-based cleaner can help to prevent them. Regardless of material, don’t overlook the top of the refrigerator when cleaning its exterior as it is likely very dirty.

Fridge Cleaning Hacks

  • Wipe up spills and stains as soon as they happen since, the longer they sit, the harder they’ll be to remove. 
  • Make sure containers are clean going into the fridge. A jam jar or ketchup bottle with residue on the outside will make your fridge sticky. 
  • When thawing items such as frozen meat, place them on a rimmed plate or baking sheet to control spills or leakage.
  • Soak cotton balls in vanilla extract and leave them in the fridge for a few hours to provide a pleasant aroma. 
  • Clean the refrigerator door seal with a toothbrush and a mixture of bleach and warm water. Wipe with a dry cloth.
  • Try scrubbing tough stains with a mildly abrasive toothpaste.
  • Place a crumpled piece of brown paper in the fruit and vegetable drawer to absorb odors over time.
  • Don’t overfill your refrigerator. Fridges cool more efficiently if air has room to circulate, and it’ll be harder to see or clean up stains if it’s overcrowded.

READ MORE
pexels-nathan-cowley-713297
Blog Uncategorized
By Fin Dittimi April 28, 2022

How To Clean Your Whole House in One Day

Cleaning every inch of your home in one day would be an incredible feat, but it’s probably too much to undertake. It might help to reframe your goal: Instead of aiming to clean your whole house in one day, decide you’re going to devote an entire day to spring cleaning. The former goal sets you up to fall short, while the latter goal allows you to measure by effort instead of impact. Rather than committing and maybe failing to check every chore off your list, you should spend time focusing on the most important tasks, and leaving the rest for another day. It’s a more thoughtful and attainable route to take. So if you can’t do it all in one day, how do you choose? What goes into whittling down a giant list of intimidating house chores into a manageable affair that still delivers a big impact? Here are some ways for doing just that:

  1. Choose whole-house cleaning tasks for the biggest effect.

Go through the spring cleaning checklist above and choose tasks that involve more than one room or item in the house. For instance, washing the pillows and bedding of all members of your household leaves everyone with refreshed bedding. While the task may not produce a visible outcome, knowing that everyone has bedding that’s as clean as, can feel really good.

Other whole-house tasks you could select include cleaning all the doors or tackling all the windows. Doing these rarely done chores mean that you’ll “touch” every room in the house with that spring cleaning magic and it will show.

  1. Select chores that you procrastinate.

Cleaning tasks that you dread probably don’t get done very often. However, if you are determined to accomplish these with your spring cleaning momentum, not only will they get done and be clean, but you’ll be relieved of the guilt that comes from knowing it’s something you really should do and then putting it off.

These dreaded, procrastinated chores will be different for everyone, but they could be deep cleaning the shower, cleaning the windows, or finally getting that oven clean. Choose your own adventure and be really, really proud of yourself when you get to the finish line.

  1. Pick the tasks you want to do.

No, this doesn’t mean to forget the whole thing because you really don’t feel like doing any spring cleaning! The sentiment underlying this method of selecting what you’ll spend your spring cleaning day doing is that certain things on the list will pop out at you as things you’ve been wanting or meaning to do but haven’t been able to get to. Maybe it’s sorting through closets and cleaning your refrigerator. Do these.

  1. Make choices based on time.

Some of the items on the spring cleaning list require time that may or not be hands-on time. For example, washing everyone’s bedding and cleaning all the mattresses doesn’t take that much hands-on time, but it does require waiting for wash and dry cycles to finish. This is a great task to undertake while you’re cleaning other things because you’ll be around to switch loads as soon as they’re ready and you can use the in-between time to check other tasks off your list.

  1. Put labor-intensive items at the top of your list.

If you’re having a hard time choosing what you’ll do and what you’ll skip, try putting the most labor-intensive tasks (I’m looking at you again, window-cleaning) at the top of the list. This way, the chores that require the most out of you are getting done on a day you’ve dedicated to cleaning and you won’t feel as much like you’re missing out on something fun.

Sample Plan for Spring Cleaning in a Day

If you need a jumping-off point to plan your day of spring cleaning, this checklist for the morning, afternoon, and evening will get you on the right track.

Morning routine

  • Strip the bedding from all the beds, including duvet covers, and gather all the bedding. Sort like with like and begin laundering sheets, blankets, pillows, and comforters.
  • Refresh mattresses while the bedding is away from the beds.
  • Empty every garbage can and recycling bin and bring them outside. Hose them down, scrub scuffs with a Magic Eraser, and get the gunk out of crevices. Leave them to dry in the sun.
  • Slather the interior of the oven with a baking soda paste.
  • Change bedding wash and dry cycles as needed.
  • Scrub your oven interior.
  • Remove vinegar bags and scrub showers and tubs and clean the bathroom.

Afternoon Routine

  • Spot clean upholstery and rugs.
  • Dust every area you’ve decided to tackle today and start at the top. This could include bookshelves, the tops of cabinets, light fixtures, light bulbs, furniture, door frames, picture frames, etc. The idea is that you’re taking your duster and using it on every inch of dust down to the baseboards.
  • Polish wooden furniture. Just like you focused on using one tool while you dusted, focus on one product here: wood polish. Hit every wooden item in your home.
  • Wipe down cabinet doors. 

Using an all-purpose cleaner and rag is fine for other materials.

  • Clean doors. You’ve already dusted the frames. Now take a damp microfiber cloth and a Lysol disinfectant, to clean and disinfect the doors including knobs.
  • Continue changing bedding loads as needed. If you finish your loads, take down your curtains and begin washing those.
  • Clean your windows. Takedown screens or use a lint roller on them, clean window tracks, and shine those windows.
  • Clean the rest of the glass in your home. You’ve already dusted picture frames. Now take it to the next level and hit the glass with a lint-free cloth and glass cleaner.

Evening Routine

  • Replace bedding.
  • Hang curtains if you were able to wash them.
  • Return garbage cans to their rooms.
  • Vacuum under furniture and under rugs.
  • Vacuum the floors throughout the house now that the dust you stirred up from dusting has had time to settle.
  • Clean your phone.
  • Choose one small area to declutter. You don’t need the sunshine to help you see what to declutter (like you would with spot cleaning your armchairs, for instance), and ending with a decluttering session sets you up for a very visual win and, with any luck, the urge to do more when you can.
  • Make a list of tasks you wish you’d been able to do and make a plan for finishing them up during your regular cleaning routine.
  • Enjoy your spring-cleaned house! 
READ MORE
Ceiling fans
Blog Uncategorized
By Fin Dittimi April 27, 2022

Spring Cleaning Checklist: 20 Things You Can Deep Clean

The following are some of the spring cleaning tasks that you have to cross off your checklist;

  1. Bedding

You wash your sheets, pillowcases, and duvet covers regularly, but your pillows, comforters, and blankets need a refresh too. Read care instructions, but most can be washed in the washer (with care) and even dried in your machine as well.

  1. Curtains

Window dressings lend a softness to your indoor space but they’re also huge dust magnets. Cleaning them gets so much dust out of the house and away from your breathing zone. Remove curtains from rods and take them to be cleaned or launder them yourself if you can. In some instances, vacuuming and/or steaming them while they’re still hanging is preferable.

  1. Ceiling fans

A big part of spring cleaning is removing dust from rarely dusted areas. Your ceiling fans are about to get switched on again to combat warmer temperatures (or you’ll rotate the way they’re spinning). Stave off an avalanche of dust by cleaning your ceiling fans now. 

  1. Doors

If you look closely, you might be surprised at how dirty your doors are. Cleaning them gives a spic-and-span feeling to the whole house. Start by dusting the top of the door frame. Next, grab a damp microfiber cloth, some all-purpose spray, a rag, or a Magic Eraser and wipe down both sides of every interior door, paying special attention to the bottom portion and the space near the knobs. Don’t forget to wipe the doorknobs as well.

  1. Cabinets

Cabinet door fronts rarely get cleaned, but with hands touching them frequently, they definitely need it! Start with kitchen cabinets and use a cleaning solution that cuts through grease. Don’t forget to check and address other cabinet doors as well, in storage areas, playrooms, or your office space, and give their fronts a wipe down.

  1. Windows Cleaning

Cleaning windows might be the quintessential spring cleaning activity. But it isn’t the easiest household chore. Doing all the windows in the house at once means you can enjoy the rest of the year without that nagging feeling that you really should clean your windows. A cloudy day is best for window washing so that your glass isn’t left with spots or streaks. Clean the dirtiest parts of your window first (read: tracks and sills), then get screens clean, if you have them. Last, wash your window panes, inside and out, and enjoy the crystal clear view.

  1. Washer and dryer

Maintaining your laundry appliances keeps them functioning their best, smelling clean, can save you from costly repairs, and is also a safety issue. In addition to running a cleaning cycle in your washer and cleaning the lint out of the lint catcher slot, wipe down the outsides of your units.

  1. Closets

Spring is the perfect time to re-evaluate your wardrobe. Declutter clothes, shoes, and accessories that you don’t like, don’t feel good in, need repairs, or that kids have outgrown. While you’re at it, re-organize what’s inside. Sorting by type, length, and/or color will greatly elevate the look of your closet and help you find what you need. Dust anything that needs dusting and give your closet floors a good cleaning.

  1. Bookshelves

Dust the very tops of the bookshelves. Dust the tops of your books. Then, take everything off of the shelves (you can do this shelf by shelf so it’s little less overwhelming), dust any decorative items (a dusting mitt is great for this), dust the shelves, and then replace everything. As you’re putting items back, use the opportunity to cull any books or items that no longer speak to you.

  1. Underneath appliances

Move appliances such as your dishwasher, oven, and refrigerator away from the wall and clean the floor beneath them. You’ll be disgusted at what’s collected under there and so, so glad to get it out!

  1. Shower/tub 

Spring cleaning is the time to deep clean shower tracks, the niche, and the grout and walls of your enclosure. Make glass doors sparkle by removing soap scum, soak the showerhead in a bag filled halfway with white vinegar, and scrub your tub, including jets if you have them.

  1. Garbage cans

Gather all the garbage cans throughout the house. Empty any garbage that’s in there. Take them outside and hose them down. Use a Magic Eraser to scrub plastic cans and tackle dirty crevices with a disinfecting wipe or rag and/or cotton swabs. Allow the garbage cans to dry in the sun.

  1. Kids’ toys

Spring cleaning is a great time to clean your kids’ toys. Many small items that seem impossible to clean can be easily washed in a mesh laundry bag in the dishwasher. This method is great for things like LEGO and other plastic toys. Use a delicate cycle and skip the heat dry.

  1. Wood furniture 

Take care of your wooden furniture and it will take care of you for a long, long time. Make sure you use cleaners designed for wood surfaces, especially if your wood is untreated or unpainted. For spring cleaning, you can also take it a step further and polish your wooden pieces for a protective layer that makes the wood gleam.

  1. Drains 

The best time to clean and refresh your drains is long before a problem ever presents itself. It’s important to remember that kitchen drains and bathroom drains suffer from different kinds of buildup, so your cleaning methods should account for this.

  1. Carpets and Rugs 

The first step in spring cleaning carpet care is vacuuming every single square inch, including the areas under furniture. Once you do this, roll area rugs back (you can do this in sections rather than removing the entire rug) and vacuum the rug pad and the floor underneath that. You can even vacuum the underside of the rug. Next, spot clean stains. If necessary, use a carpet cleaner to deep clean your area rugs and wall-to-wall carpeting, or schedule a professional to do it when it’s convenient.

  1. Plants

Your plants bring you joy, but their leaves are also dust-collecting surfaces (name a surface that isn’t dust-collecting). To rid your homes of excess dust and to help your plants breathe better, too, dust their leaves with a slightly dampened microfiber cloth. Faux plants also need to be dusted.

  1. Refrigerator 

Although you probably periodically clean out the fridge, use spring cleaning season to give it a full-blown cleaning, inside and out. Take out each shelf, bin, and drawer that you can remove and wash them (you can put them in the dishwasher!) and wipe the entire interior of the unit as well. Don’t forget to do the same for the freezer. Clean the water dispenser if you have one, and finish by polishing the exterior.

  1. Gas Stove and Oven 

Ideally, you wipe up spills in your oven as soon as it’s safe (i.e., cool) enough to do it. But even with a homeowner who’s on top of it, oven interiors become coated with buildup. Cleaning your oven does not require harsh chemicals. Make a clean oven a priority in your spring cleaning routine and your whole kitchen will feel squeaky clean.

  1. Small appliances 

Small appliances can get short shrift when it comes to cleaning attention. Clean out your coffee maker with vinegar, get your toaster or toaster oven spic-and-span, make your microwave sparkle, and give your stand mixer and blender a thorough cleaning as well.

READ MORE
Cleaning Service Poster
Blog Uncategorized
By Fin Dittimi April 27, 2022

How to Spring Clean Your
Whole House

Spring cleaning is the practice of thoroughly cleaning a house in the springtime. The practice of spring cleaning is especially prevalent in climates with a cold winter. Spring cleaning is tied back to the history of keeping winter houses warm and lit with fires and kerosene. These methods filled houses with soot and grime which was inevitable as people stayed shut in against the cold winter, but that eventually had to be cleaned. These days, spring cleaning is so rooted in our heritage that even if we don’t follow the practice because of a long winter of burning coal, we need to throw open our windows and remove all the dust and dirt from our home environments. As we welcome warmer days and the golden rays of the sun. We want a new start, too and Spring cleaning gives it to us.

Why is Spring Cleaning Needed?

Spring cleaning is a chance to reset everything in your home. It’s a chance to catch up on all the cleaning tasks you’ve been meaning to do. Instead of laying awake wondering when you last cleaned your mattress, for instance, spring cleaning is the nudge you need to get it done and get the idea out of your head. In addition, deep cleaning once a year staves off bigger problems, like a mold takeover of your grout. You can clear dust and grime from areas that hardly ever see the nozzle of a vacuum cleaner attachment. By the time spring cleaning is finished, your home will feel so fresh and clean, a state of habitation that will serve you well, both in mind and body.

Spring cleaning is also a good opportunity to make sure that certain maintenance chores that only need to be done once or a few times a year get checked off the list. When these types of tasks are tied to spring cleaning, it’s more likely you will remember to do them. Some of these tasks make a big difference in your home’s longevity, usefulness, and look, such as polishing and sealing granite. Others, such as cleaning out your dryer, are a safety issue.

When Should You Start Spring Cleaning Your Home?

There are two ways to answer this question: Subjectively, you should start spring cleaning when you sense that new-start spring freshness starts to come in on the warm afternoon breezes. When you start feeling like you want to throw open the windows and begin to wonder how the deck furniture is doing under its covers, you know spring cleaning is around the corner. You can also start spring cleaning when you can clear out a solid day or two in your schedule to devote to the task or you could outsource professional cleaning services like dialcleaningservices. You could choose a weekday or a weekend. Keep the weekend or your day clear and dedicate it to giving your home the love and care it deserves so it can love and care for you. Although you may be tempted to spread out spring cleaning tasks over a longer period of time, keeping the project more concentrated focuses your efforts and pays off with that squeaky-clean-house feeling that only spring cleaning gives. 

How Do I Start Spring Cleaning My House?

Spring cleaning is a wonderful concept, but it won’t just happen unless you take that step.  Taking that step from getting the idea to spring clean to actually doing it involves a few stepping stones. First, decide that you are going to spring clean and tell someone so you’re accountable. This can be your spouse, housemate, a mother who lives across the country, your Facebook friends, or whatever. But publicizing your commitment will help you keep it.

Next, make a plan. The details don’t matter when it comes to galvanizing you into action. But having a rough outline of what you’ll do, whether it’s a room-by-room list of what needs to get done or a whole-house checklist of tasks you want to accomplish, brings substance to your goals and functions like a map that will get you where you want to go: a spring cleaned (past tense) house.

Finally, you could get professional cleaning services to help you with spring cleaning. You don’t necessarily need to clean yourself.

READ MORE
cleaning-air-duct
Blog House Cleaning
By Fin Dittimi March 17, 2022

Cleaning And Disinfecting Your Air Conditioner Vents

You need to clean your air vents on a regular basis, depending on how quickly they get dirty. Your air vents collect a lot of dust, dirt, and other particles floating around in the air. They get dirty quickly, and dirty air vents could negatively impact your indoor air quality. What do you need to do to clean your vents, and how should you do it? 

What You Need To Clean Your Air Conditioner Vents

  • Vacuum with a hose
  • Screwdriver (type of screwdriver depends on your vents)
  • Dish soap
  • A scrubbing brush
  • Gloves
  • A bucket 
Horizontal photo of vacuum cleaning inside heater floor vent with Red Oak Floors in background

Steps To Clean Your Air Conditioner Vents

These steps will work for floor vents, wall vents, and ceiling vents. It doesn’t matter where your vent is mounted, these steps will work for any of them. These instructions are general and may not work for all types of vents; however, most residential vents should be relatively simple to clean. 

Before cleaning anything, turn your air conditioning system off! You should be able to do this through your thermostat, but you can also turn them off manually

Remove the vents.

Some vents can be easily pulled off, but many require a screwdriver. Take your vents off and put them to the side.

Vacuum the ducts.

Your ducts will likely be dirty, so take your vacuum’s hose and let it run! Get as much dust and dirt as you can out of the ducts. Don’t go too deep into the ducts: there’s no reason to clean out the entire duct at this stage, just the area near the vents.

Dust off your vents.

Use a duster and get all the extra dust and dirt off of your vents. Take this dust and throw it in the trash: try not to get too much of it in the air! Preferably, dust off your vents inside a garbage bag so that the dust doesn’t fly up into the air and up your nose!

Prepare some soapy water.

Get some warm water and mix in some dish soap. Make sure the water has a good deal of lather in it: this way, you know the water has been sufficiently soaped.

You want to do this in your bathtub, but if you don’t have a bathtub, a washbasin, or a bucket will do just fine.

Soak your vents for up to 15 minutes.

This is where the real cleaning happens. You want to soak your vents in the tub or basin for 10 to 15 minutes. It’s not necessary to let them soak for longer than 15 minutes, and if your vents are made of iron or non-stainless steel, it may cause them to rust.

The reason we soak the vents is to get rid of any grease or gunk that allows dust to collect on the vents. This way, when you put them back, you won’t have to clean them again for a while.

Dry your vents with a towel and put them back on.

Putting your vents on should be as simple as taking them off, however, ceiling vents might be a little annoying. It’s okay if your vents are still a little wet: they won’t cause any issues with your HVAC system. Try your best to get them as dry as possible though.

Replace your air filter & turn your system back on.

Go to where your furnace is and replace the air filter. If you’ve been having a problem with dusty vents, you’re likely dealing with a clogged filter.

If you find the filter to be clear, then you don’t have to replace it.

Congratulations, you’ve cleaned your vents and you shouldn’t have to do it again for several months!

READ MORE
  • 1
  • …
  • 3
  • 4
  • 5
  • 6
  • 7
  • …
  • 14
Featured author image: How to Clean Your Kitchen Appliances.

Faith Ileh

Hi! I am an author of this blog. Read Our Post

Recent Posts
  • The Best Carpet Cleaning Services in Montreal
    The Best Carpet Cleaning Services in Montreal
    August 14, 2023
  • Experience the Pinnacle of Cleanliness with Dial Cleaning Service
    Experience the Pinnacle of Cleanliness with Dial Cleaning Service
    August 13, 2023
  • Conquer Dusty Corners Like a Pro! ✨🌿
    Conquer Dusty Corners Like a Pro! ✨🌿
    May 31, 2023
dial 2D

Request A Callback

Quick Links

Menu
  • Our Blog
  • Deep Cleaning
  • Montréal
  • Commercial
  • Residential
  • Privacy Policy
  • FAQ

Get In Touch

514.629.0841

  • Business Hours:
  • 8:00 AM – 6:00 PM
  • 7 Days a Week
Copyright © 2026 Dialcleaningservices | design by fandfconsultancy