logotype
  • About
  • Residential
    • Special Cleaning
    • Carpet Cleaning
    • Window Cleaning
    • Deep Cleaning
    • Apartment Cleaning
      • Sofa Cleaning
      • Yard Cleaning
      • Roof Cleaning
      • Carpet Cleaning
    • Duct Cleaning
    • Upholstery Cleaning
    • Pool Cleaning
    • After Party Cleaning
  • Commercial
    • Office Cleaning
    • Hotel Cleaning
    • Hospital Cleaning
    • Mall & Shops Cleaning
    • Industrial Cleaning
    • Pharmacy Cleaning
    • Premises Cleaning
    • School Cleaning
  • Our Locations
    • Montréal
    • Westmount
    • Ottawa
    • Toronto
  • Contact
CALL US TODAY
  • About
  • Residential
    • Special Cleaning
    • Carpet Cleaning
    • Window Cleaning
    • Deep Cleaning
    • Apartment Cleaning
      • Sofa Cleaning
      • Yard Cleaning
      • Roof Cleaning
      • Carpet Cleaning
    • Duct Cleaning
    • Upholstery Cleaning
    • Pool Cleaning
    • After Party Cleaning
  • Commercial
    • Office Cleaning
    • Hotel Cleaning
    • Hospital Cleaning
    • Mall & Shops Cleaning
    • Industrial Cleaning
    • Pharmacy Cleaning
    • Premises Cleaning
    • School Cleaning
  • Our Locations
    • Montréal
    • Westmount
    • Ottawa
    • Toronto
  • Contact
logotype
logotype
  • About
  • Residential
    • Special Cleaning
    • Carpet Cleaning
    • Window Cleaning
    • Deep Cleaning
    • Apartment Cleaning
      • Sofa Cleaning
      • Yard Cleaning
      • Roof Cleaning
      • Carpet Cleaning
    • Duct Cleaning
    • Upholstery Cleaning
    • Pool Cleaning
    • After Party Cleaning
  • Commercial
    • Office Cleaning
    • Hotel Cleaning
    • Hospital Cleaning
    • Mall & Shops Cleaning
    • Industrial Cleaning
    • Pharmacy Cleaning
    • Premises Cleaning
    • School Cleaning
  • Our Locations
    • Montréal
    • Westmount
    • Ottawa
    • Toronto
  • Contact
high-angle-woman-with-face-protection-cleaning-tables
House Cleaning
By Fin Dittimi January 18, 2022

Reasons why you should hire a professional cleaner to clean your homes

 Hiring a cleaning service to clean your home can make your life easier and relieve you of daily chores and also gives you the opportunity to do fun things that you would love to do. You will no longer have to worry about making time to get chores done during your busy day. Once you assign the cleaning job to a cleaning service, there is no need to spend time dusting, washing, or vacuuming.

  1. Preventing Dust Allergies

   Dust allergies are a major problem in homes. Many children and adults have developed allergies to dust. It’s a common allergen that causes itchy eyes, sneezing, and a runny nose. When you hire a professional cleaning service to keep your home clean, they will make use of a High-Efficiency Filter vacuum cleaner to get rid of as much dust as possible from your home. Not only will they clean the rugs, carpets, and floors, but the filters are able to get rid of most of the dust hovering in the air. You can stay outside while cleaners get rid of the dirt and dust in your home.

2. Deeper Clean

Professional cleaners can deep clean your bathroom and kitchen and get rid of harmful bacteria. Our cleaning service uses the right tools such as vacuum cleaners, long dust extractors, sponges, and mops to reach tough areas. They use the best disinfectant to disinfect and cleanse contaminants from your home and surroundings. The vacuums they use will remove dust, dead skin, and debris from carpet and cracks. This will allow you to breathe better and have a dust-free atmosphere.

Cleaning services have experience with leaving bathrooms, kitchens, hallways, and other rooms in exceptional condition. They clean window blinds, ledges and they are careful when cleaning woodwork. They clean mirrors, clean tiles, bathtubs, and showers. They dust furniture, picture frames, and shelves and make sure cobwebs and fingerprints are gone. Your home will receive an intense clean because professionals have years of cleaning experience. They know which cleaning product to use at every time and will leave your home sparkling.

Close up of unrecognizable worker wearing protective suit cleaning floor with chemicals during disinfection indoors, copy space

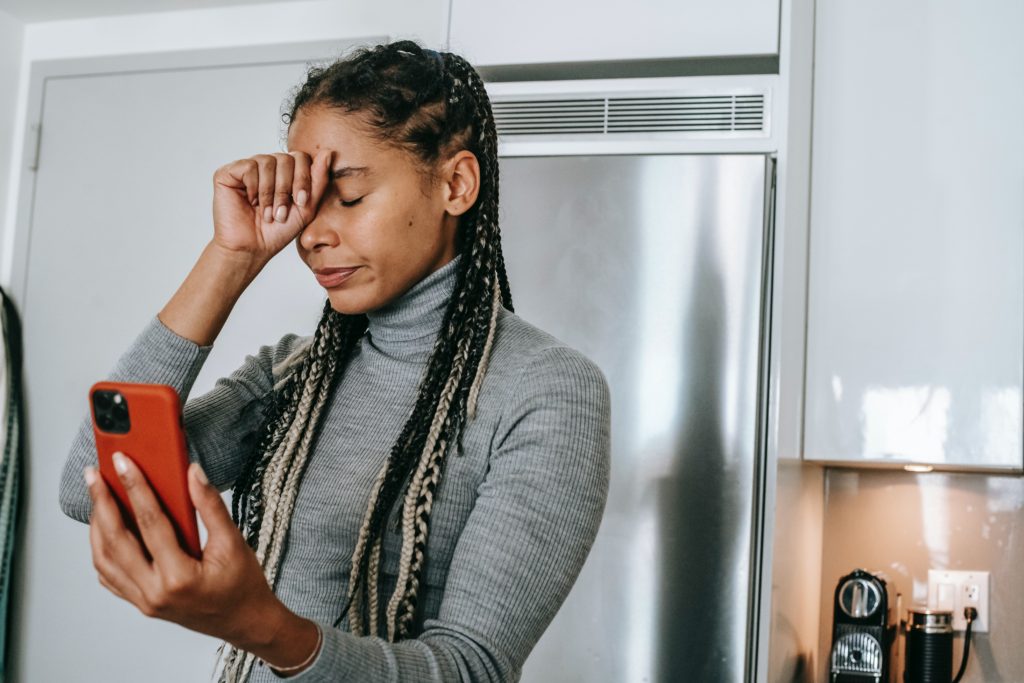
3. Reduce Fatigue and Stress

  Dealing with your everyday routine and balancing your work and home life can become stressful. After working a full day and then coming home to carter for the needs of your family, not much time or energy is left to work on cleaning your home. Overworking yourself can have a serious impact on your health, including fatigue and stress. When you hire a  professional cleaner to help you out around the house you will find that you have more downtime, and are able to actually relax and bond with your loved ones.

When you allow professionals to do the cleaning, you can relax while they do all the work. There is no need for you to overwork yourself or get stressed out from performing chores. Professional cleaning services can utilize special techniques to get rid of microscopic organisms in your home that cause sickness and infections.

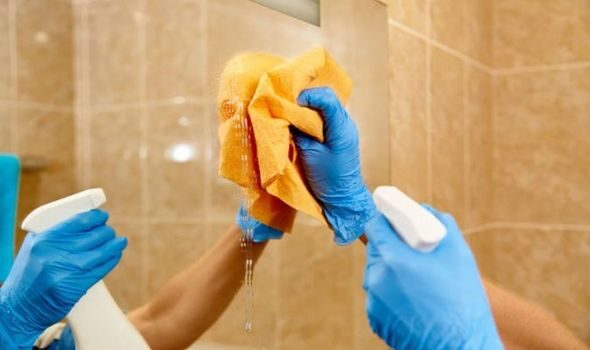
4. Keep Bathrooms and Kitchens Hygienic

When cleaning your bathroom, professional cleaners are sure to get rid of bacteria, fungi, and mold. They also clean and remove viruses and any organisms living on the bathtub, toilets, and sink surfaces. They know how to mop the floors in your kitchen and bathroom to wipe out stains. Since these two areas house the most germs, cleaners focus on cleaning hard-to-reach places.

When a professional service cleans your bathroom, they are sure to wipe down your valves and sinks and thoroughly disinfect your toilet, counters, and your bathtub. If you are concerned about germs, there is no need for you to encounter these microbes. A professional cleaner is not afraid of germs and will do a better job at sanitizing the area.

5. Trained and Skilled Staff

Professional cleaning firms have highly qualified personnel. Their employees are professional and have attended long hours of training. They have unique training to clean all commercial environments and will be able to deliver cleaning results efficiently. All of their staff are security vetted and background checked so that you are confident that they are hiring only the best teams of people.

6. Deliver Exceptional Results

   The most noticeable overall benefit to your home will be the physical transformation. You will be surprised at just how much of a difference a professional cleaning services provider can make to the look of your home. Your home will be gleaming and will become a very welcoming environment. With our professionally trained personnel, superior work, and quick response times, you should be 100% satisfied with the appearance of your home. A superior cleaning routine leaves a great impression every single time.

READ MORE
dial-cleaning-dial
House Cleaning
By Fin Dittimi December 10, 2021

Benefit Of Deep Cleaning Your Home

 Are you already in the Christmas mood, decorating and setting up the Christmas tree? Now pause and answer this question, Have you deep cleaned your house? Cleaning your house every other week might make you think that your home is already free from germs and dirt. But, what you should know is that regular home cleaning is different from a deep cleaning.

Regular cleaning involves mopping the floor and brushing the rug, wiping dust off furniture and cabinets, getting rid of the trash, and arranging all things in your home.  While deep cleaning, on the other hand, gets rid of all the deep-seated dirt and grime, as well as all the germs and bacteria. It usually covers the areas that are not covered in regular cleaning. This is why it is always a good idea to consider deep cleaning your home regularly.

Professional deep cleaning services offered by the likes of dial cleaning services will not just improve the look of your house but will eliminate the bad, filthy elements out of your home.

These are some reasons why you should consider deep cleaning your home regularly:

1. Improves Indoor Air Quality

A deep cleaning helps improve the quality of air inside your house. Having poor indoor air quality is not good for you and your family’s health. If your home is filled with dust, it may cause sickness and diseases like eye irritation, asthma attacks, hay fever, sneezing, and coughing, etc. With deep cleaning, any dust particles can be removed completely, which can help improve your home’s indoor air quality remarkably.

2. Deep cleaning helps remove viruses and bacteria.

Dirty homes are refuges for all sorts of uncontrolled bacteria and viruses. The more dirt that enters your home, the more likely you are to welcome unwanted viruses and bacteria. Quick surface cleaning might keep some of the lesser bugs away, it is only through a deep cleaning that you can really eradicate the bigger germs that hide below. At dial Cleaning Services, we help our customers get to the root of their deep cleaning issues and we offer professional, quality cleaning services.

Deep cleaning can help in removing harmful health threats. For you to target the possible areas where molds are, you have to look for sources that contain

Immerse exposure to moisture which is the reason for the mold. Deep cleaning can clear your home of these bacteria that can harm your family or loved ones.

3. Deep Cleaning Helps You Achieve An Extra-Clean Kitchen

  Regular cleaning will help keep the surfaces and corners of your kitchen clean. But, if you want it to be really spotless, then deep cleaning is the way.

Deep cleaning, go the extra mile to endeavor that your microwave is gunk-free, meaning all food buildup inside will be scrubbed off entirely. All of your small appliances, such as the mixer, blender, and toaster, will be sanitized and cleaned properly. 

With deep cleaning you will also get a cleaner stove as it will help you eliminate the burnt food on your stove’s surfaces, making it smell and look better.

4. Improves your mental health

     You may ask how deep cleaning is connected to positive mental motivation?

The state of your home affects your mental health. Notice that when a person is

suffering from depression, their home is likely to be in a mess. If you continue to ignore your surroundings the way you ignore your appearance this can increase your chances of falling into more negativity.

When you start organizing your surroundings and do a thorough

cleaning of your home, your mental state begins to raise. This has to do with

many things. One of them is the act of deep cleaning. The reason deep cleaning can improve your mental health is the satisfaction you get when your home is completely cleaned. You will get a sense of

exploit that aids in a remarkable improvement in your mood.

If the environment becomes cleaner and fresher, you will ultimately benefit from the

changes by reinstating a sense of positivity in your life. This will also help your

productivity rate by reducing clutter and helping you build a better routine in a spacious area. The more productive you become the happier you will be in the long term.

5. Lessens Allergy Symptoms

    If you always experience flu-like symptoms, such as watery or dry eyes, runny nose, and sore throat, you may be suffering from an allergy. Even if a lot of allergens start outdoors,  some others are normally found inside your home. Allergens, like dust mites, may affect anyone and can be detrimental in the long run, especially for those who have respiratory issues, like asthma.

With deep cleaning, you can lessen such allergy symptoms by getting rid of these allergens. This is because deep cleaning involves cleaning the nooks and crannies of your home, where allergens often accumulate.

Finally, If you want to maintain a germ-free home, make sure to schedule deep cleaning regularly with us at dial cleaning services, you can be assured that we are equipped with safe and high-quality cleaning products and equipment, enabling us to deep clean your home effectively.

READ MORE
Cleaning-Your-Bedroom-Closet
Blog House Cleaning Uncategorized
By Fin Dittimi October 4, 2021

Cleaning Your Bedroom Closet

It’s an area that we’ve merely managed but haven’t given much thought to. And, as it turns out, many of you are having the same issues with keeping this specific closet tidy and organized. It appears that we have much too many things and not enough room, which has been an overarching theme of spring cleaning; 

Prepare Yourself

Now, I’ll tell you right now that this will take time. More than likely a couple of hours. But when you’re through, you’ll be smiling with pride and feel so much better. There’s also a special feeling you get when you give out items you no longer need. 

What You’ll Need

  • A laundry basket
  • A donation bag
  • A recycling bag 
  • A vacuum cleaner with brush and crevice attachments
  • A microfiber cloth
  • Baking soda
  • Closet organization tools (optional)
  • A step stool
  • A mop if your closet has hardwood or tile flooring.

Step 1 – Clear out Your Closet

The first thing we’re going to do is clean out the closet completely. To be able to accommodate the contents in your closet, make sure you have a clear bed and a relatively clean room. If you believe you may run out of space, create some extra accommodations in your room, such as a clear dresser, chair, or clean area on your floor. You will require it.

So, begin by going through the closet section by section, removing all garments, and placing them on your bed. Naturally, I say this for two reasons. First, it’s a large flat surface that will assist you in organizing your clothing, and second, you won’t be able to sleep until this job is completed.

Step 2 – Clean up Your Closet

This is the actual physical cleaning of your closet, which is also fairly simple. You have a completely empty space, and all you need to do now is add your magical touch to it. Closets are rarely (if ever) cleaned. If you’re wondering why your closet smells stuffy, it’s probably because it contains stale air and has carpet that is rarely cleaned. You wouldn’t smell any better either. This is your opportunity to change that. Begin by sprinkling baking soda on the carpet and leaving it for 15 minutes or so to help rid the carpet of odors.

Get your step ladder and climb up to the shelves you can’t reach by hand while the baking soda sits. Vacuum the shelves, then spray and wipe them off with an all-purpose cleaner and a microfiber cloth. Feel free to clean the hanger rods as well.

Then, conclude by vacuuming the carpet, paying special attention to the corners and baseboard.

Step 3 – Sort Your Clothes

OK, take a deep breath. You should be aware that this will most likely be the longest and most arduous portion of the work – but this is where the rubber hits the road – this is your chance to rid yourself of all types of items that are doing nothing but cluttering up your wardrobe. I’m simply being truthful.

Let’s have a brief pep talk about it. Your garments just hang in your closet on a hook that might be used for an item of clothing you really wear. Consider your clothes to be renters, and you to be the landlord (unfortunately, you will not be paid any rent in this situation). You have limited room and want only the best tenants in your building (er, closet). So, if they are deserving renters, retain them. If they are noisy, needy, nagging renters who are always late with their rent, evict them. To put it another way, keep what you like and get rid of what you don’t. Just be truthful. Here are some pointers to consider:

  • Donate any apparel you haven’t worn in the last 12 months.
  • Donate any items that you regularly pass over in your closet.
  • Donate it if you bought it a year ago and haven’t gotten around to wearing it yet.
  • If it fit you two summers ago but not now, donate it.

Your wardrobe should only include things that you really wear – if you don’t wear it, it has no place in your closet.

Place clothing that you want to retain but need to be laundered in your laundry basket.

Don’t give anything that is broken, dirty, or otherwise wrecked beyond repair (big stain, rip, etc.). When things are sorted, even donation centers will dump whatever they don’t want, which ends up in the landfill. Consider turning it into a rag (socks, undergarments, and shirts are ideal) or a fun project (if you are the crafty type). If nothing of these options appeals to you, visit your local animal shelter.

They are always glad and eager to accept old towels, blankets, and usable clothing items (such as tees and sweatshirts) since what small kitten or dog wouldn’t want to snuggle up to something soft?

Step 4 – Organize the Items You Want to Keep

Now it’s time to put the items that have survived the last hour back into the closet.

You can reorganize your things as follows:

  • Pair like items with like items, and comparable sorts of items together.
  • Color code items – span from one end of the color spectrum to the other, which might help you match an ensemble or discover specific clothing (if you want your merlot blouse, you’ll know precisely where to find it).
  • Items you don’t use as often should be kept out of the way, while items you wear frequently should be kept in the spotlight (gowns should be harder to reach, and jeans should be at arm’s reach).

For more information or help on how to clean your bedrooms and closet spaces;

Call Us: 514.629.0841

Address: Montreal, Quebec, Canada

Mail Us: info@dialcleaningservices.com

READ MORE
mirror-cleaning-how-to-no-streaks-1307438
Blog House Cleaning
By Fin Dittimi September 30, 2021

Difference Between Sanitizer And Disinfectant

Although several months have passed since the state of alarm was released, it is still advisable to keep the surfaces disinfected. Just as you have to wear masks and respect a safe distance, experts emphasize that cleanliness in premises and homes is vital to avoid getting COVID-19. Therefore, it is normal that we are more in contact than ever with cleaning products, but do you know what the difference is between sanitizer and disinfectant?

Difference between sanitization, disinfection and cleaning

The main difference between these types of cleaning is their position in the entire cleaning process.

Step 1: Clean

The first thing we have to do is clean the floors with a broom and remove the dust with a cloth or duster when we get going. Cleaning is essentially about removing dust, debris, and surface dirt.

Step 2: Sanitize

After removing that first layer of dirt, it’s time to sanitize. This step consists of using a basic cleaning product that helps us eliminate most of the bacteria in the area.

Step 3: disinfect

To disinfect your home or premises, it will be necessary to use a specific product. In this phase, we will destroy or inactivate all bacteria and viruses on non-porous surfaces, which is why health authorities emphasize that this process considerably reduces the risk of spreading the infection. Depending on the disinfectant product you choose, you will eliminate certain bacteria and viruses, so we recommend checking the label to see if it meets what you are looking for.

Step 4: flavor

It is common for disinfectant products to have a strong smell of alcohol or bleach. To achieve a more pleasant aroma in the room, we recommend finishing the cleaning process with an aromatic product.

To be successful in cleaning, sanitizing and disinfection, they will have to be carried out following the process that we enumerated before, using the appropriate technique and products. For this reason, at Dial Cleaning Services, we have professionals you can trust throughout the cleaning process, ensuring proper monitoring and application.

Why is sanitizer and disinfectant important?

Carrying out proper sanitation and disinfection is very important to keep your home clean and fight any virus or bacteria. For this reason, we suggest that you do not reduce the process only to sanitation since this may not eliminate all contamination, as it does not penetrate all layers of dirt.

Frequency to perform the entire cleaning process

In the highest peaks of infections, we advise you to carry out this process twice a week. By doing this, your home or premises will be impeccable and you will only have to daily affect the disinfectant in those areas most used, such as doorknobs, sink keys and toilets.

Difference between sanitizing and sanitize

The word “sanitize” may sound familiar to you, but don’t worry, this is not another step in the process, but rather the same process as “sanitize”. Both concepts are used to define the use of chemicals to kill germs on objects and surfaces.

To sanitize or sanitize porous surfaces, it is advisable to leave the product to act on the area for a period of time. Please pay attention to the characteristics of the surface where you are going to apply it since some sanitizers contain bleach and could damage varnishes or lacquers.

Tips for a good disinfection

Health authorities recommend the use of viricidal disinfectants as these have shown great efficacy against viruses and bacteria. They can be bought in supermarkets, drugstores, or specialized cleaning businesses.

But remember that when it comes time to apply the product, you need to consider some safety tips. You will have to wear gloves and suitable clothing to clean since these types of products could damage your hands or stain your clothes. In the event that your skin or eyes are in direct contact with the product, clean the area with plenty of water and go to your doctor if it generates any adverse reaction.

How to choose the best disinfectant against COVID-19?

To confirm that the chosen product is valid to eliminate the virus, you will have to look at its label. 

READ MORE
How-to-Care-for-Your-Laptop
Blog Laptop Cleaning
By Fin Dittimi September 29, 2021

How to Care for Your Laptop

If you’re using a laptop, take a moment to think about the last time you cleaned it. I don’t mean a simple sleeve-wipe, but rather a thorough cleaning. Right. Don’t worry, we’ve got you covered.

According to some statistics, computers, especially the keyboard linked to your laptop, have more germs on them than a toilet seat, and when was the last time you spent a couple of hours tapping your fingers all over your toilet seat?

With that in mind, I’ll teach you how to defunkify your laptop. Our technique here is the proper, by-the-books one, not some hack-your-way-to-a-cleaner-laptop thing. This is what the makers instruct us to do. So let’s crack it open and get started.

  • You’ll need Microfiber cloths for this cleaning task – we’ll be using a normal weave microfiber cloth (texture similar to a terry towel) for everything except the screen, which will be cleaned with a flat weave microfiber cloth.
  • Mild dish soap – no aerosol sprays, solvents, abrasives, and, for God’s sake, NO GLASS CLEANER – else you risk ruining your laptop’s finish.
  • Distilled water is the ONLY liquid that should be used on your laptop screen since alcohol or ammonia solutions might harm the finish. We’re using distilled water instead of regular tap water because it won’t leave any streaks – though tap water will also work just fine.
  • Compressed air — for blasting off crumbs from sandwiches, granola bars, cereal bowls, late-night poutine, and crunchy snack mix. Oh, and I nearly forgot about dead skin cells, dust, fingernails, and other such things.
  • Rubbing Alcohol – This should only be used on the keyboard, but it is really effective since it dries rapidly. It’s ideal for removing finger oils. Dish soap and water would be enough, but why not use this if you have it on hand?
  • Pipe Cleaner – just bend and go to clear up any ports or vents!

Before we begin, there are a few things we should keep in mind when cleaning our laptop;

  • DO fully shut down and power off your laptop, and make sure you disconnect everything from all connections. Why take any chances?
  • DO NOT DIRECTLY SPRAY ANYTHING ON YOUR COMPUTER. This also applies to the outside – you’d be amazed how little moisture it takes to ruin everything inside.
  • DON’T FORGET TO READ YOUR MANUAL. There are general care instructions in the user manual, and if you’ve misplaced yours, visit the manufacturer’s website — if anybody knows how to properly care for your laptop, it’s presumably the folks who built it (and they should know).
  • If you don’t know what you’re doing, don’t remove your laptop keys. My advice is to check Google before pulling off your keys since there have been several horror stories of not being able to get them back on all that easy. So, first and foremost, conduct your study!
  • If your laptop has a fan vent, make sure you clean it. These can become clogged over time, resulting in overheating if air cannot flow into or out of your laptop.

Now that we’ve gotten that out of the way, let’s get to the cleaning.

Clean your Laptop Exterior

Make a simple solution of 1 cup distilled water and a drop of dish soap, then put your normal weave microfiber fabric into it and wring it out until it is moist and dry. You want to use the least amount of liquid feasible. Then simply wipe clean the exterior case of the laptop, taking care not to get any moisture in the openings or ports. I use a basic “s” pattern and a dry section of the cloth to rapidly buff off any remaining wetness. This should be done on both the top and bottom of the exterior.

How to clean your Keyboard

I’m not going to remove the keys for this cleaning since I don’t think it’s necessary. Compressed air should be sufficient, and if you must reach beneath the keys, a cleaning toothbrush (dry, of course) may be used to brush away any dirt. Hold the laptop upright so that trash falls down rather than back into the keyboard.

Okay, let’s get back on track. Allow the debris to fall onto a flat surface by tilting your (open) laptop at a slight angle. Take out the compressed air can and begin doing short blasts from top to bottom in the direction you’re tipping the keyboard. A LOT of crumbs and other things (as mentioned above) will start to come out. Gross. Okay, we’re done with it. Once all of the debris has been removed, you may use the same mixture of dish soap and distilled water, or I recommend rubbing alcohol for this chore since it dries SUPER quickly and is just as effective as dish soap on greasy residue. To clean the keys, lightly dampen the corner of a regular microfiber cloth with straight rubbing alcohol or that soap and water mixture, wring it out thoroughly, and carefully wipe the keys, making sure to get all the sides. Working in sections, buff each area dry with a dry section of the cloth. There will be no moisture left behind.

How to clean Laptop Trackpad

Simply apply the dish soap and distilled water mixture to a regular microfiber cloth and wring it out thoroughly to clean the trackpad and surrounding areas. Work in stages, cleaning the surface with a moist cloth and immediately buffing dry with a dry towel.

How to clean laptop Screen

We’re almost there! All you need to wipe the screen is a soft, flat weave microfibre cloth, and that’s it! You don’t need any expensive screen cleaners. You don’t have to worry about scratches since a flat-weave cloth won’t adhere to any debris. Working in parts, carefully wipe out any sticky areas with your pointer finger wrapped in the towel. Your screen should be perfectly clean.

If, for whatever reason, a dry towel cannot remove something from your screen, wet the tiny corner of your flat weave cloth with water, rapidly wipe the sticky area, then buff with a dry piece of the cloth soon after.

You don’t want to tamper with the sophisticated coatings on these screens! A quick note: while tap water is adequate, distilled water is preferable. A bottle may be purchased in a drugstore or a grocery shop for a reasonable price. It is simply water that has had all of its minerals removed.

Vents and ports

These little things, too, require attention. Bend the pipe cleaner and use the best part to gently brush away any dust or dirt from ports if desired. You can also accomplish this using compressed air. Finally, you may use compressed air to blast away junk from your computer’s vent. This is critical since this is where the fan receives its air from, and if it is really dusty, the fan will have to work overtime, and you may not enjoy the consequences of an exhausted fan. Just a thought.

That’s all there is to it! Congratulations, you have successfully cleaned your laptop!

In addition, we also have services cleaning office, hospital cleaning or cleaning of schools, among others. Contact us to request a quote and clarify your various doubts.

Read more:

PRO TIPS FOR CLEANING WINDOWS

For more information and questions on how to care for your laptop or any other electronics;

Call Us: 514.629.0841

Address: Montreal, Quebec, Canada

Mail Us: info@dialcleaningservices.com

READ MORE
10-Hydrogen-Peroxide-Cleaning-Methods
Blog House Cleaning Uncategorized
By Fin Dittimi September 27, 2021

10 Hydrogen Peroxide Cleaning Methods

There is at least one bottle of hydrogen peroxide in many homes—not all or most, but many. It is usually packaged in a brown container because it becomes unstable, separates, and becomes worthless when exposed to sunlight. It’s most commonly found in the first aid aisle while shopping, which is why it’s most commonly utilized as… a first aid product. Well, it has a number of additional applications, particularly in cleaning. According to the Centers for Disease Control and Prevention, hydrogen peroxide is an efficient disinfectant that may kill viruses, bacteria, and other forms of germs.

One quick note: if you prepare any sort of DIY cleaning remedy that includes hydrogen peroxide, make it on the spot and discard it when you’re through. Make only as much as you need because it won’t last long. Oh, and always test it in a hidden area first before using it as a stain remover or whitener to ensure it does not hurt or discolor the surface/garment.

Miracle Stain Remover

A few years ago, a recipe for Dawn Miracle Cleaner went viral on Pinterest. It was two parts hydrogen peroxide to one part Dawn dish soap. To be honest, it may be any dish soap, however, Dawn works very well.

The most essential thing here is to handle the stain like you would any other stain. To begin, remove any leftover debris/liquid by scraping and blotting—always treat a dry stain. Then, using a cleaning toothbrush, carefully brush the stain removal product in (don’t overuse the product or you’ll have to do additional rinsing later). Allow it to sit for 10 minutes before blotting with a clean towel and water to remove the substance (then launder as usual if applicable). This is one of those situations when you should try it first in an inconspicuous location before using it on a soft surface (like a sofa or carpet).

Cleaner for Cutting Boards

Glass cutting boards are very resistant to smells, but wood (and even plastic) may get rather unpleasant with time. If you discover that your cutting board smells, it means that there are bacteria on the surface that has to be removed. Straight hydrogen peroxide is an easy method to deal with it; spray it on the surface, let it sit for 5 to 10 minutes, then scrub your cutting board with soap and water, rinse carefully, and allow it to dry. Straight hydrogen peroxide will surely kill any odor-causing microorganisms.

Garbage Cans

Garbage, recycling, and compost containers can accumulate a strong odor. These items, whether kept inside your house or in your garage, must be handled regularly are several to eliminate residual smells. An excellent approach to deal with them is to first make sure they’ve been cleansed, but then use some pure hydrogen peroxide to eliminate any smells. Allow the dumpsters to rest for about 10 minutes after thoroughly spraying the interiors. Once this time has gone, just wipe them down. If the scents persist, repeat the process a couple more times to return your normally stinky bins to a lovely neutral condition.

Blood Stains

If you acquire a bloodstain on your clothing or mattress, a bottle of hydrogen peroxide is a quick and easy cure. Once a bloodstain has formed, it is quite difficult to remove, therefore always deal with it as soon as possible. Remove the clothing as soon as you discover a bloodstain, apply a small amount of hydrogen peroxide to the area, and you should observe that the bloodstain begins to fade virtually instantly. You may even see some bubbling, which is a good sign! Allow this to rest for a minute before rinsing with cold water. Repeat until the stain has disappeared, then launder the item as usual.

Toilet Plume + Toothbrush = Nasty!

If you don’t know what a toilet plume is… It’s the tiny spray that comes out of your toilet every time you flush it—and sure, if your oral healthcare instruments (toothbrush!) are within acceptable proximity (six feet or so? ), some of that toilet plume will drop on them. To summarize, you may prepare a simple solution of 3 parts water to 1 part hydrogen peroxide and soak any of your dental health care implements in it. Allow objects to soak for up to 30 minutes, then rinse well and air dry to eliminate bacteria. As an aside, before you flush, close that lid.

Kids’ Toys

There are several varieties of children’s toys, as well as numerous methods for cleaning them. However, if you only have a pile of plastic toys—no batteries, no internal parts—there is a very simple technique to clean and sterilize them. Fill a bowl with a liter/quart of water, add 1 cup of hydrogen peroxide (for a 4 to 1 ratio), and soak your toys for around 10 minutes. This will kill the majority of the bacteria and germs that have grown on the toys. To conclude, give them a good rinse and let them air dry.

Makeup Sponges and Blenders

Those of us who use makeup are aware that we must clean our cosmetic equipment on a semi-regular basis. If you use sponges to apply your makeup, these may be quite difficult to clean. First and foremost, I would recommend that you clean them with soapy water. Then, soak for around 10 minutes in a 3 to 1 solution (three parts water to one part hydrogen peroxide). Allow for a 10-minute resting period. This can assist destroy any acne-causing germs that you wish to get rid of. Brushes may be cleaned in soapy water as well, and then sprayed with a little hydrogen peroxide and left for a minute or two.

Washing Produce

If you’re concerned about the cleanliness of your vegetables when you arrive home from the grocery shop, you may make a simple wash. Simply combine a liter/quart of water and 1 cup of hydrogen peroxide in a big mixing basin. Put in all of your produce and soak it for around 5 minutes. This should be enough time for the hydrogen peroxide to kill any germs and/or bacteria that may be present on the surface of your vegetables. Then, and this is critical, thoroughly rinse and dry everything before placing it in the fridge or keeping it on the counter.

Reusable Bags

Do we ever consider washing our reusable bags? Consider where they’ve been: grocery store floors, conveyor belts, vehicle trunks, public transportation floors, kitchen floors, garage floors, and so on. You guessed it: hydrogen peroxide is an easy method to clean them. Toss them in the washer with normal detergent and a cup of hydrogen peroxide in the bleach section. If you just add this to your laundry, you can anticipate your bags to come out not only cleaner, but also free of bacteria, viruses, and other unpleasant stuff.

Grout Whitener

We enjoy using hydrogen peroxide to whiten grout since it is well-known for its ability to whiten. A simple grout whitener formula would be 2 parts baking soda to 1 part hydrogen peroxide. You may combine that in a bowl (remember, just make as much as you need at the time) and then apply it to your unclean grout using a cleaning toothbrush. Allow this to sit for about 5 minutes before retrieving the cleaning toothbrush and scrubbing a little further before washing with a clean cloth (baking soda tends to leave a little bit of grittiness behind so you want to focus on this when rinsing).

Check out our EcoFriendly Cleaning Service In Quebec, Canada.

Call Us: 514.629.0841

Address: Montreal, Quebec, Canada

Mail Us: info@dialcleaningservices.com

READ MORE
Home-Workout-Gear
Blog Uncategorized Upholstery Cleaning
By Fin Dittimi September 24, 2021

How to Clean Your Home Workout Gear

It’s taking a lot more incentive than normal for us to get our butts in the (home) gym. It’s chilly, it’s dark, and I’d rather be on the sofa than doing crunches. So, in order to eliminate any impediments to your morning sweat, you need to give your gym equipment a thorough cleaning. It’s critical that your at-home workout gear is clean, disinfected, and smells good.

Even though cleaning is the last thing anybody wants to do after a strenuous exercise, failing to do so may cause your equipment to smell, degrade, and even make you sick.

Why You Should Sanitize Your Home Workout Equipment

It’s not like you’re going to the gym and dealing with a bunch of disgusting, sweaty strangers. So why do we still have to clean our workout clothes at home? In a nutshell, bacteria.

Bacteria may be picked up by anyone, and if you don’t wash your hands before using your home gym, you risk spreading it to all of your equipment. HPV, e-coli, streptococcus, and influenzas are some of the most frequent bacteria and germs discovered in gyms. According to a UC Irvine research, germs may survive on gym surfaces for up to three days, giving you plenty of opportunities to infect your family or roommates. Aside from that, germs may cause odors, and no one enjoys grasping grips that smell like stale Doritos.

This is where sanitation comes into play. It does more than merely remove dirt; it also destroys germs. You must clean it after each session if you touch it or sweat it.

What You’ll Need to Clean Your Exercise Equipment

  • Multipurpose wipes.
  • Homemade vinegar solution (water + white vinegar, baking soda optional)
  • Spray disinfectant (like Lysol)
  • Dishwashing liquid.
  • Clean microfiber cloths
  • A mopstick
  • Yoga mat balance spray or a homemade recipe

Keep all of your cleaning supplies nearby in a shower caddy in the corner of your workout area. That way, it’s easy to find.

How to Clean Exercise Equipment

Grab an all-purpose spray after a sweat session on the treadmill or elliptical. Allow a minute for the product of your choice to settle on the surfaces utilized (avoid screens). Then, using a dry clean microfiber cloth, wipe off the handles, bars, and any other frequently handled areas. Take the moistened towel and wipe out other areas of the equipment that become dusty, as well as the occasional leak.

We recommend that you clean your devices after each usage. (Also, unplug your machine just to be safe.)

Cleaning Dumbbells and Weights

Do you even lift at all, bro? If you do, it is important that you clean your weights. Weights come into close touch with the palms of your hands, so whatever germs you pick up will definitely pass to them.

The following is how to clean weights:

  • Fill a basin halfway with water and add some dish soap.
  • Then, dunk your microfiber towel into the soapy water and wring it out to prevent it from dripping.
  • Wipe your dumbbells down.
  • Wipe them down with a dry towel once more.

You might even make the most of your time by doing this during your breaks. Soapy water is effective at eliminating most germs, making it an excellent choice for at-home equipment. If you are concerned about someone becoming ill, bring on the disinfectant for weights or equipment, or get your hands on your favorite brand and put it in your caddy.

How to Care for a Yoga Mat

After you’ve finished downward dogging, you’ll need to clean up the sweat drops that have fallen onto your mat.

Disclaimer: Because yoga mats are made from a variety of materials, make sure to read the directions carefully so you don’t destroy them. If your mat is made of rubber, there are two methods for cleaning it:

  1. Use a store-bought yoga mat balancing spray. To remove perspiration and smells from your mat, spray it down before and after practice,
  2. Alternatively, make your own disinfection spray using water, vinegar, and 10 drops of essential oil of your choice. (like tea tree oil)

Optionally, hang your yoga mat to dry over a shower curtain or outside (but not in direct sunlight).

Remove Your Shoes

Our shoes carry a lot of germs and bacteria with them. That’s why I have a pair of “indoor” training sneakers that have never been worn outside of the home (much like me these days). If you don’t want to do this, simply wipe out the bottoms of your running shoes before beginning your workout.

Clean Your Clothes

When your workout is finished, don’t throw your sweaty Lululemons in the laundry straight away – this can stink up the rest of your garments and perhaps create mold. (No, thank you.) So, if you don’t want your laundry basket to smell like a men’s locker room (and trust me, you don’t), wash your workout clothing as soon as possible. If this isn’t possible, hang them inside out to dry until you can toss them in the washing machine.

Another thing to remember while washing workout clothing is to avoid using fabric softener at all costs. It prevents perspiration and grime from entirely washing away, so if your clothing still has the workout stench after washing, this is most likely the cause. (Hint: the hotter the water, the better it cleans germs.)

Clean Those Floors

You don’t have to mop the floor after every session (unless you want to), but it’s a good idea to take out your mop every now and again to get rid of the muck your shoes bring in.

Check out our EcoFriendly Cleaning Service In Quebec, Canada.

Call Us: 514.629.0841

Address: Montreal, Quebec, Canada

Mail Us: info@dialcleaningservices.com

You may also like:

READ MORE
Upholstery Cleaning
By Fin Dittimi September 22, 2021

How to Clean Car Upholstery and Disinfect Surfaces

We know that removing stains from leather or cloth car seats can be a big challenge. Coffee stains? Meal? Do not worry! I kept reading and learned how to clean car upholstery effectively.
Cleaning and disinfecting our car regularly is key to reducing the risk of contagion of diseases, such as the coronavirus and enjoying the many hours we spend there. A clean car is more comfortable and safer, especially since it is a space that we use every day and share with other people.
In this article, we will explain in detail how to disinfect the car and each of its interior parts and, above all, how to clean the car upholstery according to the material from which they are made. In addition, in this guide, we also explain how to clean the car upholstery with natural products and remove the different most common stains.

How to clean the interior of the car

Before explaining how to wash car seats, we will start with the interior:

  1. First, carefully vacuum the entire interior . Vacuum carpets, ceiling, vents, and seats.
  2. Disinfect the most exposed surfaces. The most contaminated surfaces of the car are those with which we have the most contact: the steering wheel, the gear lever, the parking brake, the seat belt, the door handles, the mirrors and the buttons and displays on the console. central. To disinfect them, moisten a soft cloth in a solution of isopropyl alcohol and water (70% alcohol – 30% water) or use any antibacterial cleaner, such as Cif 2-in-1 Trigger . Wipe the surfaces and allow to dry naturally for about 10 minutes.

How to wash car upholstery

Some upholstery may require a special method to be used, so before thinking about how to clean car seats, check your vehicle manual to see if the manufacturer offers any special advice on cleaning or maintenance.

Here is a step-by-step guide on how to clean car upholstery, depending on the material it is made from, so that the seats show up and do not get damaged.

Helpful Tip: Before you begin, test any product on a small inconspicuous area of ​​the upholstery. This way, you make sure it doesn’t get damaged.

How to clean fabric car upholstery

Now, we explain how to clean car upholstery at home and leave them as if they had been treated by a professional or even better:

  1. Start by vacuuming the seats.Use a regular vacuum with the brush attachment or a small portable vacuum to suck up any grime that the seats may have. This will prevent traces of dirt from remaining while you wash them.
  2. Fill a bucket with cold water and another with hot water.Add a tablespoon of regular laundry detergent to the bucket of hot water to use as a car upholstery cleaner. We recommend you opt for Ala liquid soap to dilute .Remember to always follow the instructions on the product and use small amounts to avoid generating a lot of foam.
  3. Dip a sponge in the bucket of hot water and scrub thoroughly.Squeeze the sponge well to avoid excess water on the seats.
  4. I dipped a towel in the bucket of cold water.Once the seats look clean and are evenly moistened, use the towel to wipe the dirt and excess detergent off the surface of the seat.
  5. I repeated this process for a better result.A final tip to keep in mind when thinking about how to wash car seats: do not rub the sponge or towel with force as you can discolor the upholstery.

Once you’re done, open the doors to allow the car to air out and the product to evaporate.

How to clean leather car upholstery

Above all, always remember that the leather upholstery of a car must be cleaned very carefully and always use a special product for this type of fabric. However, vacuuming them as often as necessary is okay.

To find out how to clean leather upholstery flawlessly and keep it in perfect condition, read this step-by-step guide:

  1. Vacuum the seats and the rest of the interior of the car.You will be able to easily remove food debris and dirt.
  2. Wipe a flannel slightly moistened with water over the leather upholstery.Make sure to squeeze it well to avoid excess water.
  3. Once dry, apply moderate amounts of leather upholstery cleaner.We recommend Cif Ultra Shine , which is ideal for cleaning leather. Do this using a damp cloth or chamois and wipe the seats thoroughly.Remember to always follow the instructions on the container.
  4. Remove the product with a microfiber cloth.Pay attention that no product remains.
  5. Let the seats dry.Be surprised with the results!

If you want, as a final step, you can use this super tip. Because we not only teach you how to clean leather seats, but also how to leave them impeccable. Use a leather conditioner to properly maintain the upholstery: these products help the leather of the seats retain and recover its natural oils, and prevent the surface from drying out and cracking throughout the life of the car.

Always read the label and follow the instructions to know how to properly clean leather upholstery with these products.

How to clean car upholstery with natural products

If you don’t want to use commercial products to wash your car upholstery because you prefer more natural options, keep reading these steps on how to clean car seats with natural ingredients.

In particular, we are going to explain how to clean car seats with baking soda. This product has the advantage of being an excellent stain remover.

You will need :

Lemon juice Baking soda A brush

How to use it?
  1. Mix the lemon juice with the baking soda to make a paste.Apply it on the stained areas with the help of an old toothbrush.
  2. Let the paste sit for 15-20 minutes or until it is dry.The baking soda will absorb the stain.
  3. Vacuum to remove the bicarbonateAnd the stains will no longer be there! How cleaning car seats is no longer a problem!

Check the best cleaning service in Quebec, Canada.

How to remove stains from car upholstery

In addition to bicarbonate, which is used in general for all stains, we leave you some tips on how to clean car seats according to the type of stain.

If we have young children, it is likely that we will have, at some point, stains on the upholstery. To remove stains, the first thing to do is act fast. Clean the stain with soap and water, rub with the help of a brush.

Take note:

  1. Ink.To remove ink stains, mix equal parts rubbing alcohol and water in a spray container. Spray on the stain and with a dry cotton cloth and remove the ink that is going to come off the upholstery. Try the product first in a non-visible area.
  2. Coffee.Coffee stains are very common on car upholstery. To remove them, spray the area with an all-purpose trigger cleaner and a little water. Dry with a clean cloth.
  3. Chocolate.To clean the upholstery of a car with chocolate stains, use liquid soap and a damp cloth. Repeat the process if necessary.
  4. Gum.Did you get gum stuck to the seat and you wonder how the car upholstery is cleaned in this case? Don’t worry, run an ice cube over the gum until it hardens well, then remove it with a spatula or a blunt knife to avoid damaging the fabric.

Final tips on how to clean car seats

Knowing how to clean car seats is not difficult if you followed the guide that we have just shown you and do regular maintenance on them.

We are going to finish with two general tips so that your seats do not get ruined during cleaning:

  • Never apply a product directly on the object to be cleaned.
  • Wash your car in the shade. It is important that you try not to wash it in the sun, since excessive heat dries the products quickly, preventing them from acting correctly.

You no longer have an excuse! Now that you know how to clean the upholstery of the car and leave it impeccable, it is time to get to work.

Read more: 

  • How To Clean Glass And Windows With Perfect Results
  • Top 5 Advantages Of Hiring Professional Cleaning Services
READ MORE
work-space
Blog Uncategorized Upholstery Cleaning
By Fin Dittimi September 22, 2021

7 Workplace Organization and Cleaning Habits

Working with a cluttered desk hinders my productivity. It has become obvious that it’s necessary to develop some new behaviors in order to find things and not be overwhelmed by clutter. According to research, it takes 21 days to develop a new habit, so commitment to following these practices for three weeks, and sure enough, your office would become a cleaner, more organized space!

Control Paper Clutter

Papers lead to clutter, which leads to a cluttered, unproductive environment. Store all of your stray documents in a file on top of the desk, which you go through every day. That way, if you need to get rid of something or relocate it to a more permanent position, you can either do so or destroy it.

Perpendicular and parallel

Before departing for the day,  line everything up parallel and perpendicular on my desk. This sort of organization is visually appealing and makes the space feel less crowded. As a result, when you get to work each morning, you have an orderly desk everything is in its place.

Wires and chargers should be hidden

Whether it’s going wireless on your keyboard and mouse or simply disguising existing cables in your area, a cord-free environment can drastically improve how clean and neat your place seems. There are a lot of smart devices on the market to assist corral and conceal cables, and utilizing something like a docking station for your cell phone would naturally hide these eyesores as well.

Coffee Cups and Water Bottles

These things have a way of lingering after they’ve been completed. Most offices have a handful of Starbucks cups or dirty ceramic mugs on their desks. Be cautious when disposing of these or returning them to the break room and washing them.

Daily Clutter Removal

Everything in your workplace should have a home, and if it doesn’t, you should either find one for it (ideally out of sight) or get rid of it. Make a thorough sweep of your desktop before you leave each night and return everything to its rightful position; this way, you’ll wake up to a clean workstation.

Cleaning of Spots

Get a general-purpose microfiber cloth ( Maker’s mini takes up less room) on the desk, along with a tiny spray bottle of all-purpose cleaning. This foresight enables you to swiftly spot clean all of the surfaces in your workspace desk, mouse, lamp, and so on—as well as all of the displays, which eventually accumulate dust and fingerprints.

List of Tasks

Finally, while this isn’t really linked to cleaning, it is related to the organization. Create a running to-do list of everything you need to get done that day, including any one-time cleaning chores. This may seem self-evident, but it keeps one on track: what gets scheduled gets done!

These all appear to be easy things, but implementing them on a daily basis can be difficult. Give it the 21-day treatment, and I guarantee you’ll have a much cleaner and more organized, not to mention productive, workplace environment.

Check out our EcoFriendly Cleaning Service In Quebec, Canada.

Call Us: 514.629.0841

Address: Montreal, Quebec, Canada

Mail Us: info@dialcleaningservices.com

READ MORE
steel
Blog
By Fin Dittimi September 20, 2021

Get Your Home Back-To-School Ready

For those with school-aged children, the end of summer generally signifies the end of more casual schedules. I haven’t gone back to school in a long time—don’t ask how long!—but I remember the exhilaration of the first day. Purchasing new school supplies, fresh clothing, and ultimately racing out the door on that first morning. Back to school is always a whirlwind—inescapable!

I know that once you find out a fantastic strategy to keep your house tidy for the school year, it will be a lot easier to get back into the groove of things.

Finally, if you’re not ripping your hair out and can prevent any last-minute panic, we’ve done our job—here are some of the best back-to-school suggestions;

The Task List

Make a priority list to save your sanity from trying to recall everything you need to accomplish. Make a list of the things you need to accomplish before school starts, such as any school supplies you need to buy and any activities with impending registration deadlines. Then write another list of everything else you can think of to make the next few months easier for yourself and your family.

Inventory and Organization

Begin with a blank slate; it will be much easier to maintain it that way. Papers, jackets, backpacks, shoes, and sweaty sports gear will build up—but if you have a dedicated location for everything, you’ve just improved your organizing odds. Also, before purchasing any new school supplies or clothing for your children, check to see what they currently have. In the spirit of decluttering, get rid of anything that is damaged, severely worn out, too tiny (unless it is suitable for hand-me-downs), or discolored beyond repair.

Next, write a list of exactly what your children require and try your best to keep to it. Schools will also occasionally give a list of required materials for the upcoming school year, making your work a bit easier. When you go shopping with a list, you’re more likely to buy only what’s on it, which saves you money—bonus! Alternatively, you may wait a week after school begins and get everything when it’s marked down (#smart).

High-Contact Areas Should Be Sanitized

Hand cleaning and sanitizing high-touch areas have been top priorities in recent years. With the start of the new school year, it’s critical to boost the sanitizing routine, especially if your children are returning to school. Throughout the day, our hands wind up touching a lot of things. Disinfect doorknobs, light switches, remote controls, handles, and any other location you know your family often contacts.

I’m sure we’ve all become accustomed to cleaning face masks, so this is just a kind reminder to make sure your child has a clean one on hand every day. It’s advisable to keep at least five face masks on hand so that you can wash them at the end of the school week. They should be cleaned separately from other clothes in hot water with ordinary laundry detergent or vinegar.

Obtain a Calendar

Hang a magnetic dry-erase calendar in your kitchen if you haven’t already to keep track of everyone’s activities. Use a different color marker for each member of the family so you can tell who is doing what at a glance. When you arrange piano lessons, ice skating practice, or receive information about field excursions or bake sales, put them on the calendar right away. I also recommend purchasing a 12-month calendar to keep track of events in subsequent months and moving them to the dry-erase calendar.

The Homework Area

It’s critical for kids to have their own study place, especially as they get older and have more homework—and I’m not talking about at the dining room table (I say that to preserve the sanity of parents, too)! If they have space in their bedroom for a desk, that’s great. Otherwise, a family room, living room, or office (preferably one without a television) will suffice. If the desk lacks drawers or shelves, consider placing an organizer on top of it. And, if you have the space, a bookshelf is a great addition because it adds extra storage space with the capacity to expand!

Our obsession for pegboards has no boundaries, and the same goes for over desks.

They’re fantastic for adding extra storage space for tiny goods such as pens, paintbrushes, and pencils. Desk lights may even be hung from them! Take it a step further by painting it in your child’s preferred color.

Encourage your children to take responsibility for keeping their homework spaces nice and tidy. Giving children the tools they need to organize their artwork, projects, and report cards will help to reduce clutter around the house. Create color-coded files for each child’s schoolwork, mementos, and vital paperwork for super-organized parents. This also makes coursework easier to discover, and at the conclusion of the school year, it can be simply sifted through to choose what is preserved and what is discarded.

Cleaning the Closets

It’s amazing how quickly the front hall closet becomes a dumping ground for… well, everything. Here’s how I keep ours clean and organized. There you have it—space for coats and bags! If you have a big hallway or mudroom, you can even build cubbies with hooks for jackets and bags as well as storage for shoes, musical instruments, and sports equipment. To keep toys and books tidy, you may also use labeled plastic boxes or baskets, or create a separate shelf exclusively for school materials. If your children have a designated area for everything, chances are they will utilize it more frequently, and you will no longer trip over their belongings.

Take up chores as a family.

Make everyone in your home a team member by including them in duties and organizing. This will also help youngsters develop a sense of responsibility for their families. Begin with easier activities for the youngest and more difficult chores for the older children. In order to promote involvement, include prizes for finishing duties.

Check out our EcoFriendly Cleaning Service In Quebec, Canada.

Call Us: 514.629.0841

Address: Montreal, Quebec, Canada

Mail Us: info@dialcleaningservices.com

You may also like:

READ MORE
  • 1
  • …
  • 5
  • 6
  • 7
  • 8
  • 9
  • …
  • 14
Featured author image: Reasons why you should hire a professional cleaner to clean your homes

Faith Ileh

Hi! I am an author of this blog. Read Our Post

Recent Posts
  • The Best Carpet Cleaning Services in Montreal
    The Best Carpet Cleaning Services in Montreal
    August 14, 2023
  • Experience the Pinnacle of Cleanliness with Dial Cleaning Service
    Experience the Pinnacle of Cleanliness with Dial Cleaning Service
    August 13, 2023
  • Conquer Dusty Corners Like a Pro! ✨🌿
    Conquer Dusty Corners Like a Pro! ✨🌿
    May 31, 2023
dial 2D

Request A Callback

Quick Links

Menu
  • Our Blog
  • Deep Cleaning
  • Montréal
  • Commercial
  • Residential
  • Privacy Policy
  • FAQ

Get In Touch

514.629.0841

  • Business Hours:
  • 8:00 AM – 6:00 PM
  • 7 Days a Week
Copyright © 2026 Dialcleaningservices | design by fandfconsultancy