logotype
  • About
  • Residential
    • Special Cleaning
    • Carpet Cleaning
    • Window Cleaning
    • Deep Cleaning
    • Apartment Cleaning
      • Sofa Cleaning
      • Yard Cleaning
      • Roof Cleaning
      • Carpet Cleaning
    • Duct Cleaning
    • Upholstery Cleaning
    • Pool Cleaning
    • After Party Cleaning
  • Commercial
    • Office Cleaning
    • Hotel Cleaning
    • Hospital Cleaning
    • Mall & Shops Cleaning
    • Industrial Cleaning
    • Pharmacy Cleaning
    • Premises Cleaning
    • School Cleaning
  • Our Locations
    • Montréal
    • Westmount
    • Ottawa
    • Toronto
  • Contact
CALL US TODAY
  • About
  • Residential
    • Special Cleaning
    • Carpet Cleaning
    • Window Cleaning
    • Deep Cleaning
    • Apartment Cleaning
      • Sofa Cleaning
      • Yard Cleaning
      • Roof Cleaning
      • Carpet Cleaning
    • Duct Cleaning
    • Upholstery Cleaning
    • Pool Cleaning
    • After Party Cleaning
  • Commercial
    • Office Cleaning
    • Hotel Cleaning
    • Hospital Cleaning
    • Mall & Shops Cleaning
    • Industrial Cleaning
    • Pharmacy Cleaning
    • Premises Cleaning
    • School Cleaning
  • Our Locations
    • Montréal
    • Westmount
    • Ottawa
    • Toronto
  • Contact
logotype
logotype
  • About
  • Residential
    • Special Cleaning
    • Carpet Cleaning
    • Window Cleaning
    • Deep Cleaning
    • Apartment Cleaning
      • Sofa Cleaning
      • Yard Cleaning
      • Roof Cleaning
      • Carpet Cleaning
    • Duct Cleaning
    • Upholstery Cleaning
    • Pool Cleaning
    • After Party Cleaning
  • Commercial
    • Office Cleaning
    • Hotel Cleaning
    • Hospital Cleaning
    • Mall & Shops Cleaning
    • Industrial Cleaning
    • Pharmacy Cleaning
    • Premises Cleaning
    • School Cleaning
  • Our Locations
    • Montréal
    • Westmount
    • Ottawa
    • Toronto
  • Contact

Category: Uncategorized

cropped-image-of-woman-cleaning-carpet-at
Uncategorized
By Fin Dittimi August 14, 2023

The Best Carpet Cleaning Services in Montreal

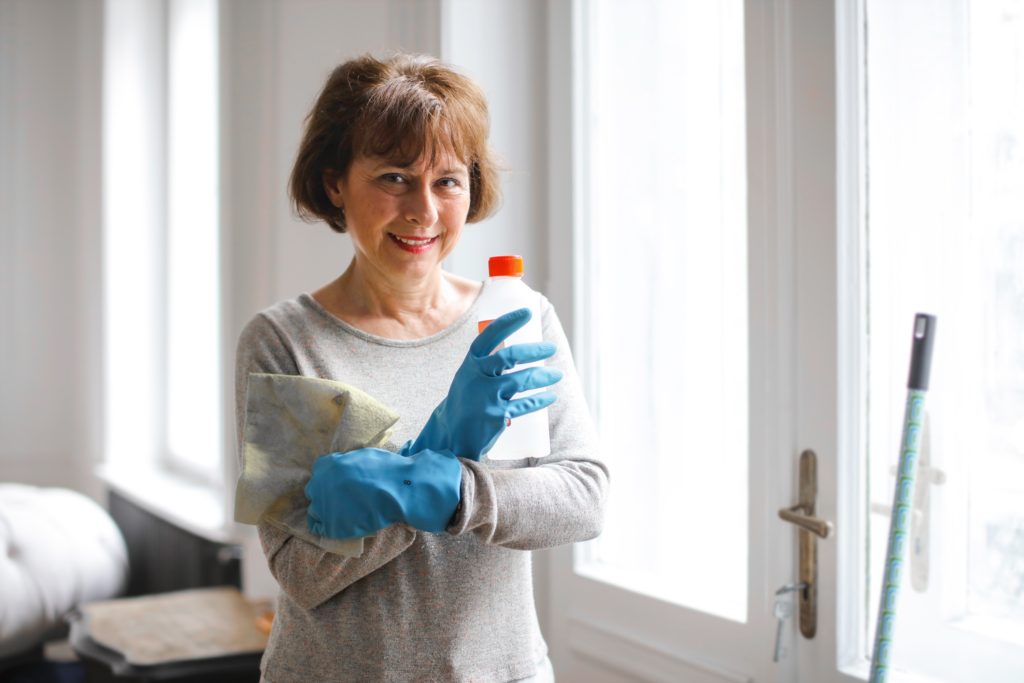
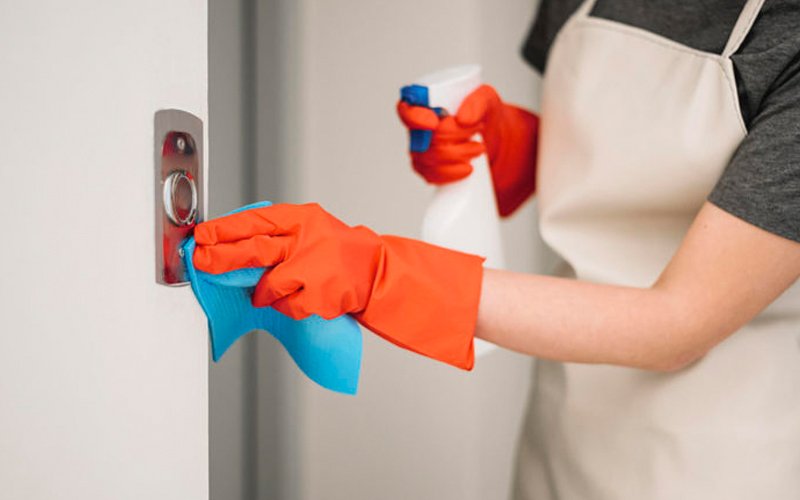
When it comes to maintaining a clean and healthy living space, your carpets often require special attention. Carpets can easily accumulate dust, dirt, allergens, and even stains over time. That’s where professional carpet cleaning services come to the rescue. In Montreal, you have a range of options to choose from when it comes to finding the best carpet cleaning services. In this article, we’ll explore some of the top contenders that offer exceptional carpet cleaning in the city.

Dial Cleaning Services

Experience the ultimate in personalized and efficient cleaning with Dial Cleaning Services. This reputable company is dedicated to providing top-notch cleaning services, and their expertise extends to carpet cleaning as well. With a fully trained team and the best equipment, Dial Cleaning Services ensures that your carpets receive the thorough cleaning they deserve. They understand that every carpet is unique and requires special care, which is why they tailor their cleaning approach to suit your specific carpet type.

Services Offered:

  • Deep carpet cleaning using industry-leading techniques.
  • Stain removal and treatment for a refreshed look.
  • Upholstery cleaning to revitalize your furniture.
  • Specialized cleaning for high-traffic areas.

FreshClean

If you’re searching for a company that combines professionalism with eco-friendliness, look no further than FreshClean. This Montreal-based carpet cleaning service is known for its commitment to using environmentally friendly products without compromising on the quality of cleaning. FreshClean’s trained technicians pay close attention to detail, ensuring that your carpets are clean and safe for your family and pets.

Services Offered:

  • Green carpet cleaning solutions that prioritize your health and the environment.
  • Odor removal to eliminate unpleasant smells from your carpets.
  • Pet stain and allergen treatment for a fresh and hygienic living space.
  • Carpet protection to prevent future stains and wear.

Sparkling Homes

Sparkling Homes stands out as a reliable option when you’re looking for a carpet cleaning service that goes the extra mile. With a focus on customer satisfaction, this company takes pride in delivering results that exceed expectations. Their trained technicians are equipped with advanced tools to tackle even the toughest carpet challenges, leaving your carpets looking revitalized and inviting.

Services Offered:

  • Steam cleaning to penetrate and sanitize carpets deeply.
  • Allergen and bacteria removal for a healthier home environment.
  • Quick-drying techniques to minimize disruption to your routine.
  • Tile and grout cleaning to give your entire home a refreshed look.

Keeping your carpets clean and well-maintained is essential for a comfortable and healthy living space. The carpet cleaning services mentioned above, including Dial Cleaning Services, FreshClean, and Sparkling Homes, offer exceptional solutions tailored to your specific needs. Whether you prioritize eco-friendliness, personalized service, or thorough cleaning, these companies have got you covered. Choose the best fit for your preferences and enjoy the benefits of pristine carpets in your Montreal home.

Company NameSpecializationsEco-Friendly OptionsCustomer Satisfaction
Dial Cleaning ServicesDeep cleaning, stain removal, upholstery cleaningYesHigh
FreshCleanGreen cleaning, odor removal, pet stain treatmentYesModerate
Sparkling HomesSteam cleaning, allergen removal, tile cleaningNoHigh

Tips for Choosing the Right Carpet Cleaning Service

Selecting the best carpet cleaning service for your needs can sometimes be daunting. With various options available in Montreal, making an informed decision is important to ensure your carpets receive the care they deserve. Here are some valuable tips to help you choose the right carpet cleaning service:

Expertise and Experience

When entrusting your carpets to a cleaning service, experience matters. Look for a company that has a proven track record in the industry. Dial Cleaning Services, for instance, boasts a team of fully trained professionals who are well-versed in the intricacies of carpet cleaning. Their expertise ensures that your carpets are treated with the utmost care and attention, leaving them fresh and vibrant.

Cleaning Techniques and Technology

Different carpets require different cleaning approaches. A reputable carpet cleaning service should be equipped with advanced cleaning techniques and state-of-the-art technology. FreshClean is known for its commitment to green cleaning methods, using eco-friendly solutions that effectively clean and refresh your carpets without harming the environment.

Customer Reviews and Testimonials

Before making a decision, take a moment to read customer reviews and testimonials. These insights can provide valuable information about the quality of service you can expect. Customers often share their experiences, shedding light on aspects such as punctuality, professionalism, and the overall outcome of the cleaning process. Companies like Sparkling Homes have garnered positive reviews for their dedication to customer satisfaction.

Additional Services

While carpet cleaning might be your primary concern, companies offering additional cleaning services are worth considering. Dial Cleaning Services excels in carpet cleaning and provides a range of other cleaning solutions, from deep cleaning to window cleaning and floor maintenance. This comprehensive approach ensures that your entire living space receives the attention it deserves.

Pricing Transparency

Transparency in pricing is essential to avoid any surprises down the line. Reputable carpet cleaning services should provide clear and detailed information about their pricing structure. It’s a good practice to request a quote before scheduling a service. This way, you can ensure that the service aligns with your budget and expectations.

Table: Key Considerations for Choosing a Carpet Cleaning Service

ConsiderationDial Cleaning ServicesFreshCleanSparkling Homes
Expertise and ExperienceHighly trained teamGreen cleaning methodsSkilled professionals
Cleaning Techniques and TechnologyAdvanced cleaning techniquesEco-friendly solutionsState-of-the-art tools
Customer Reviews and TestimonialsPositive customer feedbackTrusted by customersDedicated to satisfaction
Additional ServicesComprehensive offeringsFocus on carpet cleaningWide range of services
Pricing TransparencyTransparent pricingClear pricing structureDetailed pricing info

Choosing the best carpet cleaning service in Montreal involves considering various factors such as expertise, cleaning techniques, customer reviews, additional services, and pricing transparency. By considering these aspects, you can make an informed decision that ensures your carpets receive the care they need to stay fresh, clean, and inviting. Whether you opt for the personalized approach of Dial Cleaning Services, the eco-friendly methods of FreshClean, or the dedicated service of Sparkling Homes, your carpets will thank you for the attention they receive.

Remember, a well-maintained carpet contributes not only to the aesthetics of your home but also to the overall health and comfort of your living space. Choose wisely and enjoy the benefits of a cleaner, more inviting home environment

DIY Tips for Maintaining Clean Carpets Between Professional Cleanings

While professional carpet cleaning services offer a thorough and effective way to keep your carpets in top condition, there are also steps you can take to maintain their cleanliness between professional cleanings. Here are some DIY tips to help you keep your carpets looking and feeling fresh:
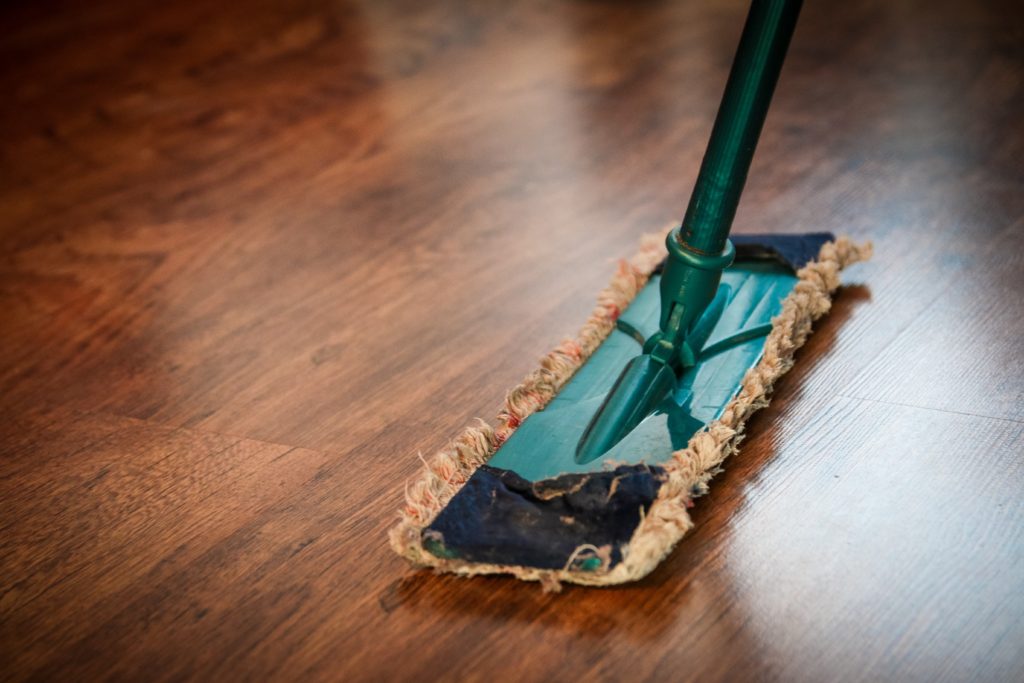
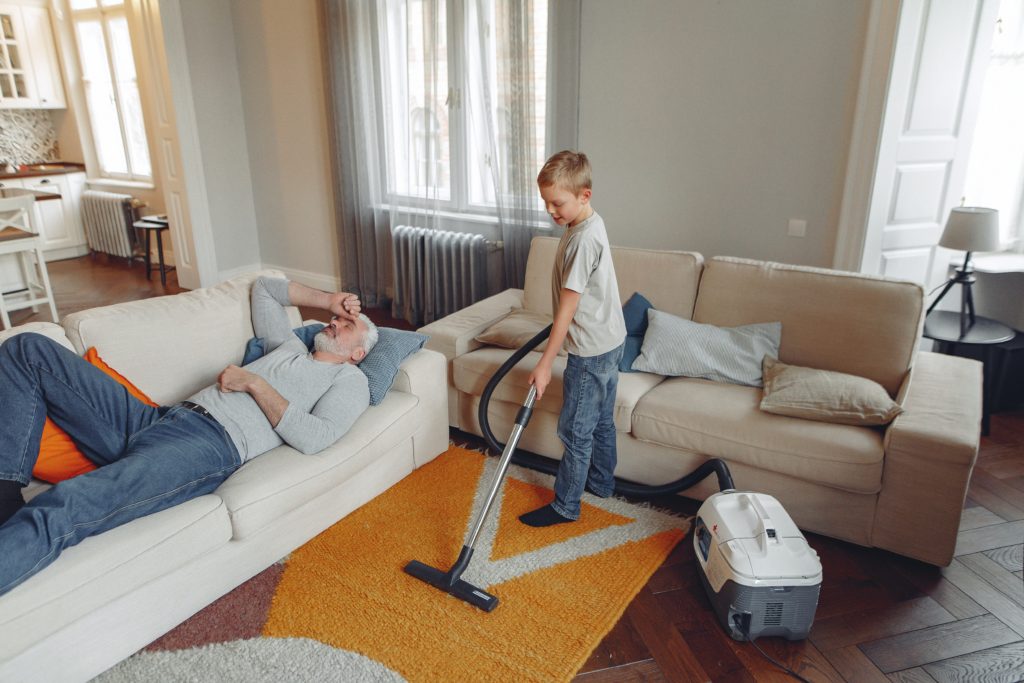
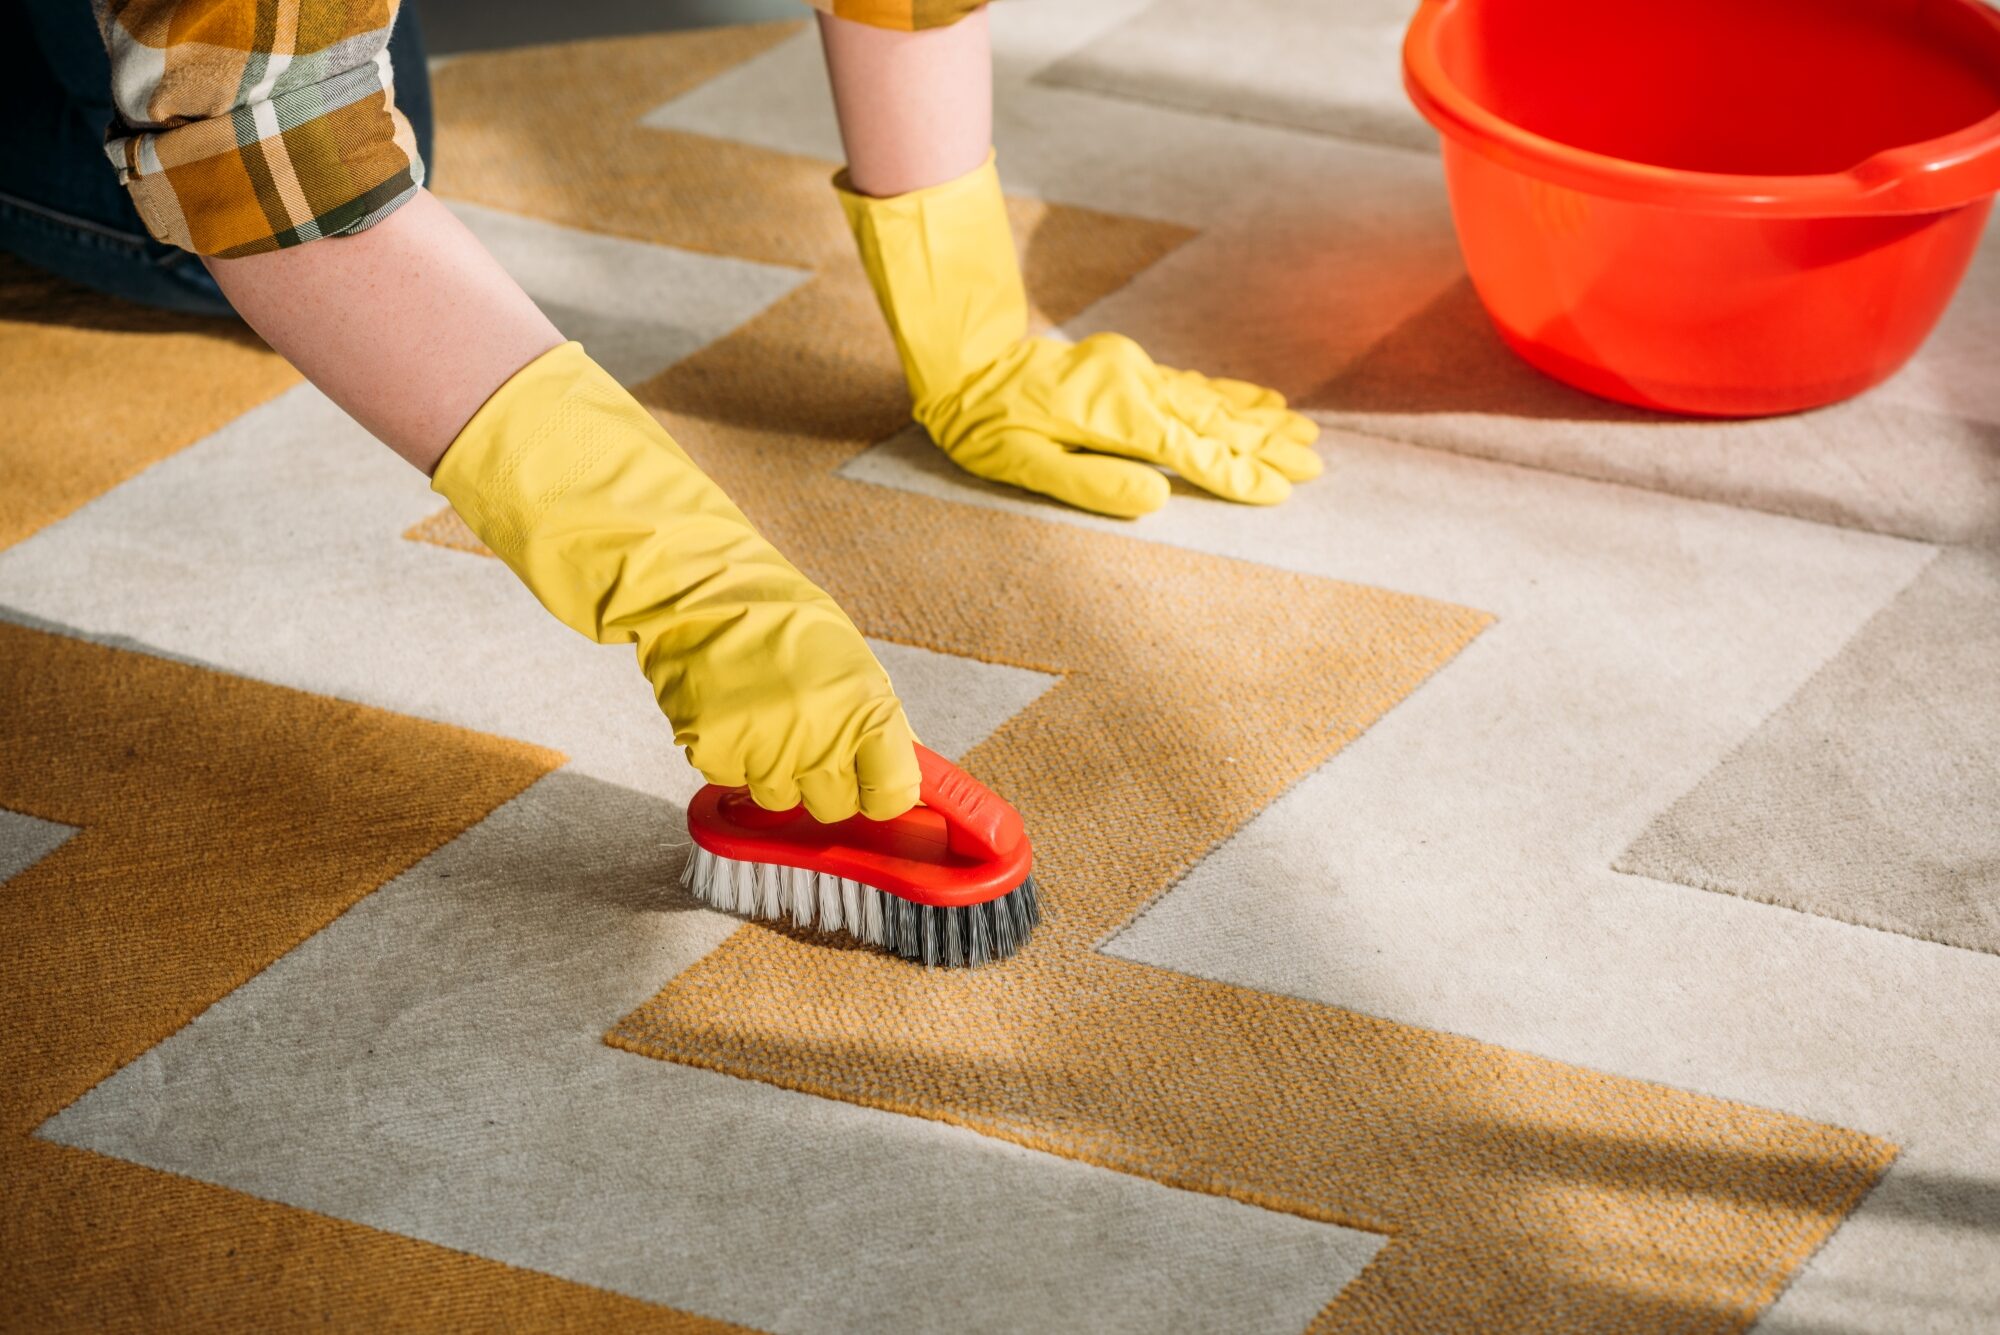
Regular Vacuuming

Regular vacuuming is a simple yet effective way to prevent the buildup of dust, dirt, and debris on your carpets. Aim to vacuum high-traffic areas at least once a week and less frequently used areas at least every two weeks. Use a vacuum cleaner with a HEPA filter to capture allergens and ensure a thorough clean.

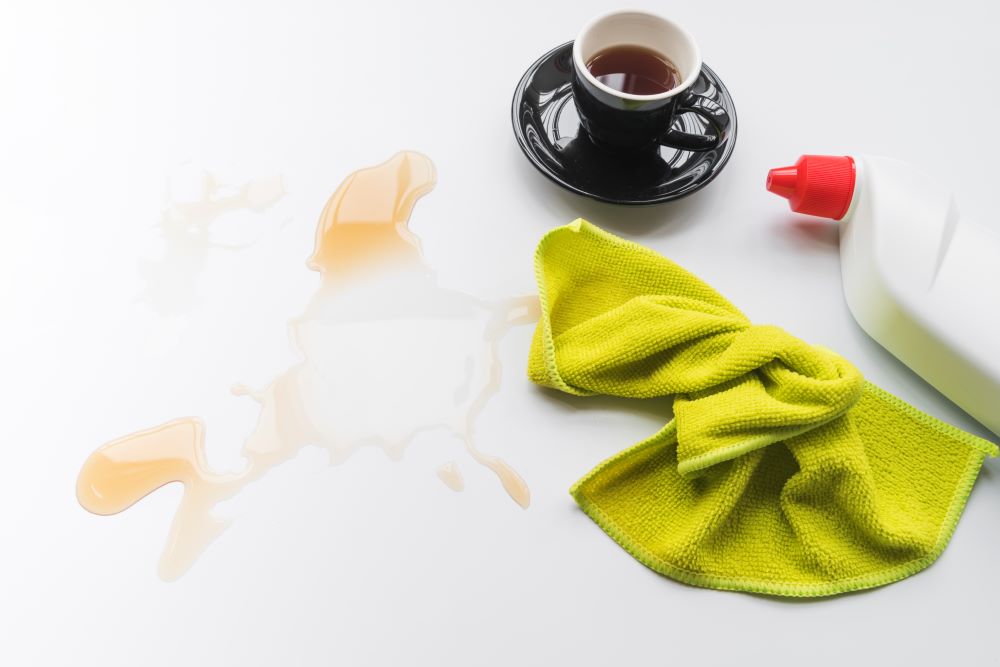
Address Stains Promptly

Accidents happen; when they do, it’s important to address stains promptly. Blot the stain gently with a clean cloth or paper towel to absorb as much liquid as possible. Then, treat the stain using appropriate cleaning solutions. A mixture of water and mild dish soap can often do the trick for common stains. Remember to test the solution on a hidden area of the carpet first to ensure it doesn’t cause discoloration.

Use Carpet Runners and Mats

Strategically placing carpet runners and mats in high-traffic areas can help prevent dirt and debris from spreading to your carpets. These protective coverings can also capture moisture and help prevent stains from occurring. Be sure to clean and shake out the runners and mats regularly to maintain their effectiveness.

Rotate Furniture

Furniture can leave indentations on carpets over time. To prevent uneven wear, consider rotating your furniture periodically. This simple step helps distribute the weight and pressure on different areas of the carpet, extending its lifespan and maintaining its appearance.

List: Quick DIY Tips for Carpet Maintenance

  • Regular Vacuuming: Vacuum high-traffic areas weekly and less frequently used areas bi-weekly.
  • Prompt Stain Treatment: Blot and treat stains immediately to prevent permanent damage.
  • Carpet Runners and Mats: Protective coverings prevent dirt and stains from spreading.
  • Furniture Rotation: Rotate furniture to prevent uneven wear and indentations.

Professional Carpet Cleaning Schedule

Even with diligent DIY maintenance, it’s important to schedule regular professional carpet cleanings. Experts recommend having your carpets professionally cleaned every 12 to 18 months, depending on factors such as foot traffic and the presence of pets or children. Dial Cleaning Services, FreshClean, and Sparkling Homes are excellent choices to consider for your professional carpet cleaning needs.

Combining these DIY tips with professional cleanings ensures that your carpets remain in optimal condition, providing a clean and inviting atmosphere for your home.

Ready to schedule a service? Call 514-629-0841 to speak with our friendly customer service representatives. Or SCHEDULE A FREE ESTIMATE today!

The Benefits of Professional Carpet Cleaning

Incorporating these practices into your carpet care routine can go a long way in extending the life of your carpets and maintaining a fresh and healthy living environment. Whether you’re tackling stains promptly, using protective coverings, or following a regular vacuuming schedule, your efforts will contribute to the longevity and beauty of your carpets. And when it’s time for a deeper clean, you can confidently turn to the reputable carpet cleaning services Montreal offers.

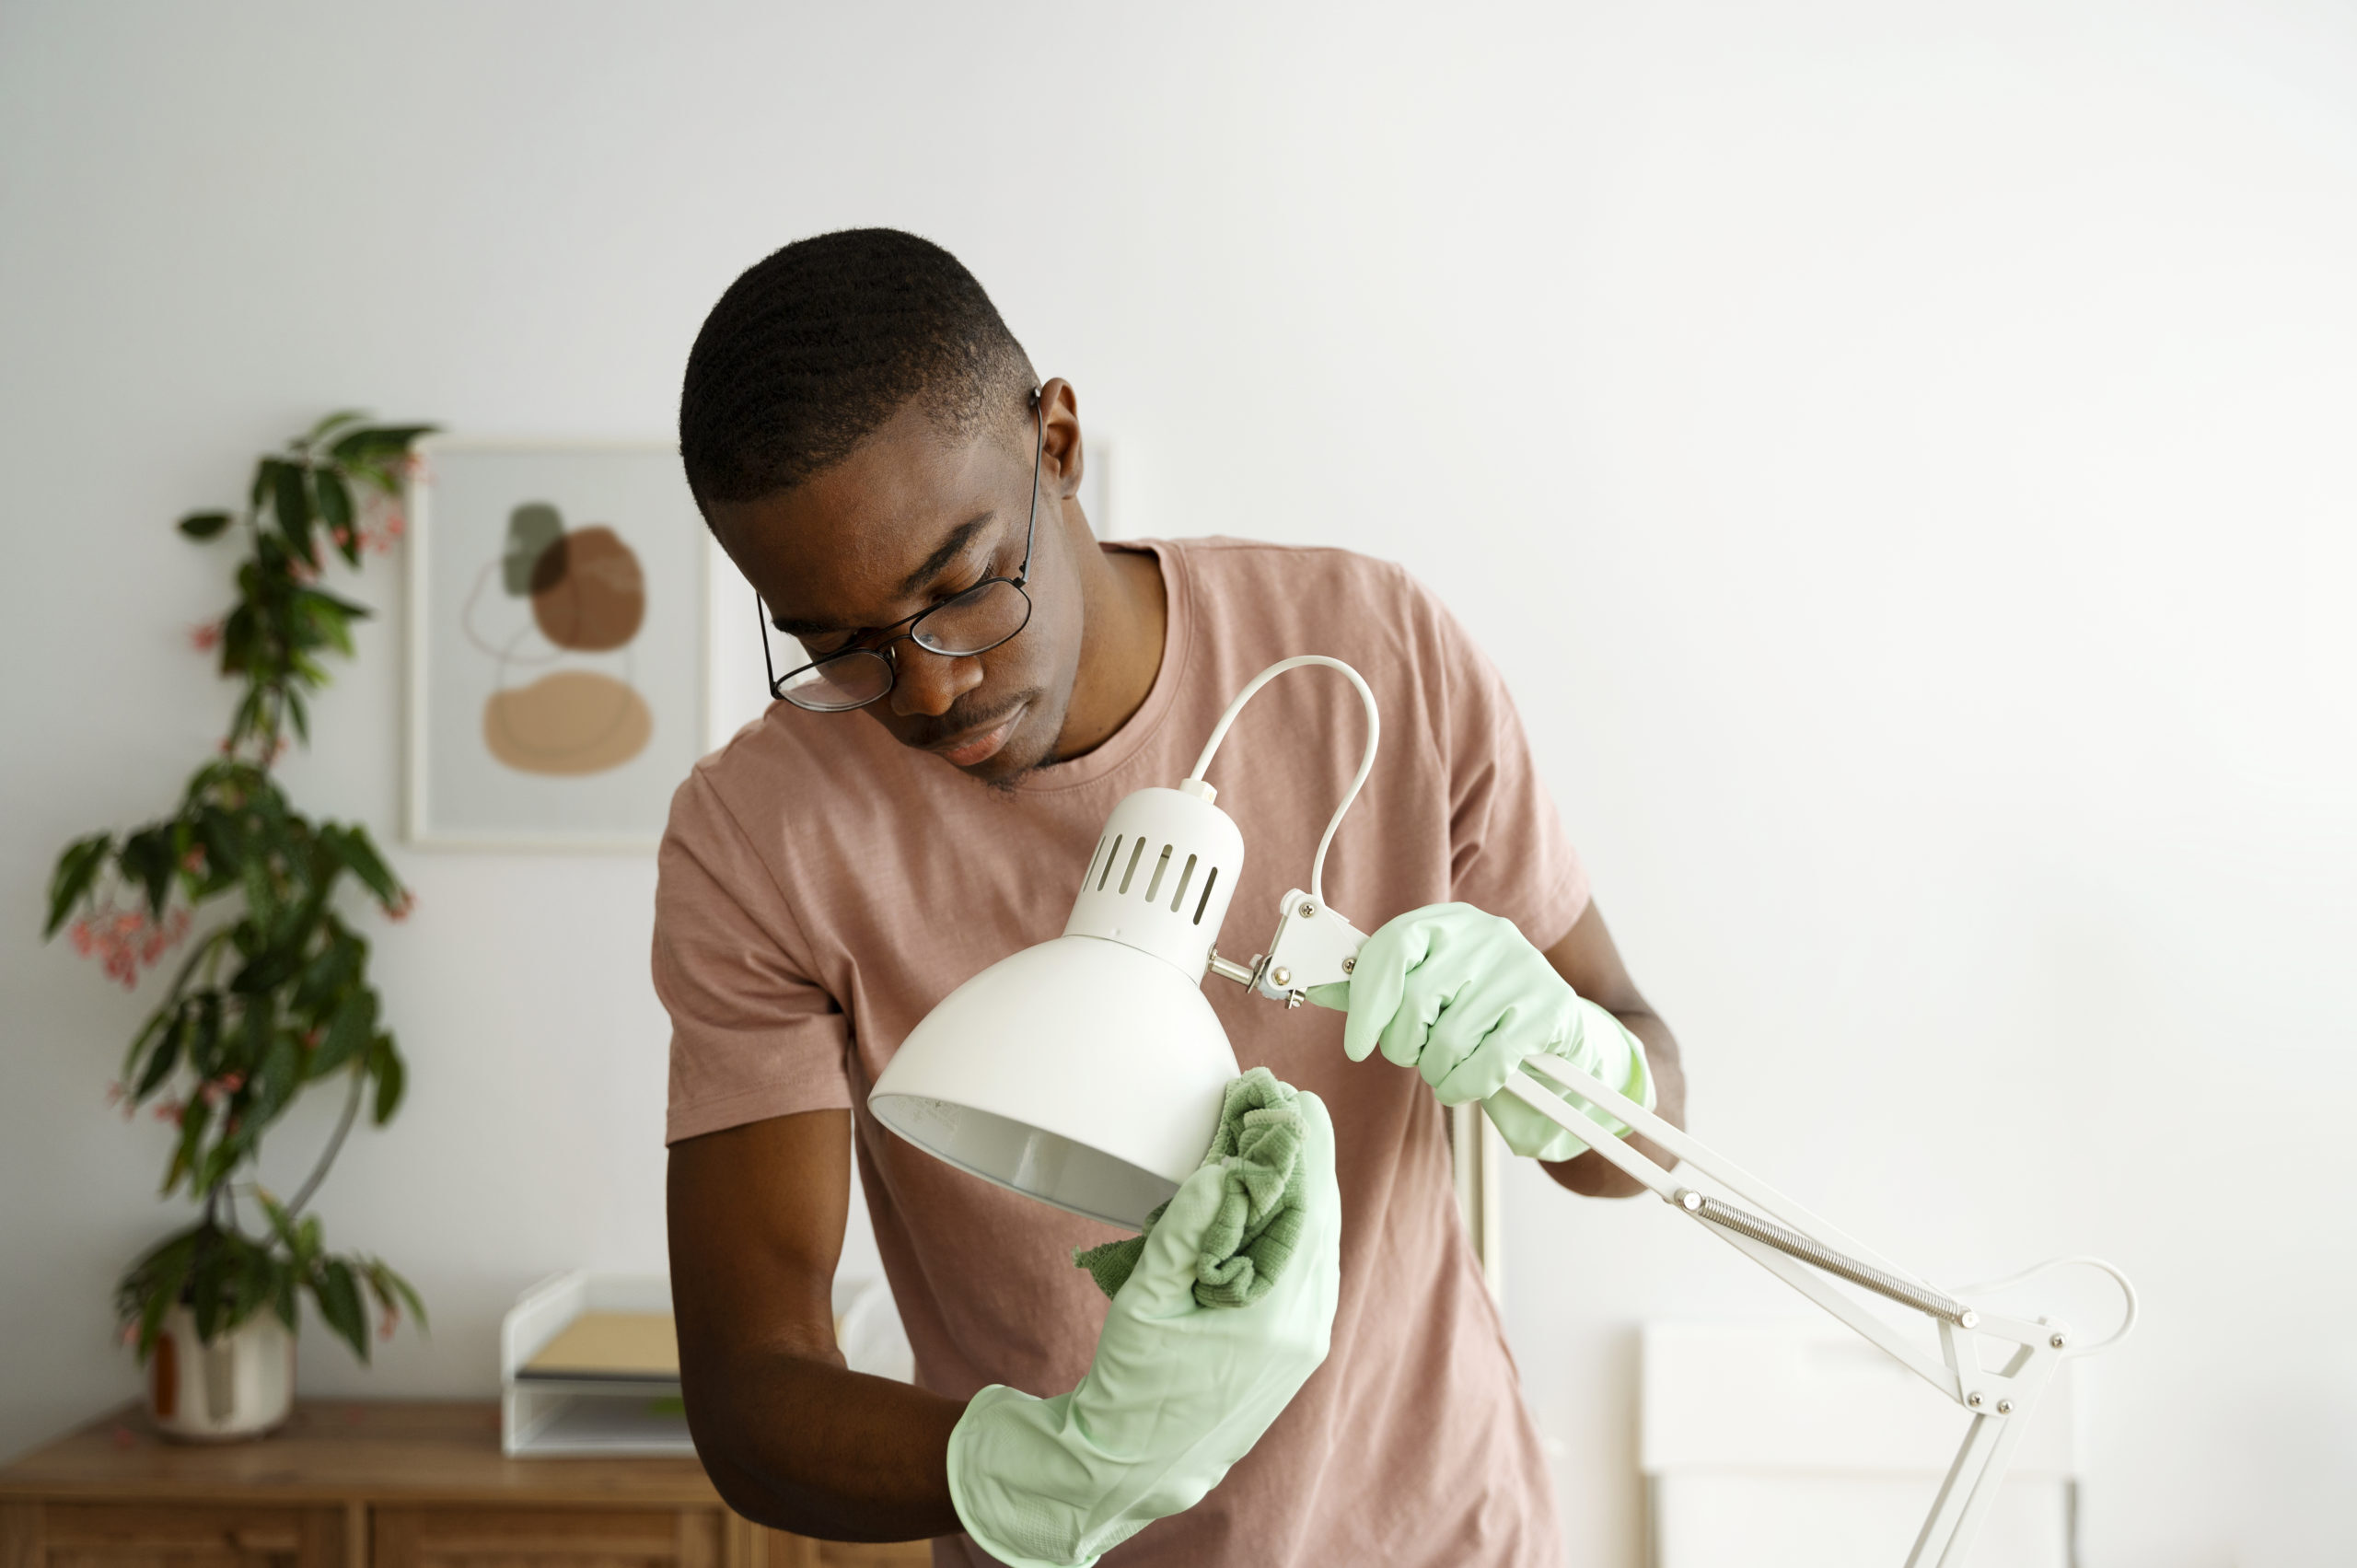
While DIY carpet maintenance is important, there’s no denying the significant benefits that professional carpet cleaning can offer. Let’s explore why entrusting your carpets to the experts at companies like Dial Cleaning Services, FreshClean, and Sparkling Homes can make a real difference:

Deep Cleaning and Restoration

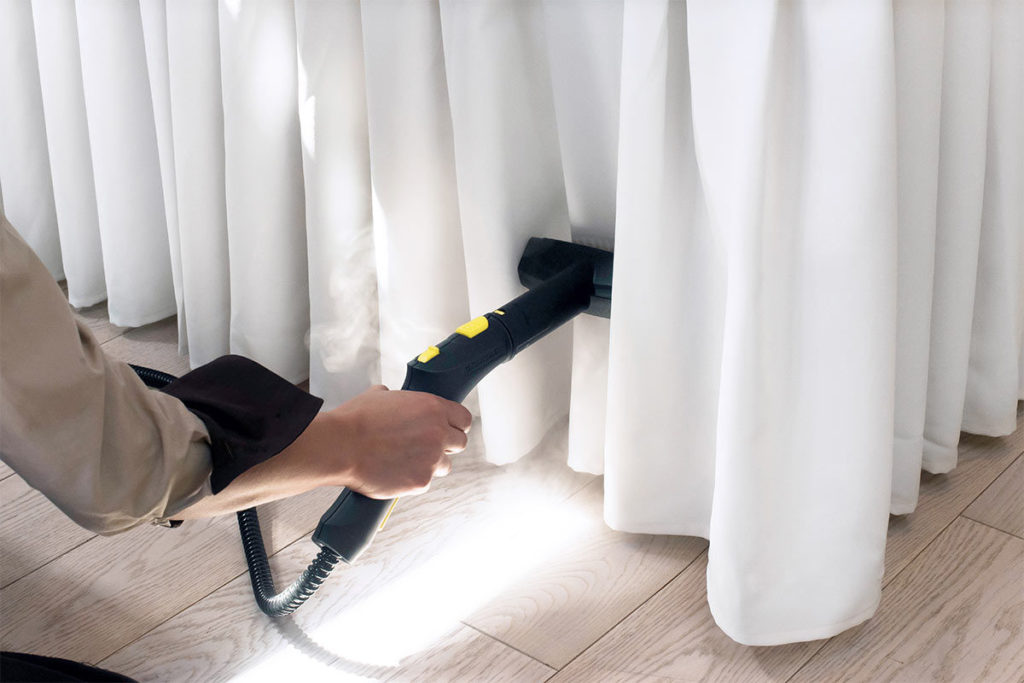
Professional carpet cleaning goes beyond the surface, providing a deep and thorough clean that can revive even the most tired-looking carpets. Advanced cleaning techniques, such as steam cleaning, can penetrate deep into the fibers, extracting dirt, allergens, and stubborn stains. This level of cleaning improves the appearance of your carpets and contributes to a healthier indoor environment.

Allergen and Bacteria Removal

Carpets can trap allergens, bacteria, and other microscopic particles that can affect the air quality in your home. Professional carpet cleaning utilizes specialized equipment and solutions that effectively remove these contaminants, reducing your family’s risk of allergies and respiratory issues.

Prolonged Carpet Lifespan

Regular professional carpet cleaning can significantly extend the lifespan of your carpets. By removing dirt and debris that can cause wear and tear, your carpets remain in better condition over time. This saves you money on premature replacements and ensures your living space maintains its aesthetic appeal.

Stain Prevention and Treatment

Professional carpet cleaners have the knowledge and expertise to identify different types of stains and apply appropriate treatments. They can tackle even the toughest stains, such as wine spills or pet accidents, without causing damage to your carpets. Additionally, some services offer stain protection treatments that help repel future stains, keeping your carpets looking cleaner for longer.

Table: Benefits of Professional Carpet Cleaning

BenefitDescription
Deep Cleaning and RestorationThorough cleaning for refreshed and revitalized carpets.
Allergen and Bacteria RemovalElimination of contaminants for improved indoor air quality.
Prolonged Carpet LifespanPrevention of wear and tear, extending carpet life.
Stain Prevention and TreatmentExpert stain removal and protection against future stains.

Time and Convenience

Professional carpet cleaning saves you valuable time and effort. The trained technicians handle all aspects of the cleaning process, from moving furniture to choosing the appropriate cleaning methods. This convenience lets you focus on other important tasks while your carpets receive the care they need.

Eco-Friendly Options

Companies like FreshClean prioritize eco-friendliness by using green cleaning solutions that are safe for your family and the environment. By choosing such services, you enjoy clean carpets and contribute to a sustainable and healthier planet.

Enhanced Aesthetics and Comfort

Clean carpets contribute to a more aesthetically pleasing and comfortable living space. Walking on soft, clean carpets enhances the overall ambiance of your home, making it a welcoming environment for family members and guests alike.

In conclusion, the benefits of professional carpet cleaning are numerous and impactful. From deep cleaning and stain removal to improved indoor air quality and prolonged carpet lifespan, entrusting your carpets to experienced professionals offers a range of advantages. Whether you’re seeking a refresh for your living space or looking to maintain a healthy home environment, the expertise of companies like Dial Cleaning Services, FreshClean, and Sparkling Homes can make a noticeable difference in the appearance and condition of your carpets.

READ MORE
medium-shot-man-servant-cleaning-lamp
Blog Home Cleaning Uncategorized
By Fin Dittimi May 31, 2023

Conquer Dusty Corners Like a Pro! ✨🌿

The Dusty Battle

Keeping your home free from dust is an ongoing challenge, especially regarding hard-to-reach corners and high ceilings. But fret not! This article has a handy tip that will help you conquer dusty corners like a pro.

The Importance of Dusting

Before we dive into the solution, let’s understand why dusting is essential for maintaining a clean and healthy home. Dust is not just unsightly; it can also contribute to poor indoor air quality and allergies. Regular dusting removes allergens, improves air circulation, and creates a more comfortable living environment.

The Duster Hack: A Microfiber Magic

Now, let’s unveil the ingenious tip that will revolutionize your dusting routine. This tip involves transforming a common household item into a makeshift duster.

1. Materials Needed

  • A long-handled mop or broom
  • A microfiber cloth
  • Rubber band or clip

2. Assembly

Wrap a clean microfiber cloth around the end of the long-handled mop or broom. Make sure the cloth covers the entire end and hangs down loosely. Secure it in place with a rubber band or clip. Voila! You now have a makeshift duster ready to tackle dusty corners and high ceilings.

3. Dusting Technique

Using your newly created duster, reach up to high ceilings, ceiling fans, light fixtures, and tight corners. Swipe the cloth gently across the surfaces, capturing the dust. The microfiber material’s electrostatic properties will attract and hold onto the dust particles, ensuring a thorough clean.

Professional Cleaning Services: Going the Extra Mile

While the DIY solution mentioned above can be highly effective, sometimes a professional touch is needed to achieve a truly dust-free home. Dial Cleaning Services offers professional cleaning services to help you conquer even the most stubborn dust.

Contact Dial Cleaning Services today at ☎️ 514-629-0841 or visit their website https://dialcleaningservices.com to explore their range of services and discover how their expert team can help you achieve a pristine and dust-free living space.

Conclusion: Embrace Dust-Free Living

With the simple yet powerful tip shared in this article, you can now conquer dusty corners like a pro. By utilizing a long-handled mop or broom with a microfiber cloth, you’ll easily reach high ceilings, ceiling fans, and tight corners. Say goodbye to dusty surfaces and enjoy cleaner air in your home.

Remember, regular dusting is key to maintaining a dust-free environment. Incorporate this tip into your cleaning routine and experience the benefits of a cleaner and healthier home.

FAQs (Frequently Asked Questions)

Q1: Can I use any type of cloth for the makeshift duster?

A: While you can use various types of cloths, microfiber cloths are highly recommended for dusting. Microfiber has superior dust-attracting properties and can effectively trap and hold onto dust particles.

Q2: How often should I dust my home?

A: The frequency of dusting depends on various factors such as the level of dust accumulation and your home’s environment. As a general guideline, aim to dust your home at least once a week, paying extra attention to high-traffic areas and surfaces prone to dust buildup.

Q3: Are there any other tools or methods for dusting hard-to-reach areas?

A: Yes, there are other tools you can use, such as extendable dusters or vacuum attachments with long hoses. Additionally, using a step ladder or sturdy stool can help you reach high ceilings and shelves. Choose the method that works best for your specific cleaning needs.

Q4: Can Dial Cleaning Services assist with other cleaning tasks besides dusting?

A: Absolutely! Dial Cleaning Services offers a comprehensive range of professional cleaning services, including but not limited to dusting, vacuuming, mopping, and deep cleaning. They can customize their services to meet your specific cleaning requirements.

Q5: How can I reduce dust in my home?

A: Besides regular dusting, you can take a few additional measures to minimize dust accumulation. These include using air purifiers, regularly changing HVAC filters, keeping windows closed during high pollen seasons, and implementing a no-shoes policy inside your home.

READ MORE
domestic-female-hand-wearing-gloves-cleaning-dirty-stove-after-cooking-using-sponge-washing-woman-housewife-enjoying-daily-household-closeup-top-view (1)
Blog Uncategorized
By Fin Dittimi May 31, 2023

Tackle Kitchen Grease with Ease! ✨🍳

Battling Kitchen Grease

Dealing with grease buildup in the kitchen can be a real challenge. The accumulation of cooking residue and oils on surfaces and appliances can make your kitchen feel greasy and unclean. But fear not! In this article, we will share a powerful tip that will help you tackle kitchen grease with ease.

The Importance of a Grease-Free Kitchen

Before we dive into the solution, let’s understand why it’s crucial to maintain a grease-free kitchen. A clean and grease-free kitchen not only enhances the overall cooking experience but also promotes a healthier environment. Eliminating grease buildup can prevent unpleasant odors, improve the longevity of your appliances, and reduce the risk of grease-related accidents such as fires.

Understanding the Causes of Kitchen Grease

To effectively combat kitchen grease, it’s important to comprehend its underlying causes. Here are the primary culprits:

1. Cooking Oils and Fats

The use of cooking oils and fats in daily food preparation inevitably leads to grease buildup. These substances can splatter and accumulate on stove hoods, oven interiors, countertops, and other surfaces.

2. Residue from Cooking

Food particles and cooking residues, such as sauces and gravies, can leave behind greasy stains on various kitchen surfaces. Over time, if not properly cleaned, these stains can become stubborn and challenging to remove.

An Effective Tip for Grease Removal

Now that we understand the causes, it’s time to unveil an effective tip for removing kitchen grease. This tip utilizes common household items to create a powerful grease-fighting paste.

1. DIY Grease-Fighting Paste: Baking Soda and Dish Soap

Mix equal parts baking soda and dish soap to create a potent grease-fighting paste. Baking soda acts as a gentle abrasive that helps lift off grease, while dish soap cuts through the oils effectively.

2. Application and Scrubbing

Apply the baking soda and dish soap paste to greasy surfaces, such as stove hoods and oven interiors. Let the paste sit for a few minutes to penetrate the grease. Then, use a sponge or brush to scrub away the grime, applying gentle pressure. Rinse the surfaces thoroughly with water to reveal a spotless and grease-free kitchen.

Professional Cleaning Services: Taking it to the Next Level

While the DIY solution mentioned above can work wonders, there are instances where professional assistance might be necessary to achieve a truly pristine and grease-free kitchen. Dial Cleaning Services offers expert cleaning services, including kitchen cleaning, to ensure your kitchen shines like never before.

Contact Dial Cleaning Services today at ☎️ 514-629-0841 or visit their website https://dialcleaningservices.com to explore their comprehensive range of services and discover how they can make your kitchen sparkle.

Conclusion: A Grease-Free Culinary Haven

With the powerful tip shared in this article, you now have the knowledge to tackle kitchen grease with ease. By utilizing the baking soda and dish soap paste, you can say goodbye to stubborn grease stains and enjoy a clean and inviting culinary haven.

Remember, regular maintenance is key to preventing grease buildup. Incorporate this tip into your cleaning routine and enjoy a grease-free kitchen that promotes a healthier and more enjoyable cooking experience.

FAQs (Frequently Asked Questions)

Q1: Can I use the baking soda and dish soap paste on all kitchen surfaces?

A: The baking soda and dish soap paste is safe to use on most kitchen surfaces, including stove hoods, oven interiors, countertops, and backsplashes. However, exercise caution when using it on delicate surfaces and always test a small, inconspicuous area first.

Q2: How often should I clean my kitchen to prevent grease buildup?

A: It is recommended to clean your kitchen surfaces regularly, at least once a week, to prevent the accumulation of grease and ensure a clean cooking environment. However, high-traffic kitchens or those with heavy cooking activities may require more frequent cleaning.

Q3: Are there any alternative methods for removing stubborn grease?

A: Yes, there are other effective methods for tackling stubborn grease. For example, using a vinegar and water solution, citrus-based cleaners, or specialized degreasers can also help remove grease. Experiment with different methods to find the one that works best for your kitchen.

Q4: How can I maintain a grease-free kitchen in the long run?

A: To maintain a grease-free kitchen, wipe down surfaces regularly, especially after cooking. Use absorbent materials like paper towels to soak up excess grease and dispose of them properly. Additionally, ensure proper ventilation in the kitchen to prevent grease from settling on surfaces.

Q5: Why should I consider professional cleaning services for my kitchen?

A: Professional cleaning services, like Dial Cleaning Services, bring expertise, efficiency, and attention to detail to ensure a thorough and comprehensive cleaning of your kitchen. They have the knowledge, tools, and techniques to tackle tough grease and deliver outstanding results.

READ MORE
pexels-rodnae-productions-5591930
Blog House Cleaning Uncategorized
By Fin Dittimi April 29, 2022

Easy Steps To Clean Your Fridge

Few large kitchen appliances get such frequent use as refrigerators, so it’s crucial to keep them clean. A fridge exterior can help brighten your whole kitchen, while a clean interior looks great, uses space more efficiently, and can help you keep food fresher. These are easy steps on how to clean your fridge inside and out. 

Step1: Take everything out of the refrigerator

In order to properly deep clean a refrigerator, it needs to be totally empty, which means taking everything,  Stash highly perishable foods like milk or raw chicken in a cooler, to avoid spoiling.

Once you’ve taken out the food, remove any detached shelves, drawers, and door inserts.

Step2: Throw out old and spoiled food

As you transfer food from the refrigerator to the cooler or freezer, check for spoiling and throw away anything that’s gone off, or that you simply know you will not use. If your refrigerator is home to a lot of leftovers in food storage containers, this is a good time to review the contents and throw out any food that you know you will not consume. Disposing of leftovers can be an unpleasant task, but donning a pair of rubber household gloves can help to make scooping old food out from storage containers a less disgusting job.

Step3: Wash shelves and drawers

Start by washing the shelves, drawers, and/or door inserts you removed from the refrigerator, which can be done just like you wash dishes, using a sponge and dish soap. If the refrigerator shelves are made of tempered glass, a bit of caution is required when cleaning them. Priyanka Rathore, a communication manager for KitchenAid, says, “It is important not to clean glass shelves or covers with warm water when they are cold. Shelves and covers may break if exposed to sudden temperature changes or impact, such as bumping.”

Step4: Clean the interior of the refrigerator

When it comes to choosing a solution for cleaning the interior of a refrigerator, there are a number of options, and personal choice should certainly play a role. If using a disinfectant like diluted bleach solution makes you feel more comfortable, that is a fine choice. If using bleach in the place where you store your food makes you feel uncomfortable, that is also okay.

There are, however, some products to avoid when cleaning a refrigerator, Rathore says. “Do not use abrasive or harsh cleaners such as window sprays, scouring cleansers, flammable fluids, cleaning waxes, concentrated detergents, or cleaners containing petroleum products on plastic parts, interior, and door liners or gaskets.” After scrubbing with a sponge, use a microfiber cloth or paper towels to give the interior of the refrigerator a going-over. Use an old toothbrush to reach tight or oddly-shaped parts and a thin cloth for cleaning the rubber seal around the door.

Step5: Treat stubborn spills and stains with these tricks

To remove a stubborn, stuck-on mess, wet a sponge or rag with very hot water, wring it out and press it on the spill just as you would a compress, repeating as needed and being careful not to burn yourself with the hot water. The heat and moisture will reconstitute the dried-on mess, making it pliable and easy to wipe up.

Young worker woman wearing rubber protective yellow gloves cleaning the fridge with rag and spray bottle detergent. Home, housekeeping concept. Lifestyle

Step6: Clean the exterior

The exterior of plastic refrigerators can be cleaned in the same way as the interior, using a microfiber cloth or sponge with a mild cleaning solution. Stainless steel refrigerators can be wiped clean using a microfiber cloth; very dirty exteriors may require a stainless steel cleaner, though typically one is not needed. If fingerprints and smudges often show up on your stainless steel appliances, a wax-based cleaner can help to prevent them. Regardless of material, don’t overlook the top of the refrigerator when cleaning its exterior as it is likely very dirty.

Fridge Cleaning Hacks

  • Wipe up spills and stains as soon as they happen since, the longer they sit, the harder they’ll be to remove. 
  • Make sure containers are clean going into the fridge. A jam jar or ketchup bottle with residue on the outside will make your fridge sticky. 
  • When thawing items such as frozen meat, place them on a rimmed plate or baking sheet to control spills or leakage.
  • Soak cotton balls in vanilla extract and leave them in the fridge for a few hours to provide a pleasant aroma. 
  • Clean the refrigerator door seal with a toothbrush and a mixture of bleach and warm water. Wipe with a dry cloth.
  • Try scrubbing tough stains with a mildly abrasive toothpaste.
  • Place a crumpled piece of brown paper in the fruit and vegetable drawer to absorb odors over time.
  • Don’t overfill your refrigerator. Fridges cool more efficiently if air has room to circulate, and it’ll be harder to see or clean up stains if it’s overcrowded.

READ MORE
pexels-nathan-cowley-713297
Blog Uncategorized
By Fin Dittimi April 28, 2022

How To Clean Your Whole House in One Day

Cleaning every inch of your home in one day would be an incredible feat, but it’s probably too much to undertake. It might help to reframe your goal: Instead of aiming to clean your whole house in one day, decide you’re going to devote an entire day to spring cleaning. The former goal sets you up to fall short, while the latter goal allows you to measure by effort instead of impact. Rather than committing and maybe failing to check every chore off your list, you should spend time focusing on the most important tasks, and leaving the rest for another day. It’s a more thoughtful and attainable route to take. So if you can’t do it all in one day, how do you choose? What goes into whittling down a giant list of intimidating house chores into a manageable affair that still delivers a big impact? Here are some ways for doing just that:

  1. Choose whole-house cleaning tasks for the biggest effect.

Go through the spring cleaning checklist above and choose tasks that involve more than one room or item in the house. For instance, washing the pillows and bedding of all members of your household leaves everyone with refreshed bedding. While the task may not produce a visible outcome, knowing that everyone has bedding that’s as clean as, can feel really good.

Other whole-house tasks you could select include cleaning all the doors or tackling all the windows. Doing these rarely done chores mean that you’ll “touch” every room in the house with that spring cleaning magic and it will show.

  1. Select chores that you procrastinate.

Cleaning tasks that you dread probably don’t get done very often. However, if you are determined to accomplish these with your spring cleaning momentum, not only will they get done and be clean, but you’ll be relieved of the guilt that comes from knowing it’s something you really should do and then putting it off.

These dreaded, procrastinated chores will be different for everyone, but they could be deep cleaning the shower, cleaning the windows, or finally getting that oven clean. Choose your own adventure and be really, really proud of yourself when you get to the finish line.

  1. Pick the tasks you want to do.

No, this doesn’t mean to forget the whole thing because you really don’t feel like doing any spring cleaning! The sentiment underlying this method of selecting what you’ll spend your spring cleaning day doing is that certain things on the list will pop out at you as things you’ve been wanting or meaning to do but haven’t been able to get to. Maybe it’s sorting through closets and cleaning your refrigerator. Do these.

  1. Make choices based on time.

Some of the items on the spring cleaning list require time that may or not be hands-on time. For example, washing everyone’s bedding and cleaning all the mattresses doesn’t take that much hands-on time, but it does require waiting for wash and dry cycles to finish. This is a great task to undertake while you’re cleaning other things because you’ll be around to switch loads as soon as they’re ready and you can use the in-between time to check other tasks off your list.

  1. Put labor-intensive items at the top of your list.

If you’re having a hard time choosing what you’ll do and what you’ll skip, try putting the most labor-intensive tasks (I’m looking at you again, window-cleaning) at the top of the list. This way, the chores that require the most out of you are getting done on a day you’ve dedicated to cleaning and you won’t feel as much like you’re missing out on something fun.

Sample Plan for Spring Cleaning in a Day

If you need a jumping-off point to plan your day of spring cleaning, this checklist for the morning, afternoon, and evening will get you on the right track.

Morning routine

  • Strip the bedding from all the beds, including duvet covers, and gather all the bedding. Sort like with like and begin laundering sheets, blankets, pillows, and comforters.
  • Refresh mattresses while the bedding is away from the beds.
  • Empty every garbage can and recycling bin and bring them outside. Hose them down, scrub scuffs with a Magic Eraser, and get the gunk out of crevices. Leave them to dry in the sun.
  • Slather the interior of the oven with a baking soda paste.
  • Change bedding wash and dry cycles as needed.
  • Scrub your oven interior.
  • Remove vinegar bags and scrub showers and tubs and clean the bathroom.

Afternoon Routine

  • Spot clean upholstery and rugs.
  • Dust every area you’ve decided to tackle today and start at the top. This could include bookshelves, the tops of cabinets, light fixtures, light bulbs, furniture, door frames, picture frames, etc. The idea is that you’re taking your duster and using it on every inch of dust down to the baseboards.
  • Polish wooden furniture. Just like you focused on using one tool while you dusted, focus on one product here: wood polish. Hit every wooden item in your home.
  • Wipe down cabinet doors. 

Using an all-purpose cleaner and rag is fine for other materials.

  • Clean doors. You’ve already dusted the frames. Now take a damp microfiber cloth and a Lysol disinfectant, to clean and disinfect the doors including knobs.
  • Continue changing bedding loads as needed. If you finish your loads, take down your curtains and begin washing those.
  • Clean your windows. Takedown screens or use a lint roller on them, clean window tracks, and shine those windows.
  • Clean the rest of the glass in your home. You’ve already dusted picture frames. Now take it to the next level and hit the glass with a lint-free cloth and glass cleaner.

Evening Routine

  • Replace bedding.
  • Hang curtains if you were able to wash them.
  • Return garbage cans to their rooms.
  • Vacuum under furniture and under rugs.
  • Vacuum the floors throughout the house now that the dust you stirred up from dusting has had time to settle.
  • Clean your phone.
  • Choose one small area to declutter. You don’t need the sunshine to help you see what to declutter (like you would with spot cleaning your armchairs, for instance), and ending with a decluttering session sets you up for a very visual win and, with any luck, the urge to do more when you can.
  • Make a list of tasks you wish you’d been able to do and make a plan for finishing them up during your regular cleaning routine.
  • Enjoy your spring-cleaned house! 
READ MORE
Ceiling fans
Blog Uncategorized
By Fin Dittimi April 27, 2022

Spring Cleaning Checklist: 20 Things You Can Deep Clean

The following are some of the spring cleaning tasks that you have to cross off your checklist;

  1. Bedding

You wash your sheets, pillowcases, and duvet covers regularly, but your pillows, comforters, and blankets need a refresh too. Read care instructions, but most can be washed in the washer (with care) and even dried in your machine as well.

  1. Curtains

Window dressings lend a softness to your indoor space but they’re also huge dust magnets. Cleaning them gets so much dust out of the house and away from your breathing zone. Remove curtains from rods and take them to be cleaned or launder them yourself if you can. In some instances, vacuuming and/or steaming them while they’re still hanging is preferable.

  1. Ceiling fans

A big part of spring cleaning is removing dust from rarely dusted areas. Your ceiling fans are about to get switched on again to combat warmer temperatures (or you’ll rotate the way they’re spinning). Stave off an avalanche of dust by cleaning your ceiling fans now. 

  1. Doors

If you look closely, you might be surprised at how dirty your doors are. Cleaning them gives a spic-and-span feeling to the whole house. Start by dusting the top of the door frame. Next, grab a damp microfiber cloth, some all-purpose spray, a rag, or a Magic Eraser and wipe down both sides of every interior door, paying special attention to the bottom portion and the space near the knobs. Don’t forget to wipe the doorknobs as well.

  1. Cabinets

Cabinet door fronts rarely get cleaned, but with hands touching them frequently, they definitely need it! Start with kitchen cabinets and use a cleaning solution that cuts through grease. Don’t forget to check and address other cabinet doors as well, in storage areas, playrooms, or your office space, and give their fronts a wipe down.

  1. Windows Cleaning

Cleaning windows might be the quintessential spring cleaning activity. But it isn’t the easiest household chore. Doing all the windows in the house at once means you can enjoy the rest of the year without that nagging feeling that you really should clean your windows. A cloudy day is best for window washing so that your glass isn’t left with spots or streaks. Clean the dirtiest parts of your window first (read: tracks and sills), then get screens clean, if you have them. Last, wash your window panes, inside and out, and enjoy the crystal clear view.

  1. Washer and dryer

Maintaining your laundry appliances keeps them functioning their best, smelling clean, can save you from costly repairs, and is also a safety issue. In addition to running a cleaning cycle in your washer and cleaning the lint out of the lint catcher slot, wipe down the outsides of your units.

  1. Closets

Spring is the perfect time to re-evaluate your wardrobe. Declutter clothes, shoes, and accessories that you don’t like, don’t feel good in, need repairs, or that kids have outgrown. While you’re at it, re-organize what’s inside. Sorting by type, length, and/or color will greatly elevate the look of your closet and help you find what you need. Dust anything that needs dusting and give your closet floors a good cleaning.

  1. Bookshelves

Dust the very tops of the bookshelves. Dust the tops of your books. Then, take everything off of the shelves (you can do this shelf by shelf so it’s little less overwhelming), dust any decorative items (a dusting mitt is great for this), dust the shelves, and then replace everything. As you’re putting items back, use the opportunity to cull any books or items that no longer speak to you.

  1. Underneath appliances

Move appliances such as your dishwasher, oven, and refrigerator away from the wall and clean the floor beneath them. You’ll be disgusted at what’s collected under there and so, so glad to get it out!

  1. Shower/tub 

Spring cleaning is the time to deep clean shower tracks, the niche, and the grout and walls of your enclosure. Make glass doors sparkle by removing soap scum, soak the showerhead in a bag filled halfway with white vinegar, and scrub your tub, including jets if you have them.

  1. Garbage cans

Gather all the garbage cans throughout the house. Empty any garbage that’s in there. Take them outside and hose them down. Use a Magic Eraser to scrub plastic cans and tackle dirty crevices with a disinfecting wipe or rag and/or cotton swabs. Allow the garbage cans to dry in the sun.

  1. Kids’ toys

Spring cleaning is a great time to clean your kids’ toys. Many small items that seem impossible to clean can be easily washed in a mesh laundry bag in the dishwasher. This method is great for things like LEGO and other plastic toys. Use a delicate cycle and skip the heat dry.

  1. Wood furniture 

Take care of your wooden furniture and it will take care of you for a long, long time. Make sure you use cleaners designed for wood surfaces, especially if your wood is untreated or unpainted. For spring cleaning, you can also take it a step further and polish your wooden pieces for a protective layer that makes the wood gleam.

  1. Drains 

The best time to clean and refresh your drains is long before a problem ever presents itself. It’s important to remember that kitchen drains and bathroom drains suffer from different kinds of buildup, so your cleaning methods should account for this.

  1. Carpets and Rugs 

The first step in spring cleaning carpet care is vacuuming every single square inch, including the areas under furniture. Once you do this, roll area rugs back (you can do this in sections rather than removing the entire rug) and vacuum the rug pad and the floor underneath that. You can even vacuum the underside of the rug. Next, spot clean stains. If necessary, use a carpet cleaner to deep clean your area rugs and wall-to-wall carpeting, or schedule a professional to do it when it’s convenient.

  1. Plants

Your plants bring you joy, but their leaves are also dust-collecting surfaces (name a surface that isn’t dust-collecting). To rid your homes of excess dust and to help your plants breathe better, too, dust their leaves with a slightly dampened microfiber cloth. Faux plants also need to be dusted.

  1. Refrigerator 

Although you probably periodically clean out the fridge, use spring cleaning season to give it a full-blown cleaning, inside and out. Take out each shelf, bin, and drawer that you can remove and wash them (you can put them in the dishwasher!) and wipe the entire interior of the unit as well. Don’t forget to do the same for the freezer. Clean the water dispenser if you have one, and finish by polishing the exterior.

  1. Gas Stove and Oven 

Ideally, you wipe up spills in your oven as soon as it’s safe (i.e., cool) enough to do it. But even with a homeowner who’s on top of it, oven interiors become coated with buildup. Cleaning your oven does not require harsh chemicals. Make a clean oven a priority in your spring cleaning routine and your whole kitchen will feel squeaky clean.

  1. Small appliances 

Small appliances can get short shrift when it comes to cleaning attention. Clean out your coffee maker with vinegar, get your toaster or toaster oven spic-and-span, make your microwave sparkle, and give your stand mixer and blender a thorough cleaning as well.

READ MORE
Cleaning Service Poster
Blog Uncategorized
By Fin Dittimi April 27, 2022

How to Spring Clean Your
Whole House

Spring cleaning is the practice of thoroughly cleaning a house in the springtime. The practice of spring cleaning is especially prevalent in climates with a cold winter. Spring cleaning is tied back to the history of keeping winter houses warm and lit with fires and kerosene. These methods filled houses with soot and grime which was inevitable as people stayed shut in against the cold winter, but that eventually had to be cleaned. These days, spring cleaning is so rooted in our heritage that even if we don’t follow the practice because of a long winter of burning coal, we need to throw open our windows and remove all the dust and dirt from our home environments. As we welcome warmer days and the golden rays of the sun. We want a new start, too and Spring cleaning gives it to us.

Why is Spring Cleaning Needed?

Spring cleaning is a chance to reset everything in your home. It’s a chance to catch up on all the cleaning tasks you’ve been meaning to do. Instead of laying awake wondering when you last cleaned your mattress, for instance, spring cleaning is the nudge you need to get it done and get the idea out of your head. In addition, deep cleaning once a year staves off bigger problems, like a mold takeover of your grout. You can clear dust and grime from areas that hardly ever see the nozzle of a vacuum cleaner attachment. By the time spring cleaning is finished, your home will feel so fresh and clean, a state of habitation that will serve you well, both in mind and body.

Spring cleaning is also a good opportunity to make sure that certain maintenance chores that only need to be done once or a few times a year get checked off the list. When these types of tasks are tied to spring cleaning, it’s more likely you will remember to do them. Some of these tasks make a big difference in your home’s longevity, usefulness, and look, such as polishing and sealing granite. Others, such as cleaning out your dryer, are a safety issue.

When Should You Start Spring Cleaning Your Home?

There are two ways to answer this question: Subjectively, you should start spring cleaning when you sense that new-start spring freshness starts to come in on the warm afternoon breezes. When you start feeling like you want to throw open the windows and begin to wonder how the deck furniture is doing under its covers, you know spring cleaning is around the corner. You can also start spring cleaning when you can clear out a solid day or two in your schedule to devote to the task or you could outsource professional cleaning services like dialcleaningservices. You could choose a weekday or a weekend. Keep the weekend or your day clear and dedicate it to giving your home the love and care it deserves so it can love and care for you. Although you may be tempted to spread out spring cleaning tasks over a longer period of time, keeping the project more concentrated focuses your efforts and pays off with that squeaky-clean-house feeling that only spring cleaning gives. 

How Do I Start Spring Cleaning My House?

Spring cleaning is a wonderful concept, but it won’t just happen unless you take that step.  Taking that step from getting the idea to spring clean to actually doing it involves a few stepping stones. First, decide that you are going to spring clean and tell someone so you’re accountable. This can be your spouse, housemate, a mother who lives across the country, your Facebook friends, or whatever. But publicizing your commitment will help you keep it.

Next, make a plan. The details don’t matter when it comes to galvanizing you into action. But having a rough outline of what you’ll do, whether it’s a room-by-room list of what needs to get done or a whole-house checklist of tasks you want to accomplish, brings substance to your goals and functions like a map that will get you where you want to go: a spring cleaned (past tense) house.

Finally, you could get professional cleaning services to help you with spring cleaning. You don’t necessarily need to clean yourself.

READ MORE
bed
Blog House Cleaning Uncategorized
By Fin Dittimi February 28, 2022

Easy Steps To Deep Cleaning Your bedroom

A messy bedroom makes it hard to find what to wear, and it can even interfere with your sleep.

Your bedroom is a sanctuary, a safe space to go at the end of the day to rest, recharge, and revive yourself. A clean and clutter-free bedroom promotes better focus, increased productivity, and better sleep. A cluttered room is a cluttered mind, and a cluttered mind isn’t going to fall asleep easily.
Here are seven easy steps on how to deep clean your bedroom.

Bedroom cleaning essentials

Cleaning your bedroom without using harmful cleaning products is easy. Here are a few cleaning essentials to get your bedroom clean as a whistle naturally.

Microfiber cloth
Natural laundry detergent
Dryer balls
Baking soda
Vinegar
Natural all-purpose cleaner
Duster

  1. Tidy up, and dust

Start your bedroom-cleaning odyssey with the very basics. First, gather up all the cups of stale water, half-empty cans of soda, and late-night snack bowls you’ve accumulated, and take them to the kitchen. Toss out your bedroom trash, put your dirty clothes in the laundry bin, and hang anything that’s clean. Put any other items that are out of place back in their spots. Now you’re ready to get down and dirty!

Dusting the stuff that’s easiest first might seem like the path of least resistance, but it actually means that all the dust from your ceiling fan is going to cover the dresser you just wiped down. Start from the top, and work your way down for the best results. Grab your duster, and hit the ceiling fan, ceiling and corners, and light fixtures first, then the windows, nightstand, dresser, and whatever other furniture you have. Don’t forget to dust your (fake?) plants!

  1. Spray and wipe down surfaces

After you’ve dusted, take a damp microfiber cloth and your all-purpose cleaning spray to surfaces that see a lot of use, like night tables, the dresser, and your bookcases or shelves. Wipe off any spills, stains, or sticky spots the duster didn’t take care of, and scrape off hardened candle wax with a blade. Scrub your door handles and the places on your doors you touch the most — these areas are prone to a build-up of dirt and oils that make them look grimy over time. They’re also probably rife with bacteria. Your baseboards are another place that gathers dirt, dust, and dead skin like no one’s business, so give ‘em a little microfiber love before you move on.

  1. Wash the sheets, duvet, and pillows

Sheets get mightily gross with all your dead skin and body fluids, so wash your sheets and pillowcases at least every two weeks.

A duvet is bulkier than your bedsheets and takes a bit more finessing to get it really clean. Check the tag for fabric care instructions, then read up on how to wash your duvet for step-by-step directions for getting yours super fresh and cozy again.

Down and feather pillows last longer and are easier to clean than typical poly-fill pillows. Surprisingly, down pillows are generally machine washable and dryable, and also surprisingly, it’s not rocket science. Wash your down pillows every 6 to 12 months.

  1. Clean your mattress

You’ve probably heard by now that humans spend a third of our lives sleeping, which means you spend about six to ten hours on your mattress every day. That’s a lot of time for sweat, dust, drool, dead skin cells and bacteria to seep into your cushy mattress, where millions of dust mites feed on each night’s bounty.
Clean your mattress every six to twelve months. Vacuum it first, then sprinkle the whole thing liberally with baking soda. Let it sit for a few hours to soak up moisture and odors. Vacuum again, and if it’s time, flip and rotate the mattress

  1. Vacuum

Now that all the dust from your ceiling fan and the crumbs from your nightstand and bedsheets are on the floor, it’s time to vacuum them up. Don’t just vacuum the floor you can see— suck out all of the dust and detritus that’s accumulated in the nooks and crannies of your bedroom, too, like the insides of your dresser drawers or nightstand, your windows frames, and between the window and the screen. Dust bunnies love to reproduce in small, dark places like under your bed, dresser, and bookcase, so scoot your furniture out of the way, and give those oft-neglected areas some attention, too. Then, attach the upholstery brush and vacuum your curtains.

  1. Remake the bed

There’s nothing quite as satisfying as hopping into a bed with clean sheets. After you’re done cleaning your bedroom, grab your freshly laundered bedding, and make

the bed. Pro tip: It’s always a good idea to have a backup set of bed linens for those days when you’re doing a deep clean and your regular set of sheets or comforter aren’t out of the dryer by the time you’re ready to hit the sack.

  1. Clean the closet

You only have to go as crazy here as you want to. If your closet is in pretty good shape, just make sure your clothes are hanging properly in the right place and in the right direction. Organize your shoes, and straighten up anything that’s gone topsy-turvy.
If your closet is a disaster in need of an overhaul, fear not. We’ll do this gently. First, get a couple of boxes or a roll of trash bags, and sort your clothes into three piles: donate/sell, recycle, and keep. Put the donate/sell items in one container and the ones you’ll recycle in another (you may need to take them to a facility that accepts textiles.) Hang up the items you’re keeping. A good rule of thumb is if you haven’t worn it in at least three months, you probably don’t need it.

READ MORE
newsinner_20200729133534_1
Blog House Cleaning Uncategorized
By Fin Dittimi February 28, 2022

TIPS FOR HEALTHY FEET AND SHOE HYGIENE

Ways To Treat Your Feet and Footwear Right.

With the outbreak of Covid-19 and the number of coronavirus cases on the rise, it is a timely reminder to maintain proper hygiene for a healthier environment. While washing and keeping our hands clean is vital, here are five tips to minimize and keep your exposure to bacteria and viruses to the minimum for healthier feet.

Tip #1: Do Not Wear Your Shoes Indoor

    There are two types of people – those who wear their footwear indoors and those who do not. While seemingly harmless, it’s worth noting that an average shoe sole carries 421,000 different kinds of bacteria including faecal bacteria, E.coli, and many more. Here’s the disturbing and gross fact why you must stop wearing your shoes in your home – poop transfer. 

It has been found that 93 percent of shoes that are worn more than a month contain faecal bacteria on the outsoles. This should not be a surprise as we step on pet waste on public grounds and step on splashes from the washrooms on public restroom floors. 90 percent of these bacteria and other microorganisms are transferred to clean floors instantly when you step into the comfort of your home. Shoes are home to bacteria and can lead to the accumulation of dirt and grime in confined spaces like our home. For parents with small kids crawling around and sticking things into their mouths, it pays to err on the safe side.

While some shoes can be disinfected if they are washable as per the care instructions, let’s face it, how many of us wash our shoes to simply walk indoors.

Solution: Practise a shoeless home and keep them outdoors! Designate an area by your house porch to drop your shoes before entering the house. Invest in a shoe rack to keep things tidy too. If you are still adamant to wear your shoes indoors whatever the reason is – convenience etc, consider investing in an antimicrobial doormat that clears most of the debris and germs on the outsoles.

 Tip #2: Clean Your Shoe Closet

Shoes should be stored in a cool, dry place. Do not literally wait till spring cleaning! It is vital to give your wardrobe (be it a clothes wardrobe or shoe closet) an occasional good clean, declutter and reorganize your footwear. Accumulating a messy pile of shoes attracts germs and here are some hacks on how you can Marie Kondo your shoe wardrobe.

How to clean your closet in 4 steps:

  1. Vacuum the floor around your wardrobe.
  2. Remove all shoes or clothes and perform your KonMari.
  3. Wipe shelves and racks with a microfiber cloth lightly sprayed with water.
  4. Clean your shoes and stuff tissue paper or shoe trees to keep them from sagging or losing their shape over time.

Tips #3: Clean Your Shoes

It can be a hassle when caked-on dirt and loose dirt get stuck on our shoes and just won’t budge, especially on rainy days or if we step over mud.

 Here’s the right tool for everything to get that stubborn dirt off.

  •  Slap the shoes together outdoors to remove loose dirt. Use a toothbrush to brush the dirt off and a butter knife or key to scrape set mud in grooves of your shoes
  • Mix a tablespoon of baking soda (abrasive) and laundry detergent (bleaching agent) and scrub the rubber parts clean with this mixture. Rinse off with water and it will look sparkling clean as before!

If you are looking beyond the general shoe care guide of your shoes, here are some bonus simple cleaning hacks without the expensive products for different types of footwear material.

Note: Always read your shoe care instructions that will provide a more detailed maintenance guide specifically for the shoes.

 Tips #4: Wear Your Socks!

Wear socks made of cotton, wool, or bamboo as they help to absorb moisture and prevent abrasion from the shoes. Plus, It keeps your feet warm and comfy.  Who says you can’t wear socks with sandals or slides? Socks’ fashion is huge these days – you can grace the streets in cute printed socks and team it up with your favorite breezy airy sandals. It protects your feet from dirt too!

READ MORE
covid-1-1
Blog Uncategorized
By Fin Dittimi January 27, 2022

How To Clean and disinfect  High-Contact Surfaces, Such as Doorknobs and light switches

Everyone is well informed about how often the home should be cleaned. This includes mopping the floor, cleaning the kitchen, along cleaning the bathroom. But did you know that there are also other areas in the home that need to be cleaned as well? For example, when did you last clean your doorknobs and light switches?

In this article, we will talk about the proper way of cleaning and disinfecting your doorknobs and light switches in order to stop the spread of viruses that can cause illnesses.

Recently, there is a spread of a new virus called Novel Coronavirus. WHO already confirmed that the spread is worldwide.

Some of the most bacteria-covered spots in your home are the ones you use most often, such as doorknobs and light switches. These frequent-contact surfaces allow easy transmission of cold, flu virus, Norovirus, and more in your household, particularly when the average person’s hands carry at least 3,000 different germs*.

People commonly use disinfecting wipes because they seem convenient, but they often require that surfaces remain wet for up to 10 minutes in order to be effective, and keeping a surface wet with disinfecting wipes can be more difficult than you might think. Many of them contain alcohol, which can cause the liquid to dry quickly. This can make it difficult to keep the surface wet without re-wiping multiple times, resulting in a potential waste of both time and money.

A fast-acting spray-application disinfectant will allow you to disinfect the hard-to-reach areas that wipes can’t, and ensures that the surface remains wet for the proper time so germs are, in fact, killed.

How Often Should Such Areas Be Cleaned?

It is estimated that people, specifically adults, suffer from a cold approximately two to three times a year. Children, on the other hand, contract the illness much more often. The bacteria or viruses that cause these illnesses can live on hard surfaces for so many weeks, so not cleaning as often enough can make you and your family susceptible to such illnesses.

Due to this, experts say that cleaning surfaces such as doorknobs and light switches should be done at least two times a week. Disinfecting these areas is vital in order to make sure that harmful viruses are prevented from spreading onto your home, most especially if it is currently flu season. You can also opt to wipe the switches down with a cleaning product much more thoroughly once every two weeks.

How Do You Clean Your Doorknobs and Light Switches?

In order to clean up these surfaces, you can use a spray-on disinfectant on hard-to-reach areas, or disinfecting wipes. However, make sure that the area remains wet for at least ten minutes. This is in order to make sure that germs and other harmful viruses are gotten rid of. There are a lot of disinfectants available in the market that can get rid of the most common bacteria found in most homes like cold and flu viruses, along with Salmonella and E. Coli. Below are instructions on how to clean your doorknobs and light switches:

  • If dirt or gunk has built up on the surface of your light switches or doorknobs, make sure that you remove them first.
  • Next, spray disinfectant on the surface. Make sure that that area is completely covered with the liquid. This includes the underside handles of the doorknob, and the whole surface of your light switch. Let the product sit on the surface for at least a few minutes, and make sure it stays during that time. Scrubbing the area will not be needed.
  • Lastly, once you’ve let the product sit for a while, you can now wipe it away with a dry and clean cloth. Let it air dry naturally.
READ MORE
  • 1
  • 2
  • 3
  • 4
Featured author image: The Best Carpet Cleaning Services in Montreal

Faith Ileh

Hi! I am an author of this blog. Read Our Post

Recent Posts
  • The Best Carpet Cleaning Services in Montreal
    The Best Carpet Cleaning Services in Montreal
    August 14, 2023
  • Experience the Pinnacle of Cleanliness with Dial Cleaning Service
    Experience the Pinnacle of Cleanliness with Dial Cleaning Service
    August 13, 2023
  • Conquer Dusty Corners Like a Pro! ✨🌿
    Conquer Dusty Corners Like a Pro! ✨🌿
    May 31, 2023
dial 2D

Request A Callback

Quick Links

Menu
  • Our Blog
  • Deep Cleaning
  • Montréal
  • Commercial
  • Residential
  • Privacy Policy
  • FAQ

Get In Touch

514.629.0841

  • Business Hours:
  • 8:00 AM – 6:00 PM
  • 7 Days a Week
Copyright © 2026 Dialcleaningservices | design by fandfconsultancy