logotype
  • About
  • Residential
    • Special Cleaning
    • Carpet Cleaning
    • Window Cleaning
    • Deep Cleaning
    • Apartment Cleaning
      • Sofa Cleaning
      • Yard Cleaning
      • Roof Cleaning
      • Carpet Cleaning
    • Duct Cleaning
    • Upholstery Cleaning
    • Pool Cleaning
    • After Party Cleaning
  • Commercial
    • Office Cleaning
    • Hotel Cleaning
    • Hospital Cleaning
    • Mall & Shops Cleaning
    • Industrial Cleaning
    • Pharmacy Cleaning
    • Premises Cleaning
    • School Cleaning
  • Our Locations
    • Montréal
    • Westmount
    • Ottawa
    • Toronto
  • Contact
CALL US TODAY
  • About
  • Residential
    • Special Cleaning
    • Carpet Cleaning
    • Window Cleaning
    • Deep Cleaning
    • Apartment Cleaning
      • Sofa Cleaning
      • Yard Cleaning
      • Roof Cleaning
      • Carpet Cleaning
    • Duct Cleaning
    • Upholstery Cleaning
    • Pool Cleaning
    • After Party Cleaning
  • Commercial
    • Office Cleaning
    • Hotel Cleaning
    • Hospital Cleaning
    • Mall & Shops Cleaning
    • Industrial Cleaning
    • Pharmacy Cleaning
    • Premises Cleaning
    • School Cleaning
  • Our Locations
    • Montréal
    • Westmount
    • Ottawa
    • Toronto
  • Contact
logotype
logotype
  • About
  • Residential
    • Special Cleaning
    • Carpet Cleaning
    • Window Cleaning
    • Deep Cleaning
    • Apartment Cleaning
      • Sofa Cleaning
      • Yard Cleaning
      • Roof Cleaning
      • Carpet Cleaning
    • Duct Cleaning
    • Upholstery Cleaning
    • Pool Cleaning
    • After Party Cleaning
  • Commercial
    • Office Cleaning
    • Hotel Cleaning
    • Hospital Cleaning
    • Mall & Shops Cleaning
    • Industrial Cleaning
    • Pharmacy Cleaning
    • Premises Cleaning
    • School Cleaning
  • Our Locations
    • Montréal
    • Westmount
    • Ottawa
    • Toronto
  • Contact

Tag: cleaning tips

Cleaning Service Poster
Blog Uncategorized
By Fin Dittimi April 27, 2022

How to Spring Clean Your
Whole House

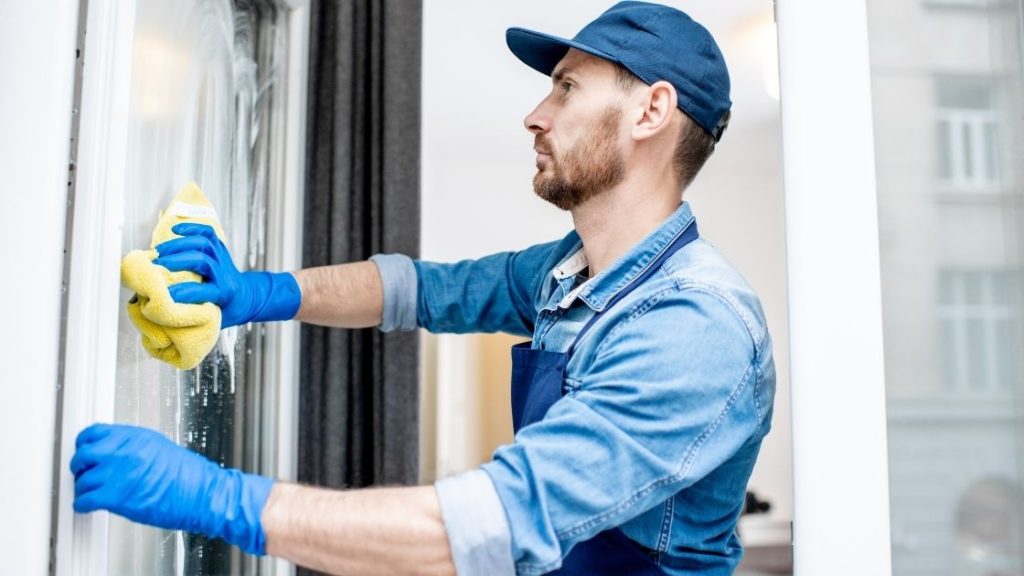
Spring cleaning is the practice of thoroughly cleaning a house in the springtime. The practice of spring cleaning is especially prevalent in climates with a cold winter. Spring cleaning is tied back to the history of keeping winter houses warm and lit with fires and kerosene. These methods filled houses with soot and grime which was inevitable as people stayed shut in against the cold winter, but that eventually had to be cleaned. These days, spring cleaning is so rooted in our heritage that even if we don’t follow the practice because of a long winter of burning coal, we need to throw open our windows and remove all the dust and dirt from our home environments. As we welcome warmer days and the golden rays of the sun. We want a new start, too and Spring cleaning gives it to us.

Why is Spring Cleaning Needed?

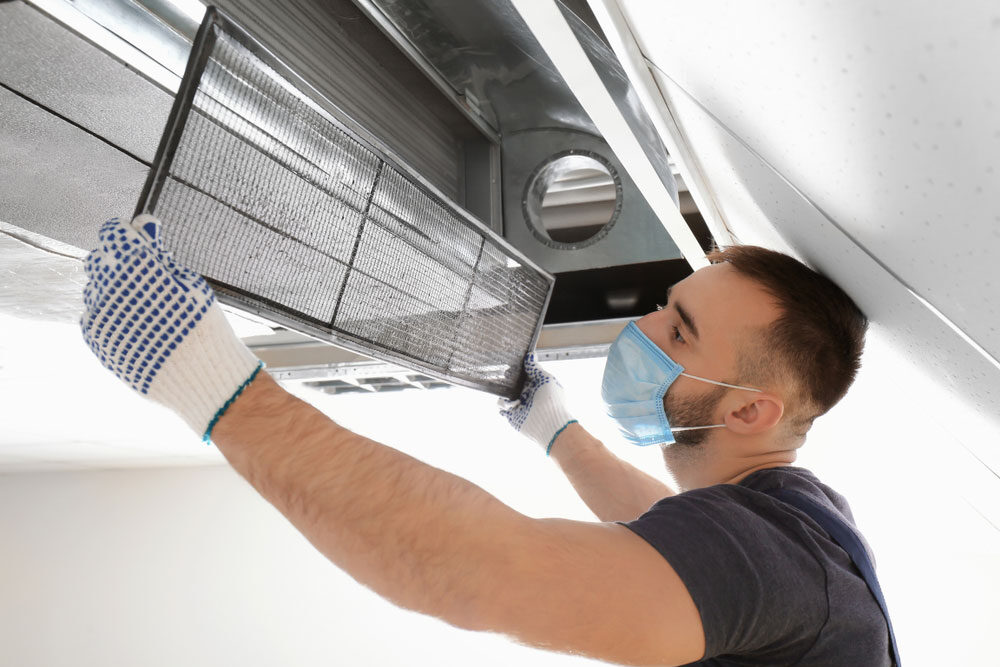
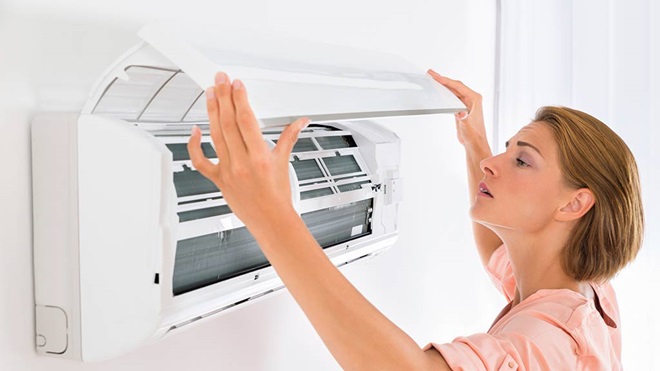
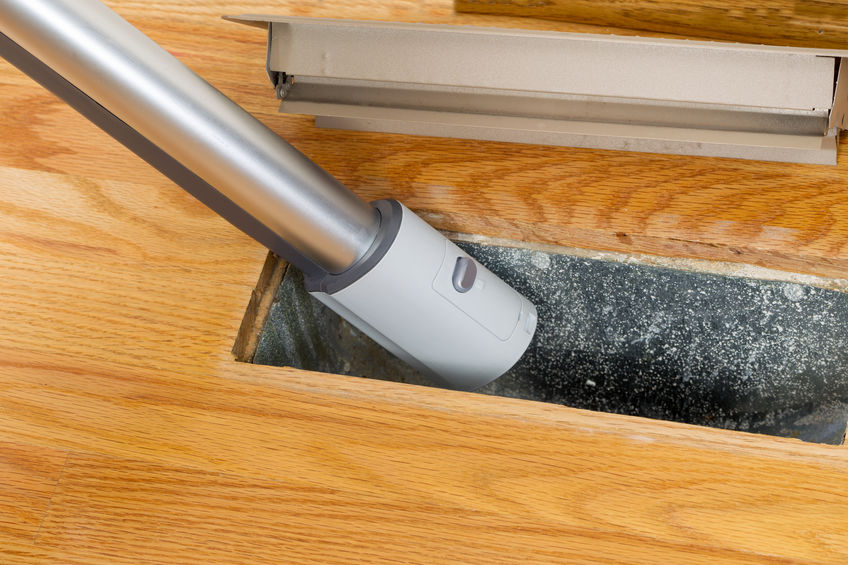
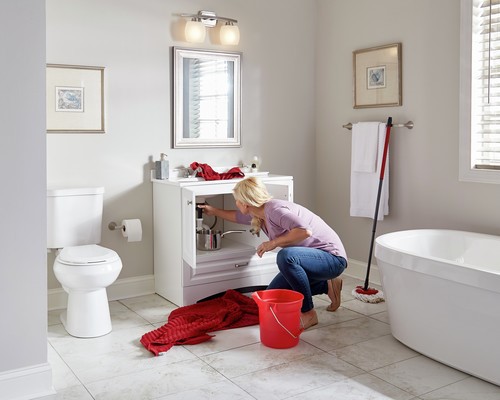
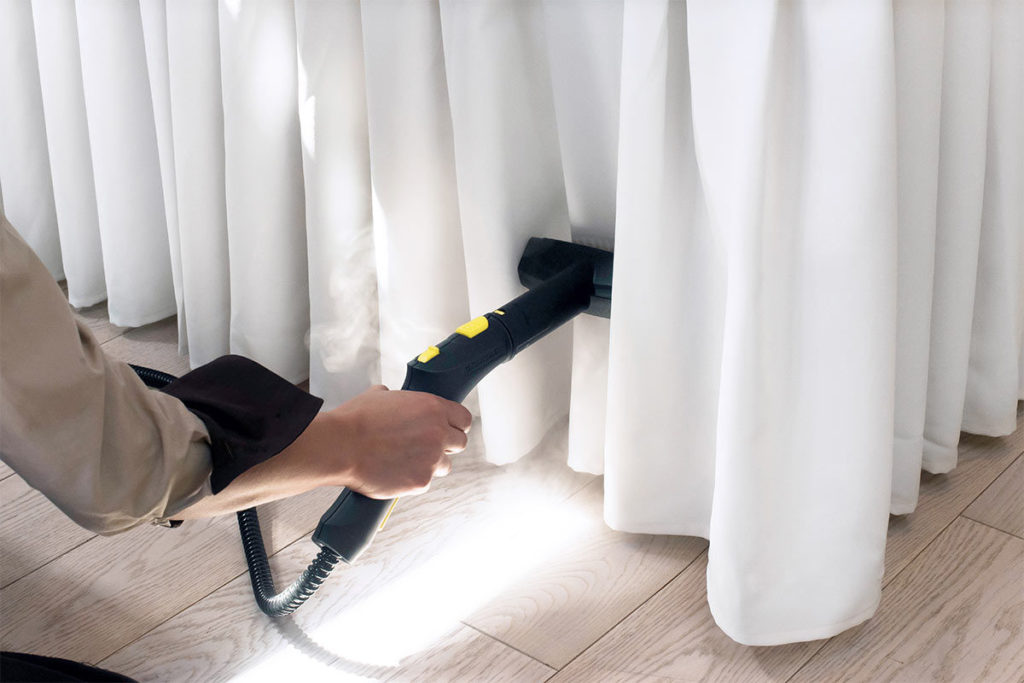
Spring cleaning is a chance to reset everything in your home. It’s a chance to catch up on all the cleaning tasks you’ve been meaning to do. Instead of laying awake wondering when you last cleaned your mattress, for instance, spring cleaning is the nudge you need to get it done and get the idea out of your head. In addition, deep cleaning once a year staves off bigger problems, like a mold takeover of your grout. You can clear dust and grime from areas that hardly ever see the nozzle of a vacuum cleaner attachment. By the time spring cleaning is finished, your home will feel so fresh and clean, a state of habitation that will serve you well, both in mind and body.

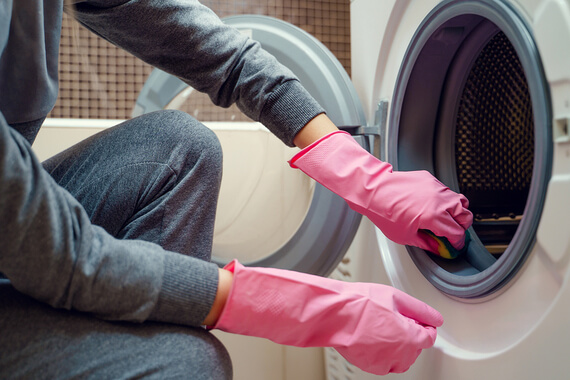
Spring cleaning is also a good opportunity to make sure that certain maintenance chores that only need to be done once or a few times a year get checked off the list. When these types of tasks are tied to spring cleaning, it’s more likely you will remember to do them. Some of these tasks make a big difference in your home’s longevity, usefulness, and look, such as polishing and sealing granite. Others, such as cleaning out your dryer, are a safety issue.

When Should You Start Spring Cleaning Your Home?

There are two ways to answer this question: Subjectively, you should start spring cleaning when you sense that new-start spring freshness starts to come in on the warm afternoon breezes. When you start feeling like you want to throw open the windows and begin to wonder how the deck furniture is doing under its covers, you know spring cleaning is around the corner. You can also start spring cleaning when you can clear out a solid day or two in your schedule to devote to the task or you could outsource professional cleaning services like dialcleaningservices. You could choose a weekday or a weekend. Keep the weekend or your day clear and dedicate it to giving your home the love and care it deserves so it can love and care for you. Although you may be tempted to spread out spring cleaning tasks over a longer period of time, keeping the project more concentrated focuses your efforts and pays off with that squeaky-clean-house feeling that only spring cleaning gives. 

How Do I Start Spring Cleaning My House?

Spring cleaning is a wonderful concept, but it won’t just happen unless you take that step.  Taking that step from getting the idea to spring clean to actually doing it involves a few stepping stones. First, decide that you are going to spring clean and tell someone so you’re accountable. This can be your spouse, housemate, a mother who lives across the country, your Facebook friends, or whatever. But publicizing your commitment will help you keep it.

Next, make a plan. The details don’t matter when it comes to galvanizing you into action. But having a rough outline of what you’ll do, whether it’s a room-by-room list of what needs to get done or a whole-house checklist of tasks you want to accomplish, brings substance to your goals and functions like a map that will get you where you want to go: a spring cleaned (past tense) house.

Finally, you could get professional cleaning services to help you with spring cleaning. You don’t necessarily need to clean yourself.

READ MORE
cleaning-air-duct
Blog House Cleaning
By Fin Dittimi March 17, 2022

Cleaning And Disinfecting Your Air Conditioner Vents

You need to clean your air vents on a regular basis, depending on how quickly they get dirty. Your air vents collect a lot of dust, dirt, and other particles floating around in the air. They get dirty quickly, and dirty air vents could negatively impact your indoor air quality. What do you need to do to clean your vents, and how should you do it? 

What You Need To Clean Your Air Conditioner Vents

  • Vacuum with a hose
  • Screwdriver (type of screwdriver depends on your vents)
  • Dish soap
  • A scrubbing brush
  • Gloves
  • A bucket 
Horizontal photo of vacuum cleaning inside heater floor vent with Red Oak Floors in background

Steps To Clean Your Air Conditioner Vents

These steps will work for floor vents, wall vents, and ceiling vents. It doesn’t matter where your vent is mounted, these steps will work for any of them. These instructions are general and may not work for all types of vents; however, most residential vents should be relatively simple to clean. 

Before cleaning anything, turn your air conditioning system off! You should be able to do this through your thermostat, but you can also turn them off manually

Remove the vents.

Some vents can be easily pulled off, but many require a screwdriver. Take your vents off and put them to the side.

Vacuum the ducts.

Your ducts will likely be dirty, so take your vacuum’s hose and let it run! Get as much dust and dirt as you can out of the ducts. Don’t go too deep into the ducts: there’s no reason to clean out the entire duct at this stage, just the area near the vents.

Dust off your vents.

Use a duster and get all the extra dust and dirt off of your vents. Take this dust and throw it in the trash: try not to get too much of it in the air! Preferably, dust off your vents inside a garbage bag so that the dust doesn’t fly up into the air and up your nose!

Prepare some soapy water.

Get some warm water and mix in some dish soap. Make sure the water has a good deal of lather in it: this way, you know the water has been sufficiently soaped.

You want to do this in your bathtub, but if you don’t have a bathtub, a washbasin, or a bucket will do just fine.

Soak your vents for up to 15 minutes.

This is where the real cleaning happens. You want to soak your vents in the tub or basin for 10 to 15 minutes. It’s not necessary to let them soak for longer than 15 minutes, and if your vents are made of iron or non-stainless steel, it may cause them to rust.

The reason we soak the vents is to get rid of any grease or gunk that allows dust to collect on the vents. This way, when you put them back, you won’t have to clean them again for a while.

Dry your vents with a towel and put them back on.

Putting your vents on should be as simple as taking them off, however, ceiling vents might be a little annoying. It’s okay if your vents are still a little wet: they won’t cause any issues with your HVAC system. Try your best to get them as dry as possible though.

Replace your air filter & turn your system back on.

Go to where your furnace is and replace the air filter. If you’ve been having a problem with dusty vents, you’re likely dealing with a clogged filter.

If you find the filter to be clear, then you don’t have to replace it.

Congratulations, you’ve cleaned your vents and you shouldn’t have to do it again for several months!

READ MORE
3d-rendering-luxury-modern-bathroom_105762-675-1
Blog House Cleaning
By Fin Dittimi March 15, 2022

How To Deep Clean Your Bathroom

 You could get professionals to deep clean your bathroom, or you can choose to do it yourself. If you’re about to take on this task, read on for tips for deep cleaning your bathroom.

What do you need to deep clean your bathroom?

For those of you who are new to the concept of deep cleaning, it includes the regular cleaning you do on a weekly or daily basis, as well as reaching the deep, disgusting parts of your bathroom that aren’t normally covered or thought of.

Things you need

  • All-purpose cleaner (if you are looking to disinfect surfaces, make sure and use EPA-approved cleaners)
  • Glass cleaner
  • Baking soda and vinegar
  • Tile and grout cleaner
  • Double-sided bucket
  • Grout and toilet brush
  • Microfiber towel and mop
  • Gloves
  • Broom and extendible duster
  • Vacuum

Here are some of the areas you will have  to deep clean list:

  • Shower, bathtub, grout
  • Showerhead
  • Shower doors and handles
  • Bathroom sink and counters
  • Inside and outside the toilet
  • Mirrors
  • Light fixtures, switches, and vents
  • Floors
  • Bath mats and rugs
  • Trash can

Steps to deep clean your bathroom

Shower and bath

  1. Pour enough vinegar in a plastic bag to submerge your showerhead with vinegar. Tie the bag, leaving it overnight to soak. The next morning, remove the bag and run the water to rinse.
  1. Wash all shower curtains with some old towels and hang to dry.
  1. For glass shower doors, mix 1 part distilled white vinegar with 3 parts distilled water in a bowl and microwave for 60 seconds. Pour the solution into a spray bottle and spray onto glass, letting it sit for 3 to 5 minutes. Then, use a microfiber cloth to wipe dry from top to bottom.
  1. For grout, you can use a special tile and mildew spray. Alternatively, mix ½ cup baking soda, ¼ cup hydrogen peroxide, 1 teaspoon dish soap. Spoon the mix onto the grout and let sit for 5 to 10 minutes. Scrub hard with a grout brush.
  1. For a bathtub, first pour hot water from a bucket all over the tub. Sprinkle baking soda on all surfaces. Fill your bucket with a half gallon of hot water and two tablespoons of dish soap. Then use a stiff brush or sponge to dip into the bucket and scrub the tub. If your tub is really dirty, use a store bought tile cleaner.

Tiles, walls, and ceilings

Spray all surfaces like countertops, tile, walls, and the ceiling with an all-purpose cleaner. Run the shower for five minutes to build up steam. Shut the door and let the steam and cleaner mix for 20 minutes. Then wipe down all surfaces with a clean cloth. For walls and ceilings, you can use a microfiber mop to reach the high spaces.

Bathroom sink

First, pour vinegar or baking soda down the drain and rinse with hot water. Use disinfecting wipes for the handles and faucets in order to prevent the transfer of bacteria from other parts of the bathroom (like the toilet). Use floss to clean the base, where the faucet and taps are flush with the sink.

Toilets

Coat the entire toilet bowl with a toilet cleaner — preferably one with bleach. Scrub the bowl hard with a toilet brush and let it sit for 5 to 10 minutes. While that is sitting, wipe down the outside of your toilet with a disinfectant wipe, as well as the outer lid, and then the inner lid. Then, use a bathroom specific disinfectant spray and leave it on for as long as the cleaner recommends (usually 10 minutes). Don’t forget to spray the flush handle. Then wipe everything down with clean clothes.

READ MORE
unpleased-slavic-cleaner-man-holding-cleaning-equipment-toilet-brush_141793-124856
Blog House Cleaning
By Fin Dittimi March 14, 2022

How To Clean The Toilet Brush And It’s Holder

The toilet brush and its holder get no respect. This housekeeping tool tackles one of the germiest spots in the home with very little praise or care. When was the last time you cleaned or retired your toilet brush? It’s time to take action.

How Often to Clean a Toilet Brush and Holder

     Ideally, the toilet brush and holder should be cleaned after every use and disinfected at least monthly. If the brush is allowed to dry completely before replacing it in the holder, then the holder should only need a thorough cleaning monthly. However, if the brush is not cleaned or allowed to dry after each use, then the holder should be cleaned at least weekly.

Steps to clean and disinfect your toilet brush and holder

  • Once you have finished cleaning the toilet, you can do a quick clean of the toilet brush using a disinfectant spray and disinfectant wipe.
  • After cleaning, flush the toilet and rinse the toilet brush in the water. Hold the handle with the brush head directly over the bowl of the toilet.
  • Generously spray the brush head with a disinfectant spray or 3 percent hydrogen peroxide, turning it so that all sides are sprayed.
  • Use a disinfectant wipe to wipe down the handle. Use a second wipe to clean the holder inside and out. The surfaces should remain wet for at least 10 minutes.
  • Balance the toilet brush handle between the toilet bowl rim and the lowered toilet seat to dry.
  • Dry the holder with a microfiber cloth. Allow the brush to air-dry thoroughly before placing it into the holder.

When to Replace a Toilet Brush

If you are using a nylon-bristle toilet brush, it should be replaced when the bristles become smelly, discolored, flattened, brittle, or begin to fall off the head while toilet brushes with a silicone head are usually more durable and should be replaced if the head becomes loose or damaged. With proper cleaning, they should last at least one year. A toilet brush’s longevity depends on how frequently it is used, but most brushes should be replaced every six to eight months.

Five Tips to Help Your Toilet Brush and Holder Last Longer

  1. Rinse the toilet brush in clean water after every use.
  1. Allow the brush to air-dry completely before storing.
  1. Do not allow a messy soup of bacteria-laden water to pool and dry in the bottom of the holder.
  1. Choose a holder that keeps the brush head off the bottom of the holder to prevent bending and breakage of the bristles.
  2. Use a toilet wand with disposable heads. Simply use a disinfecting wipe to clean the handle after each use and allow it to air-dry. The handle can be stored under the sink or from a hook—no need for a holder.

READ MORE
laundry-room-with-a-washing-machine-royalty-free-image-1567949316
Blog House Cleaning
By Fin Dittimi March 14, 2022

How to Deep Clean a Washing Machine

Whether you have a front-loader or top-loader, you’ll benefit from these cleaning tips.

With all the detergent, fabric softener, body soil and dirt that goes into your washer with each load, anything that’s not removed builds up over time and makes the perfect breeding ground for mold, mildew and odors.

It is of great necessity to clean your washing machine at least once every month and here is how to do it:

  1. Many newer models have a dedicated washer cleaning cycle that presets the time, agitation and water temperature, and all you need to do is simply add bleach. If yours doesn’t have this cycle, add 1/2 cup of liquid chlorine bleach to the dispenser or fill the dispenser to the max line and run a normal cycle with hot water or follow what the manual says. Clean according to package directions. While bleach alone will kill bacteria and mold, it may not dissolve other residues. These washing machine cleaners have ingredients to rid your machine of greasy build-ups and hard water minerals, too.
  1. Once the cleaning cycle is done, run another rinse and spin just to make sure any traces of bleach or particle remnants are completely washed away.
  1. If you have removable dispensers, pop them out, take them apart and rinse them well under hot water. Use a soft toothbrush to dislodge any stuck-on gunk. Wipe dry, reassemble and reinsert them into the machine. If they are still wet, leave them open to thoroughly air dry.
  1. If you have a front-loader, wipe the rubber gasket clean and dry thoroughly to prevent mold. Wipe the drum and door or lid, too, or leave it open to air dry.

How to Deodorize a Smelly Washing Machine

Along with cleaning monthly, make it a habit to leave the machine door open or lift the lid after each use. By doing this, air will circulate and dry out any remaining moisture that can contribute to musty smells. Just make sure that you keep children and pets away from the open machine, as a safety precaution and engage the child lock on your controls if you have one.

  • Take out clean clothes promptly: As soon as a cycle ends, empty the machine to prevent a musty odor from developing in the washtub.
  • Remove any debris or pet hair: If you have a pet that sheds in the house, you’re going to find pet hair in your washer after running several loads. Leave the door open until the pet hair and drum are thoroughly dry. Then, using your vacuum’s soft brush attachment, vacuum out the fur.
  • Dry the gasket: If you have a front loading machine, regularly check the gasket to be sure no small items, like baby socks, are trapped in there and dry it often to keep mold away.
  • Clean the controls: With a damp cloth, wipe the controls, door handle and any drips of detergent or softener you see on the front, sides and top of the machine to keep it looking its best.

READ MORE
dial-b
Blog House Cleaning Upholstery Cleaning Window Cleaning
By Fin Dittimi February 28, 2022

STEPS TO WINDOW CLEANING

The fastest way to wash your windows with crystal clear, streak-free results.

Basic Window Washing Equipment

When cleaning windows, remember that the same high-quality window washing tools the pros use are readily available online, at home centers, and in full-service hardware stores. Here’s what you need:

  • 10 or 12-in. squeegee.
  • A scrubber or a sponge.
  • A bucket (a 5-gallon plastic bucket will work).
  • Dish soap
  • Lint-free rags or small towels.
  • A ladder and a ladder stabilizer 

Keep your squeegee fitted with a sharp, new rubber blade. Purchase two or three extra rubber blades to have on hand. You can get a little more mileage out of blades that aren’t nicked or sliced by simply reversing them to expose a fresh edge. When you store the squeegee, make sure nothing touches the blade.

DIY Window Cleaning Solution

The best homemade window cleaning solution is to just mix two gallons of water and about a teaspoon of dishwashing liquid together in your bucket. Some people also opt to use vinegar and water to clean windows.

In warm weather, you’ll get a little more working time by using cool water. If you’ve procrastinated so long that you’re washing windows in below-freezing temps, add windshield washing solution until the water doesn’t freeze on the glass.

  1. Scrub the Glass

The first step in the exterior window cleaning process is to scrub the glass, working at all angles to clean the edges. Make sure to cover every square inch of the glass. This technique allows you to get great results immediately. We’re moving the squeegee horizontally across the glass, but vertical strokes will work too. If you work vertically, angle the squeegee to direct excess water toward the uncleaned area.

  1. Clean a Starting Strip

Tip the squeegee so that only the corner contacts the glass. Then, starting at the top corner of the glass, clean a narrow strip of glass from top to bottom on one side. This clean strip makes it easier to start the horizontal strokes.

  1. Squeegee Across the Top

Press the squeegee blade against the glass in the upper corner and pull it steadily across the window. Concentrate on keeping the top of the squeegee in contact with the top edge of the window.

  1. Wipe the Squeegee Clean

Wipe the blade on the clean towel in your front pocket or wipe it across the scrubber to remove dirt and excess water.

  1. Work Down the Window

Start again, with the top of the squeegee overlapping the previous stroke about 2-in. Pull the squeegee across the window at an angle to direct excess water down. Wipe and repeat.

  1. Wipe Off Excess Water

The next step in exterior window cleaning is to use the rag in your pocket to wipe up excess water along the bottom edge of the window. Then poke your finger into a dry spot on a separate lint-free rag and run it around the perimeter of the window to remove any remaining suds. Wipe off any streaks using a clean area of the lint-free rag. Change rags when you can’t find any fresh, clean areas.

Tips for Hard-to-Clean Windows

Remove paint specks and labels with a razor blade mounted in a holder. Always use a new blade to avoid scratching the glass. Wet the window first and push the blade across once. Rinse the blade and repeat on the next section to avoid trapping debris under the blade that could scratch the glass. Don’t use a razor blade on tempered glass.

  • Remove tree pitch or bug droppings with a fine (white) nylon scrub pad. Wet the glass first and rub in an inconspicuous area to make sure you’re not scratching the glass.
  • Clean tough glass stains and built-up mineral deposits from shower doors and other glass surfaces using mild household abrasives and an ordinary power drill. Here’s how.
  • Use this glass cleaning solution for tough spots: Add 1/2 cup of ammonia per gallon of water to help remove greasy dirt for a DIY window cleaner
  • Loosen sticky residue left from labels or tape by soaking it with a specialty product like Goof Off. You’ll find Goof Off in the paint department at hardware stores and home centers. Then scrape off the residue with a razor blade

READ MORE
bed
Blog House Cleaning Uncategorized
By Fin Dittimi February 28, 2022

Easy Steps To Deep Cleaning Your bedroom

A messy bedroom makes it hard to find what to wear, and it can even interfere with your sleep.

Your bedroom is a sanctuary, a safe space to go at the end of the day to rest, recharge, and revive yourself. A clean and clutter-free bedroom promotes better focus, increased productivity, and better sleep. A cluttered room is a cluttered mind, and a cluttered mind isn’t going to fall asleep easily.
Here are seven easy steps on how to deep clean your bedroom.

Bedroom cleaning essentials

Cleaning your bedroom without using harmful cleaning products is easy. Here are a few cleaning essentials to get your bedroom clean as a whistle naturally.

Microfiber cloth
Natural laundry detergent
Dryer balls
Baking soda
Vinegar
Natural all-purpose cleaner
Duster

  1. Tidy up, and dust

Start your bedroom-cleaning odyssey with the very basics. First, gather up all the cups of stale water, half-empty cans of soda, and late-night snack bowls you’ve accumulated, and take them to the kitchen. Toss out your bedroom trash, put your dirty clothes in the laundry bin, and hang anything that’s clean. Put any other items that are out of place back in their spots. Now you’re ready to get down and dirty!

Dusting the stuff that’s easiest first might seem like the path of least resistance, but it actually means that all the dust from your ceiling fan is going to cover the dresser you just wiped down. Start from the top, and work your way down for the best results. Grab your duster, and hit the ceiling fan, ceiling and corners, and light fixtures first, then the windows, nightstand, dresser, and whatever other furniture you have. Don’t forget to dust your (fake?) plants!

  1. Spray and wipe down surfaces

After you’ve dusted, take a damp microfiber cloth and your all-purpose cleaning spray to surfaces that see a lot of use, like night tables, the dresser, and your bookcases or shelves. Wipe off any spills, stains, or sticky spots the duster didn’t take care of, and scrape off hardened candle wax with a blade. Scrub your door handles and the places on your doors you touch the most — these areas are prone to a build-up of dirt and oils that make them look grimy over time. They’re also probably rife with bacteria. Your baseboards are another place that gathers dirt, dust, and dead skin like no one’s business, so give ‘em a little microfiber love before you move on.

  1. Wash the sheets, duvet, and pillows

Sheets get mightily gross with all your dead skin and body fluids, so wash your sheets and pillowcases at least every two weeks.

A duvet is bulkier than your bedsheets and takes a bit more finessing to get it really clean. Check the tag for fabric care instructions, then read up on how to wash your duvet for step-by-step directions for getting yours super fresh and cozy again.

Down and feather pillows last longer and are easier to clean than typical poly-fill pillows. Surprisingly, down pillows are generally machine washable and dryable, and also surprisingly, it’s not rocket science. Wash your down pillows every 6 to 12 months.

  1. Clean your mattress

You’ve probably heard by now that humans spend a third of our lives sleeping, which means you spend about six to ten hours on your mattress every day. That’s a lot of time for sweat, dust, drool, dead skin cells and bacteria to seep into your cushy mattress, where millions of dust mites feed on each night’s bounty.
Clean your mattress every six to twelve months. Vacuum it first, then sprinkle the whole thing liberally with baking soda. Let it sit for a few hours to soak up moisture and odors. Vacuum again, and if it’s time, flip and rotate the mattress

  1. Vacuum

Now that all the dust from your ceiling fan and the crumbs from your nightstand and bedsheets are on the floor, it’s time to vacuum them up. Don’t just vacuum the floor you can see— suck out all of the dust and detritus that’s accumulated in the nooks and crannies of your bedroom, too, like the insides of your dresser drawers or nightstand, your windows frames, and between the window and the screen. Dust bunnies love to reproduce in small, dark places like under your bed, dresser, and bookcase, so scoot your furniture out of the way, and give those oft-neglected areas some attention, too. Then, attach the upholstery brush and vacuum your curtains.

  1. Remake the bed

There’s nothing quite as satisfying as hopping into a bed with clean sheets. After you’re done cleaning your bedroom, grab your freshly laundered bedding, and make

the bed. Pro tip: It’s always a good idea to have a backup set of bed linens for those days when you’re doing a deep clean and your regular set of sheets or comforter aren’t out of the dryer by the time you’re ready to hit the sack.

  1. Clean the closet

You only have to go as crazy here as you want to. If your closet is in pretty good shape, just make sure your clothes are hanging properly in the right place and in the right direction. Organize your shoes, and straighten up anything that’s gone topsy-turvy.
If your closet is a disaster in need of an overhaul, fear not. We’ll do this gently. First, get a couple of boxes or a roll of trash bags, and sort your clothes into three piles: donate/sell, recycle, and keep. Put the donate/sell items in one container and the ones you’ll recycle in another (you may need to take them to a facility that accepts textiles.) Hang up the items you’re keeping. A good rule of thumb is if you haven’t worn it in at least three months, you probably don’t need it.

READ MORE
newsinner_20200729133534_1
Blog House Cleaning Uncategorized
By Fin Dittimi February 28, 2022

TIPS FOR HEALTHY FEET AND SHOE HYGIENE

Ways To Treat Your Feet and Footwear Right.

With the outbreak of Covid-19 and the number of coronavirus cases on the rise, it is a timely reminder to maintain proper hygiene for a healthier environment. While washing and keeping our hands clean is vital, here are five tips to minimize and keep your exposure to bacteria and viruses to the minimum for healthier feet.

Tip #1: Do Not Wear Your Shoes Indoor

    There are two types of people – those who wear their footwear indoors and those who do not. While seemingly harmless, it’s worth noting that an average shoe sole carries 421,000 different kinds of bacteria including faecal bacteria, E.coli, and many more. Here’s the disturbing and gross fact why you must stop wearing your shoes in your home – poop transfer. 

It has been found that 93 percent of shoes that are worn more than a month contain faecal bacteria on the outsoles. This should not be a surprise as we step on pet waste on public grounds and step on splashes from the washrooms on public restroom floors. 90 percent of these bacteria and other microorganisms are transferred to clean floors instantly when you step into the comfort of your home. Shoes are home to bacteria and can lead to the accumulation of dirt and grime in confined spaces like our home. For parents with small kids crawling around and sticking things into their mouths, it pays to err on the safe side.

While some shoes can be disinfected if they are washable as per the care instructions, let’s face it, how many of us wash our shoes to simply walk indoors.

Solution: Practise a shoeless home and keep them outdoors! Designate an area by your house porch to drop your shoes before entering the house. Invest in a shoe rack to keep things tidy too. If you are still adamant to wear your shoes indoors whatever the reason is – convenience etc, consider investing in an antimicrobial doormat that clears most of the debris and germs on the outsoles.

 Tip #2: Clean Your Shoe Closet

Shoes should be stored in a cool, dry place. Do not literally wait till spring cleaning! It is vital to give your wardrobe (be it a clothes wardrobe or shoe closet) an occasional good clean, declutter and reorganize your footwear. Accumulating a messy pile of shoes attracts germs and here are some hacks on how you can Marie Kondo your shoe wardrobe.

How to clean your closet in 4 steps:

  1. Vacuum the floor around your wardrobe.
  2. Remove all shoes or clothes and perform your KonMari.
  3. Wipe shelves and racks with a microfiber cloth lightly sprayed with water.
  4. Clean your shoes and stuff tissue paper or shoe trees to keep them from sagging or losing their shape over time.

Tips #3: Clean Your Shoes

It can be a hassle when caked-on dirt and loose dirt get stuck on our shoes and just won’t budge, especially on rainy days or if we step over mud.

 Here’s the right tool for everything to get that stubborn dirt off.

  •  Slap the shoes together outdoors to remove loose dirt. Use a toothbrush to brush the dirt off and a butter knife or key to scrape set mud in grooves of your shoes
  • Mix a tablespoon of baking soda (abrasive) and laundry detergent (bleaching agent) and scrub the rubber parts clean with this mixture. Rinse off with water and it will look sparkling clean as before!

If you are looking beyond the general shoe care guide of your shoes, here are some bonus simple cleaning hacks without the expensive products for different types of footwear material.

Note: Always read your shoe care instructions that will provide a more detailed maintenance guide specifically for the shoes.

 Tips #4: Wear Your Socks!

Wear socks made of cotton, wool, or bamboo as they help to absorb moisture and prevent abrasion from the shoes. Plus, It keeps your feet warm and comfy.  Who says you can’t wear socks with sandals or slides? Socks’ fashion is huge these days – you can grace the streets in cute printed socks and team it up with your favorite breezy airy sandals. It protects your feet from dirt too!

READ MORE
high-angle-woman-with-face-protection-cleaning-tables
House Cleaning
By Fin Dittimi January 18, 2022

Reasons why you should hire a professional cleaner to clean your homes

 Hiring a cleaning service to clean your home can make your life easier and relieve you of daily chores and also gives you the opportunity to do fun things that you would love to do. You will no longer have to worry about making time to get chores done during your busy day. Once you assign the cleaning job to a cleaning service, there is no need to spend time dusting, washing, or vacuuming.

  1. Preventing Dust Allergies

   Dust allergies are a major problem in homes. Many children and adults have developed allergies to dust. It’s a common allergen that causes itchy eyes, sneezing, and a runny nose. When you hire a professional cleaning service to keep your home clean, they will make use of a High-Efficiency Filter vacuum cleaner to get rid of as much dust as possible from your home. Not only will they clean the rugs, carpets, and floors, but the filters are able to get rid of most of the dust hovering in the air. You can stay outside while cleaners get rid of the dirt and dust in your home.

2. Deeper Clean

Professional cleaners can deep clean your bathroom and kitchen and get rid of harmful bacteria. Our cleaning service uses the right tools such as vacuum cleaners, long dust extractors, sponges, and mops to reach tough areas. They use the best disinfectant to disinfect and cleanse contaminants from your home and surroundings. The vacuums they use will remove dust, dead skin, and debris from carpet and cracks. This will allow you to breathe better and have a dust-free atmosphere.

Cleaning services have experience with leaving bathrooms, kitchens, hallways, and other rooms in exceptional condition. They clean window blinds, ledges and they are careful when cleaning woodwork. They clean mirrors, clean tiles, bathtubs, and showers. They dust furniture, picture frames, and shelves and make sure cobwebs and fingerprints are gone. Your home will receive an intense clean because professionals have years of cleaning experience. They know which cleaning product to use at every time and will leave your home sparkling.

Close up of unrecognizable worker wearing protective suit cleaning floor with chemicals during disinfection indoors, copy space

3. Reduce Fatigue and Stress

  Dealing with your everyday routine and balancing your work and home life can become stressful. After working a full day and then coming home to carter for the needs of your family, not much time or energy is left to work on cleaning your home. Overworking yourself can have a serious impact on your health, including fatigue and stress. When you hire a  professional cleaner to help you out around the house you will find that you have more downtime, and are able to actually relax and bond with your loved ones.

When you allow professionals to do the cleaning, you can relax while they do all the work. There is no need for you to overwork yourself or get stressed out from performing chores. Professional cleaning services can utilize special techniques to get rid of microscopic organisms in your home that cause sickness and infections.

4. Keep Bathrooms and Kitchens Hygienic

When cleaning your bathroom, professional cleaners are sure to get rid of bacteria, fungi, and mold. They also clean and remove viruses and any organisms living on the bathtub, toilets, and sink surfaces. They know how to mop the floors in your kitchen and bathroom to wipe out stains. Since these two areas house the most germs, cleaners focus on cleaning hard-to-reach places.

When a professional service cleans your bathroom, they are sure to wipe down your valves and sinks and thoroughly disinfect your toilet, counters, and your bathtub. If you are concerned about germs, there is no need for you to encounter these microbes. A professional cleaner is not afraid of germs and will do a better job at sanitizing the area.

5. Trained and Skilled Staff

Professional cleaning firms have highly qualified personnel. Their employees are professional and have attended long hours of training. They have unique training to clean all commercial environments and will be able to deliver cleaning results efficiently. All of their staff are security vetted and background checked so that you are confident that they are hiring only the best teams of people.

6. Deliver Exceptional Results

   The most noticeable overall benefit to your home will be the physical transformation. You will be surprised at just how much of a difference a professional cleaning services provider can make to the look of your home. Your home will be gleaming and will become a very welcoming environment. With our professionally trained personnel, superior work, and quick response times, you should be 100% satisfied with the appearance of your home. A superior cleaning routine leaves a great impression every single time.

READ MORE
Cleaning-Your-Bedroom-Closet
Blog House Cleaning Uncategorized
By Fin Dittimi October 4, 2021

Cleaning Your Bedroom Closet

It’s an area that we’ve merely managed but haven’t given much thought to. And, as it turns out, many of you are having the same issues with keeping this specific closet tidy and organized. It appears that we have much too many things and not enough room, which has been an overarching theme of spring cleaning; 

Prepare Yourself

Now, I’ll tell you right now that this will take time. More than likely a couple of hours. But when you’re through, you’ll be smiling with pride and feel so much better. There’s also a special feeling you get when you give out items you no longer need. 

What You’ll Need

  • A laundry basket
  • A donation bag
  • A recycling bag 
  • A vacuum cleaner with brush and crevice attachments
  • A microfiber cloth
  • Baking soda
  • Closet organization tools (optional)
  • A step stool
  • A mop if your closet has hardwood or tile flooring.

Step 1 – Clear out Your Closet

The first thing we’re going to do is clean out the closet completely. To be able to accommodate the contents in your closet, make sure you have a clear bed and a relatively clean room. If you believe you may run out of space, create some extra accommodations in your room, such as a clear dresser, chair, or clean area on your floor. You will require it.

So, begin by going through the closet section by section, removing all garments, and placing them on your bed. Naturally, I say this for two reasons. First, it’s a large flat surface that will assist you in organizing your clothing, and second, you won’t be able to sleep until this job is completed.

Step 2 – Clean up Your Closet

This is the actual physical cleaning of your closet, which is also fairly simple. You have a completely empty space, and all you need to do now is add your magical touch to it. Closets are rarely (if ever) cleaned. If you’re wondering why your closet smells stuffy, it’s probably because it contains stale air and has carpet that is rarely cleaned. You wouldn’t smell any better either. This is your opportunity to change that. Begin by sprinkling baking soda on the carpet and leaving it for 15 minutes or so to help rid the carpet of odors.

Get your step ladder and climb up to the shelves you can’t reach by hand while the baking soda sits. Vacuum the shelves, then spray and wipe them off with an all-purpose cleaner and a microfiber cloth. Feel free to clean the hanger rods as well.

Then, conclude by vacuuming the carpet, paying special attention to the corners and baseboard.

Step 3 – Sort Your Clothes

OK, take a deep breath. You should be aware that this will most likely be the longest and most arduous portion of the work – but this is where the rubber hits the road – this is your chance to rid yourself of all types of items that are doing nothing but cluttering up your wardrobe. I’m simply being truthful.

Let’s have a brief pep talk about it. Your garments just hang in your closet on a hook that might be used for an item of clothing you really wear. Consider your clothes to be renters, and you to be the landlord (unfortunately, you will not be paid any rent in this situation). You have limited room and want only the best tenants in your building (er, closet). So, if they are deserving renters, retain them. If they are noisy, needy, nagging renters who are always late with their rent, evict them. To put it another way, keep what you like and get rid of what you don’t. Just be truthful. Here are some pointers to consider:

  • Donate any apparel you haven’t worn in the last 12 months.
  • Donate any items that you regularly pass over in your closet.
  • Donate it if you bought it a year ago and haven’t gotten around to wearing it yet.
  • If it fit you two summers ago but not now, donate it.

Your wardrobe should only include things that you really wear – if you don’t wear it, it has no place in your closet.

Place clothing that you want to retain but need to be laundered in your laundry basket.

Don’t give anything that is broken, dirty, or otherwise wrecked beyond repair (big stain, rip, etc.). When things are sorted, even donation centers will dump whatever they don’t want, which ends up in the landfill. Consider turning it into a rag (socks, undergarments, and shirts are ideal) or a fun project (if you are the crafty type). If nothing of these options appeals to you, visit your local animal shelter.

They are always glad and eager to accept old towels, blankets, and usable clothing items (such as tees and sweatshirts) since what small kitten or dog wouldn’t want to snuggle up to something soft?

Step 4 – Organize the Items You Want to Keep

Now it’s time to put the items that have survived the last hour back into the closet.

You can reorganize your things as follows:

  • Pair like items with like items, and comparable sorts of items together.
  • Color code items – span from one end of the color spectrum to the other, which might help you match an ensemble or discover specific clothing (if you want your merlot blouse, you’ll know precisely where to find it).
  • Items you don’t use as often should be kept out of the way, while items you wear frequently should be kept in the spotlight (gowns should be harder to reach, and jeans should be at arm’s reach).

For more information or help on how to clean your bedrooms and closet spaces;

Call Us: 514.629.0841

Address: Montreal, Quebec, Canada

Mail Us: info@dialcleaningservices.com

READ MORE
  • 1
  • …
  • 3
  • 4
  • 5
  • 6
  • 7
  • …
  • 9
Featured author image: How to Spring Clean YourWhole House

Faith Ileh

Hi! I am an author of this blog. Read Our Post

Recent Posts
  • The Best Carpet Cleaning Services in Montreal
    The Best Carpet Cleaning Services in Montreal
    August 14, 2023
  • Experience the Pinnacle of Cleanliness with Dial Cleaning Service
    Experience the Pinnacle of Cleanliness with Dial Cleaning Service
    August 13, 2023
  • Conquer Dusty Corners Like a Pro! ✨🌿
    Conquer Dusty Corners Like a Pro! ✨🌿
    May 31, 2023
dial 2D

Request A Callback

Quick Links

Menu
  • Our Blog
  • Deep Cleaning
  • Montréal
  • Commercial
  • Residential
  • Privacy Policy
  • FAQ

Get In Touch

514.629.0841

  • Business Hours:
  • 8:00 AM – 6:00 PM
  • 7 Days a Week
Copyright © 2026 Dialcleaningservices | design by fandfconsultancy