logotype
  • About
  • Residential
    • Special Cleaning
    • Carpet Cleaning
    • Window Cleaning
    • Deep Cleaning
    • Apartment Cleaning
      • Sofa Cleaning
      • Yard Cleaning
      • Roof Cleaning
      • Carpet Cleaning
    • Duct Cleaning
    • Upholstery Cleaning
    • Pool Cleaning
    • After Party Cleaning
  • Commercial
    • Office Cleaning
    • Hotel Cleaning
    • Hospital Cleaning
    • Mall & Shops Cleaning
    • Industrial Cleaning
    • Pharmacy Cleaning
    • Premises Cleaning
    • School Cleaning
  • Our Locations
    • Montréal
    • Westmount
    • Ottawa
    • Toronto
  • Contact
CALL US TODAY
  • About
  • Residential
    • Special Cleaning
    • Carpet Cleaning
    • Window Cleaning
    • Deep Cleaning
    • Apartment Cleaning
      • Sofa Cleaning
      • Yard Cleaning
      • Roof Cleaning
      • Carpet Cleaning
    • Duct Cleaning
    • Upholstery Cleaning
    • Pool Cleaning
    • After Party Cleaning
  • Commercial
    • Office Cleaning
    • Hotel Cleaning
    • Hospital Cleaning
    • Mall & Shops Cleaning
    • Industrial Cleaning
    • Pharmacy Cleaning
    • Premises Cleaning
    • School Cleaning
  • Our Locations
    • Montréal
    • Westmount
    • Ottawa
    • Toronto
  • Contact
logotype
logotype
  • About
  • Residential
    • Special Cleaning
    • Carpet Cleaning
    • Window Cleaning
    • Deep Cleaning
    • Apartment Cleaning
      • Sofa Cleaning
      • Yard Cleaning
      • Roof Cleaning
      • Carpet Cleaning
    • Duct Cleaning
    • Upholstery Cleaning
    • Pool Cleaning
    • After Party Cleaning
  • Commercial
    • Office Cleaning
    • Hotel Cleaning
    • Hospital Cleaning
    • Mall & Shops Cleaning
    • Industrial Cleaning
    • Pharmacy Cleaning
    • Premises Cleaning
    • School Cleaning
  • Our Locations
    • Montréal
    • Westmount
    • Ottawa
    • Toronto
  • Contact

Tag: cleaning tips

9-HOUSEHOLD-ITEMS-YOU-MIGHT-OVERLOOK-CLEANING
Blog House Cleaning
By Fin Dittimi August 18, 2021

9 HOUSEHOLD ITEMS YOU MIGHT OVERLOOK CLEANING

Though it requires a significant amount of effort, performing a comprehensive, deep cleaning of your home is eventually quite gratifying. Everything is as good as new, and you may enjoy the pleasure of a job well done. However, there always seem to be a few items around the house that you forget about while conducting a general cleanup,post-renovation cleaning or that appear too tough to clean in the first place. Here are nine domestic places or things that often go unnoticed and the best techniques to clean them.

Yellowed Pillows

You most likely wash your pillowcases on a regular basis, but what about your pillows? Sweat and hair products can soak down through pillowcases, causing old pillows to become yellow. Fortunately, pillows are simple to clean. Here’s how to have yours spotless in no time.

  1. Remove all pillow coverings.
  2. Place two in the washing machine at a time.
  3. Using liquid detergent and bleach, wash on a hot cycle with an additional rinse.
  4. Dry according to the tag’s instructions, adding tennis balls to the dryer to agitate them, and expose all surfaces to the heat.
  5. If there is any remaining wetness, allow them to dry fully before replacing the pillowcases.

Window Blinds

Blinds accumulate dust rapidly, yet they appear to take an eternity to clean. That doesn’t have to be the case thanks to this easy method that makes creative use of your kitchen tongs.

  1. To make two thinner strips of fabric, cut a dusting cloth in half.
  2. Wrap each strip around the ends of the kitchen tongs and secure it with rubber bands. Trim the fabric strips if they become too bulky when wrapped.
  3. Continue cleaning the blinds by pinching one slat at a time between the cloth-wrapped tongs and moving it horizontally.
  4. When finished, just remove the towel and return the tongs to the kitchen. Take care to thoroughly clean them before using them to pick up the food!
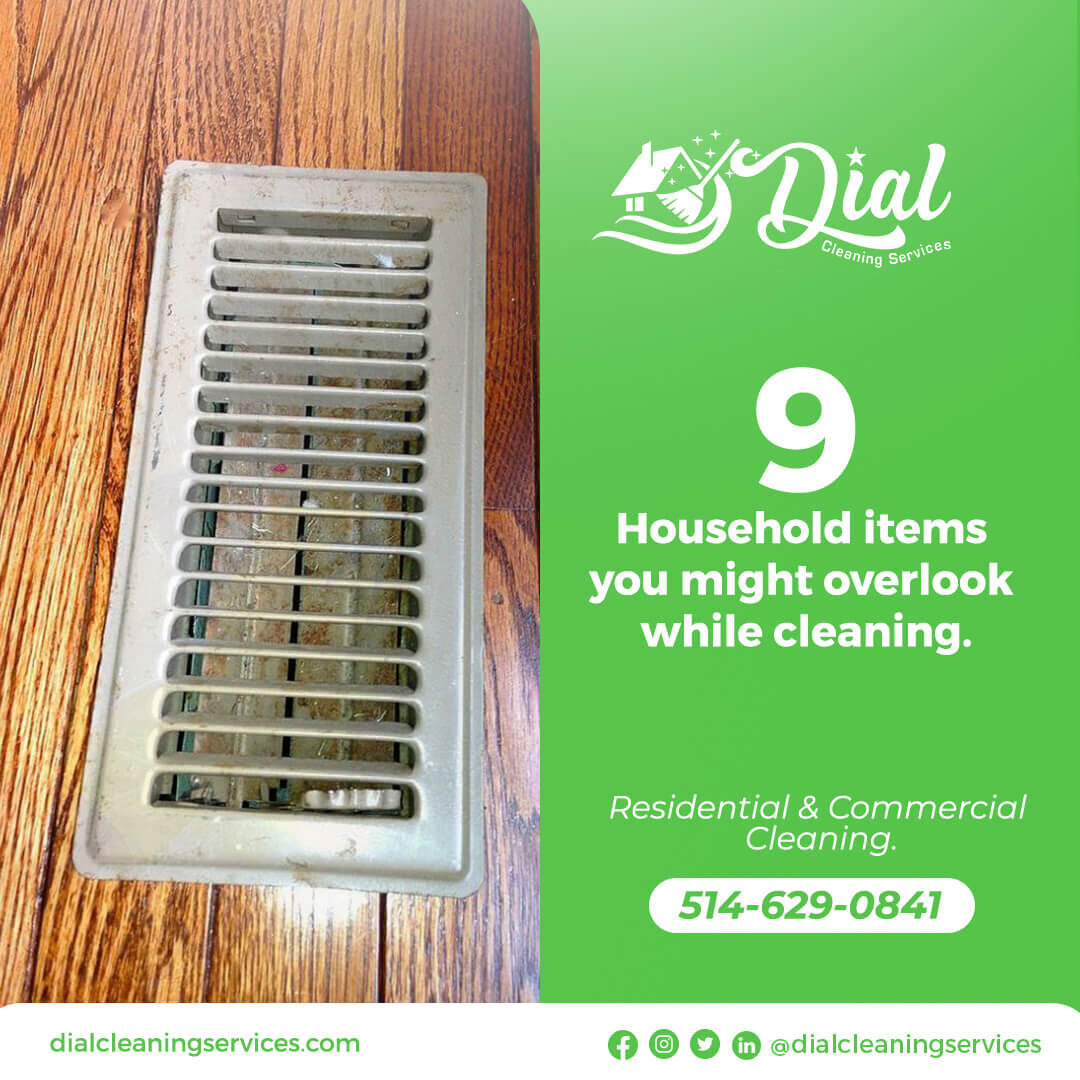
Vent Covers

All of the air passing through the vent covers collects more dust and filth than you’d think. These covers can be tough to clean while attached to the vents, but remove them and the operation becomes much easier.

  1. Remove the vent cover. Make a note of where you put the screws.
  2. Using a paper towel, wipe off the slats.
  3. Place the vent cover in the top rack of your dishwasher and perform a water-only cycle.
  4. To test it, wipe the cover with a towel.
  5. Do you remember those screws? Use these to reattach the vent cover, and you’re done.

Couch clothing

Because the fabric has a porous surface, dirt, stains, and smells sink in and cannot be easily removed. However, because sofas are common locations in the home for people to rest and gather, any comprehensive cleaning must include them. Some sofas have detachable coverings that may be cleaned in the washing machine. If it is your sofa, simply follow the directions on the tags. If not, you can use baking soda to remove stains and eliminate the odor of an old couch.

  1. Remove any human and pet hair from the fabric-covered areas of the couch using a stiff brush.
  2. Sprinkle baking soda on any stains or dirty patches of cloth.
  3. Allow for a 20-minute rest.
  4. Suck up the baking powder with a handheld vacuum or hose attachment.
  5. Use a clean cloth to apply a mild all-purpose cleaning to all fabric surfaces. Stains should be easier to remove.

Electric stove burners

Cleaning the burner rings on an electric stove may appear to be a difficult process. They rapidly get black from dirt and corrosion. However, you can bypass all of it with a few simple actions.

  1. Remove the burner and set it on a towel or another work surface.
  2. Use degreasing dish detergent and a paper towel to remove as much dirt as possible.
  3. Make a paste of baking soda and water and apply it to the burner’s top surface.
  4. Allow for a 20-minute resting period.
  5. Scrub away the baking soda paste using a sponge’s rough side.
  6. Rinse well and pat dry.

Glass Cooktops

What if your stove doesn’t have any burners to remove? The cooking surface can still acquire unattractive rust and dirt rings. Fortunately, you can clean a glass cooktop using the same materials listed above.

  1. Apply baking soda liberally to discolored spots and spread evenly with your fingertips.
  2. Soak a washcloth or hand towel in a water-and-degreasing-dish-soap solution.
  3. Squeeze the soap and water solution over the baking soda and lay the cloth over the stove.
  4. Allow for a 20-minute resting period.
  5. Pick up the cloth and scrape away the loosened filth.
  6. Remove any extra baking soda paste with a paper towel to leave a glossy finish.

Area rugs

While most people use a steamer to clean their carpets at home, many rugs may be cleaned with simply soap and water. When you notice stains on your favorite area rug, take it outdoors and perform the following:

  1. Hose down the rug, making sure it is uniformly saturated.
  2. Pour OxiClean or a comparable cleaner over the rug and scrub with a stiff-bristled brush, paying special attention to any discolored spots. Check the label to see if any compounds should not be used on your specific rug.
  3. Allow sitting for 2-3 hours.
  4. Use the hose to rinse the rug, ideally with a sprayer attachment.
  5. Roll the rug up, squeezing out any excess water and cleaner as you go.
  6. Step 5 should be repeated, squeezing out even more water.
  7. Allow the rug to air dry. Return it to its original indoor location after it has dried fully.

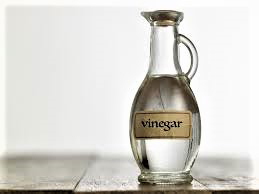
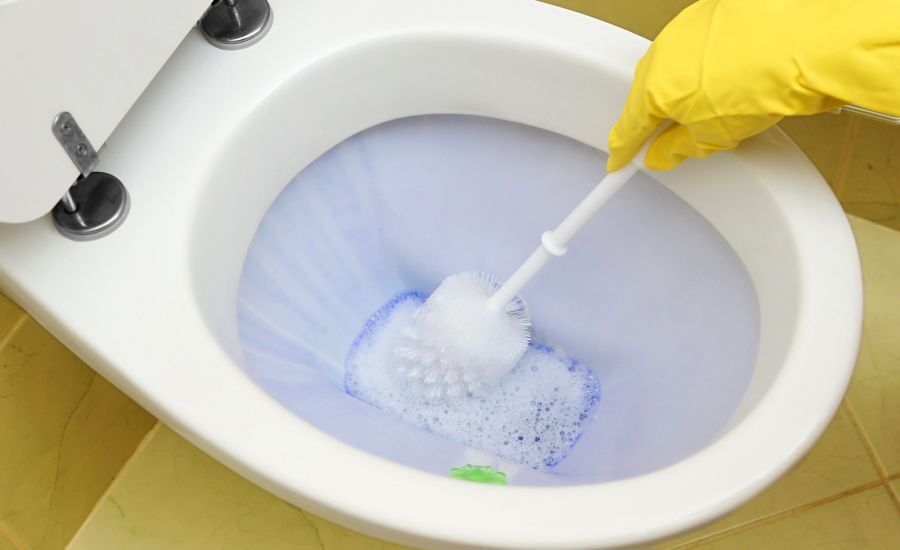
Toilet Siphon Access

Your toilet’s siphon maintains a consistent water level in the bowl and prevents it from overflowing. The siphon’s opening is towards the rim of the bowl, and it may have hard water or rust streaks. Follow these steps to get rid of the stains:

  1. Remove the toilet tank’s lid.
  2. Turn off the water supply to the toilet.
  3. To empty the tank and bowl, flush the toilet.
  4. Completely cover the toilet siphon opening with one or more strips of duct tape. The objective here is to create a good seal.
  5. Pour several glasses of white vinegar into the tank.
  6. Allow sitting overnight after flushing. The duct tape will keep the vinegar in the siphon hole, allowing it to dissolve the discoloration.
  7. Remove the duct tape, turn on the water, and use the toilet as usual.

Clean Your Brooms

When was the last time you cleaned your cleaning supplies? You may not realize it, but your broom may get very filthy after a time. When you’re through sweeping, give your broom some love. To get it as clean as possible, use any or all of these ways.

  1. Step outdoors with the broom and sweep away any excess dirt or pet hair.
  2. Vacuum the end of the bristles with a handheld vacuum or a vacuum with hose attachments.
  3. To clean the bristles, use a disposable disinfectant wipe.
  4. Add a little amount of degreasing dish soap to a pail of water and swirl to generate foam. Place the broom, brush side down, in the bucket, and soak for one hour.
  5. Don’t forget your dustpan while you’re at it! A squirt of multipurpose cleaning and a quick wipe-off should suffice.

A thorough deep clean may do a house a lot of good, but the entire process can be daunting at times. If you follow these suggestions yet still need assistance, contact us at Dial Cleaning Services for professional help.

Contact us today for professional help

Call Us: 514.629.0841

Address: Montreal, Quebec, Canada

Mail Us: info@dialcleaningservices.com

READ MORE
HOW-TO-CLEAN-YOUR-MIRRORS-PROPERLY
Uncategorized
By Fin Dittimi August 16, 2021

HOW TO CLEAN YOUR MIRRORS PROPERLY

Have you ever noticed that your mirrors are usually the first item to get dirty in your house? These lovely objects always seem to get stains, dust, or fingerprints on them. How many times have you checked your reflection just to get sidetracked by some blemishes on the mirror?

Nothing ruins the appearance of your home like a filthy mirror. It may make your bathroom and house appear disorganized. A clean mirror is one of those small touches that can make a big difference in your house. A glossy and streak-free mirror may better reflect light around your home, making everything appear brighter and more prominent. It’s surprising how much of a difference a clean mirror can make in your room.

Unfortunately, knowing how to clean a mirror properly is not always straightforward. If you don’t use the proper technique, you might end up with a muddy, streaky mess on your mirrors.

There are numerous things you should not do while cleaning your mirrors, including:

Wiping steamy mirrors with a towel after a shower: While some people believe this is a beautiful method to remove all the dust and grime, it will just make your mirror appear worse for wear. This is because towels frequently leave dust behind. This method can potentially leave streaks on your mirror if you don’t use a good glass cleaner.

Using a newspaper to clean your mirror

While using a newspaper to clean your mirror was previously a dependable method, the ink from modern-day papers might leave residue behind. This may result in a streaky mess on your mirror.

Wiping your mirrors with a paper towel: Unfortunately, paper towels sometimes leave behind tiny particles of dust. Instead, you’ll need a lint-free cloth.

Using chemicals that aren’t intended for window or glass cleaning: If you notice that your mirrors and glass have a foggy appearance, you know you’re not using the appropriate cleaner for the task. Anything labeled as a glass cleaner has specific ingredients that will not leave streaks behind.

While avoiding these techniques is beneficial, there are a few more measures you can take to clean your mirrors properly.

Tips for Getting a Streak-Free Mirror

One of the most crucial elements of cleaning your mirror is the instruments you use. This does not imply that you must spend a lot of money on new cleaning supplies and equipment. Some of these items may already be in your house. Take the following items with you:

  • Microfibre cloths: Use flatter ones because thicker ones might collect lint and leave it behind, therefore spoiling your clean mirror image.
  • Cleaning solution, such as glass cleaner or a basic water-vinegar mixture
  • The cotton pad
  • Using rubbing alcohol

Now that you have the proper equipment, it is time to learn the proper method. There are several strategies and procedures that individuals claim will work yet do not. Here is a five-step procedure on which you may rely:

  1. Begin with the most cluttered area of the mirror. This includes dried-on toothpaste, hair products, and so on. Pouring rubbing alcohol on a cotton pad and wiping away the dirt is the best way to remove it. You may need to use a lot of elbow grease to get the buildup off, but be careful not to harm the mirror. It is critical to work rapidly since rubbing alcohol dries quickly. Consider this the pre-wash step, which is comparable to addressing stains on your clothes before putting them in the washing machine.
  1. After that, spray your cleaning solution on the mirror. The key is not to overdo it – just a little mist will suffice. If you put too much on the mirror, it will begin to leak, creating an even bigger mess for you to clean up.
  1. After you’ve sprayed the mirror with mist, grab a microfiber cloth and fold it twice. This provides you with a couple of layers to work with during the cleaning process.
  1. Starting at the upper, left-hand side of the mirror, wipe the cloth to the right. Then, without raising your cloth, wipe back to the left while maintaining a downward angle. Continue wiping in this way until you reach the bottom of the mirror. It should be a zigzag or Z-pattern to make it easier to follow. If your cloth gathers too much dust or solution, fold it again and utilize a drier and cleaner corner of the microfibre cloth.
  1. Finally, examine your mirror from various angles to check if there are any stains or streaks. Buff these out using a clean side of your microfiber cloth and a little cleaning solution. However, don’t reapply the solution to the mirror during this stage. Instead, spray it on a clean towel and gently wipe away the streak.

This procedure may be used regularly on any mirror or glass in your home. It should provide you with streak-free cleaning for a long period.

Conclusion

If your mirrors are one of the first things to become dirty in your home, or if they constantly appear to have streaks, dust, or fingerprints on them, there is a correct technique to clean them and get your mirrors gleaming.

Mirrors are one of those subtle ornamental elements in your house that have far more influence than most people think. If your mirrors are unclean, they may create the appearance that your home is disorganized. On the other hand, Mirrors may give light and depth to your area if they are well maintained. It’s astonishing to see what a difference a clean mirror can make.

Contact us today for professional help.

Call Us: 514.629.0841

Address: Montreal, Quebec, Canada

Mail Us: info@dialcleaningservices.com

READ MORE
lash
Blog Uncategorized
By Fin Dittimi August 13, 2021

5 WAYS TO CLEAN YOUR FREEZER

Clean your freezer entails more than merely removing food and allowing it to thaw. There are a lot of stages involved in getting it done correctly! Here are five cleaning suggestions for your freezer to guarantee its maximum functioning over time:

Turn off the freezer

The first step in cleaning your freezer is to turn it off. This reduces the possibility of electrical shock and other damage while your freezer defrosts.

Because shutting off your freezer may cause it to defrost, position it in a location where excess water will not damage the floor or other appliances. If required, lay towels or old newspapers below it to absorb water.

Take out all the food.

Please remove all of the food from your freezer after turning it off to prepare for the major clean-up. Place all food in the refrigerator or another freezer to keep it cool while you clean. Fill plastic storage bins or big containers with lids with frozen food. You may avoid \early defrosting by keeping food in airtight containers when the food is returned to the freezer, line containers with towels or plastic bags to make cleaning easier.

Take stock of what you own.

A lot of the food in your freezer has most likely been there for a long time. Cleaning out your freezer is an excellent time to take stock of all you own.

As you remove the items, make a list of the names and expiration dates of everything you wish to save, and label the containers. Also, check and smell food to see whether it is rotten.

Food spoilage indicators include:

Discoloration that is not typical

noxious odors

Frost or ice on the food contained within the container or packaging

Labels that are no longer in use

Accelerate the defrosting procedure.

After you’ve completed the first few stages, it’s time to let your freezer defrost. If you leave the lid open, this might take many hours. However, if you want to expedite the procedure, follow these steps:

Close the top on a big container of boiling water and place it in the freezer. You may need to refill the hot water many times.

Use a low-heat hairdryer. Keep water away from the dryer to avoid an electrical shock.

Clean your Freezer

Drain your freezer once it has defrosted. Then, clean it out with a gentle cleaner such as dish soap or baking soda and vinegar. The following is how you should clean it:

Fill a dish halfway with water and a tiny quantity of your preferred cleanser.

Wash the inside with a towel dipped in the solution.

Takedown any shelves or baskets and wash them in the sink.

Rinse your freezer to get rid of any cleaner.

Allow it to dry naturally.

Place a package of baking soda inside and shut it for several hours to get rid of any residual odors. You may also put a box of baking soda in the freezer with your food as a preventive step, as long as you replenish it every few months.

Contact us today for professional help.

Call Us: 514.629.0841

Address: Montreal, Quebec, Canada

Mail Us: info@dialcleaningservices.com

READ MORE
oven
Blog Uncategorized
By Fin Dittimi August 11, 2021

HOW TO DEEP OVEN CLEAN

At the heart of each excellent house is a kitchen that welcomes family and friends and serves as a gathering place for wonderful meals and even better memories. The oven, of course, is at the center of that kitchen. The oven is where all of your favorite meals come to life right before your eyes, and it’s also where you wait eagerly to see if your cookies and cakes turned out properly. While your oven provides a lot for you and your family, it is necessary to give it some additional attention from time to time in order for it to stay operating at its best. Cleaning your oven is critical to the health and safety of everyone in your household.

DIY Oven Cleaning

Close up of female hand with yellow protective gloves cleaning oven door

To begin cleaning your oven, gather the following items: an old toothbrush, scourer, oven cleaner, sponges, and rubber gloves. When cleaning your kitchen and oven, strive to use caustic-free cleansers to avoid harmful or dangerous chemicals in your cleaners. Make sure your oven is turned off and cool before you begin. Wear your rubber gloves and cover any gas burner jets before beginning to remove any food, crumbs, or leftovers from the oven.

Next, remove all of the oven shelves and soak them in soapy water. If you have the time, you may soak them overnight.

While the shelves are soaking, spray and clean the oven’s corners with your oven cleaning and sponge. Allow the solution to sit for a few minutes to soften stubborn stains and oil. Before cleaning and drying the oven racks, use your scourer to ensure they are clean.

Make sure you get inside the oven’s corners, where most people overlook spots and residual stains. If required, use an old toothbrush to clean hard-to-reach places. Keep in mind not to get anything electrical wet! During this time, you may also clean your baking trays by soaking and washing them in a sink of hot water and liquid detergent.

The final step is to clean the glass door of your oven.

Again, a scourer can be used to remove stubborn food and oil. Wipe off completely, being careful not to leave any cleaning chemical residue behind.

Making Use of the Self-Cleaning Function

While cleaning your oven using your hands and getting into corners will provide a thorough clean, some people choose to use the self-cleaning option of their oven for comfort and ease. The intense heat of the oven is used in this approach to incinerate residual food particles and oil. Keep in mind that, even if your oven is labeled as self-cleaning, we recommend removing and wiping off as much grease and food as possible before beginning the self-cleaning option.

You will also need to clear up any ashes that remain after the cleaning. While this is a fantastic choice and handy for many, other people are concerned about the gases it may produce and the possible harm caused by such high heat. In general, you should not leave your house while your self-cleaning oven is running. It’s also vital to keep an eye on it and keep young children and pets away from the oven while it’s heating up.

Using Alternative Natural Cleaners

Unlike chemical cleaners (which contain lye and caustic chemicals), homemade or alternative cleaners are far safer to use in your oven, as well as in and around your kitchen and house. It is ideal if you avoid using chemical off-the-shelf cleansers as much as possible because they emit fumes that are damaging to our lungs and health. Use natural cleaning solutions that perform equally as well, such as baking soda, lemon juice, vinegar, and natural soaps, instead.

Keeping it Clean

To make cleaning your oven much easier, try to clean up a bit after each use and avoid allowing messes to accumulate for too long. When stubborn stains emerge, you can use baking soda overnight to remove them. Wipe off the glass screen of your oven after a heavy cooking session, and cover the bottom oven shelf with foil ahead of time to catch any food that falls. Consider using cooking bags to roast meat so that less fat and oil accumulates in your oven on a regular basis.

While it is easy to put off cleaning your oven, maybe this acts as a reminder to do so if you haven’t done so in a while.

Remember to leave your windows open when cleaning, regardless of whatever cleaner you use, to ensure that the space is adequately aired. If you utilize the self-cleaning function, ensure no dogs are around. If you are unclear which procedure to employ or would like to have someone else clean your oven, consider having it professionally cleaned.

It not only saves you time, but it also provides a complete cleaning that is both safe and efficient. Contact us at Dial Cleaning Services today for additional cleaning ideas and information on house and office cleaning.

Contact us today for professional help

Call Us: 514.629.0841

Address: Montreal, Quebec, Canada

Mail Us: info@dialcleaningservices.com

READ MORE
hjiy
Blog Uncategorized
By Fin Dittimi August 9, 2021

The Most Effective Mold Removal Methods for Your Home

It’s unappealing, stinks, and can make you sick. Mold is the absolute last thing you want to discover in your house. However, if discovered immediately, it should be simple to remove on your own. No matter where you find mold in your home, there are safe, efficient methods for removing it from a range of household items and preventing it from returning.

All you need are some simple household materials and a broad grasp of what mold is and what kills mold to restore your home to its previous mold-free condition.

What Is Mold?

First and first, what exactly is this dreadful household pest known as mold? Mold is a fungus composed of microscopic living creatures that flourish in wet settings such as your damp bathroom or basement. Mold and its spores may be found everywhere. There are over 100,000 different forms of mold, and every homeowner finds at least one of them in their house at some point.

Many molds are innocuous, even beneficial, but others are harmful. You don’t want it in your house, anyways. Mold degrades materials, causes allergies, and can make people sick. It also appears to be dirt buildup.

Because mold is a living creature, the best way to get rid of it is to destroy and remove it; otherwise, it will return shortly. You should be able to accomplish this yourself as long as the home mold is limited to a small area.

Bleach versus Vinegar: Which Kills Mold?

Oh no, you’ve discovered mold. What are you going to do? The majority of households will douse it with bleach or a similar cleaning solution. Unfortunately, while these cleansers are harmful to you and your family, they have little effect on mold. Vinegar is the true mold-killer.

When harsh chemicals fail to destroy mold, how does vinegar? Although bleach may remove surface mold, its chemical composition prohibits it from penetrating porous surfaces where mold spores have sunk in deep and formed a protective barrier. It just cannot get to the bottom of the problem.

Vinegar, on the other hand, may enter porous surfaces and attack the molded membrane with its acidity, effectively destroying the whole mold colony so that no surviving spores can replicate and grow again. A moldy surface may be temporarily cleaned with bleach, but vinegar can completely remove it.

How to Get Rid of Mold Using Vinegar and Other Natural Remedies

So, now that you know bleach doesn’t work, you’re probably wondering how to remove mold with vinegar and whether that’s the only option.

Good question! Vinegar is incredibly simple to use on mold, and there are other simple and efficient non-toxic mold killers you may try as well. Here are the finest all-natural mold removal methods:

  1. Vinegar: Simply fill a spray bottle with vinegar and liberally spray the moldy area. Allow the vinegar to rest for at least an hour to perform its magic. Finally, blot the area dry with water with a cloth or paper towels. That’s all!
  1. Hydrogen peroxide: Hydrogen peroxide is an antifungal that acts on hard surfaces comparable to vinegar. Fill a spray bottle with 3 percent hydrogen peroxide, saturate the moldy surface, and let it sit for 10 minutes. Remove any residue by scrubbing the mold and wiping everything down.
  1. Baking soda: This gentle product has the proper pH to destroy mold while being safe for dogs and humans.
  1. Tea tree oil: You may not have this in your cabinet, but it is available at health food stores or online. It is a powerful fungicide that may be used to eliminate mold. In a spray bottle, combine 2 teaspoons of tea tree oil and 2 cups of water. Allow the mold to rest for 24 hours after spraying it. Remove any dead mold that has accumulated.

Contact us today for professional Commercial cleaning and Residential Cleaning Services

Call Us: 514.629.0841

Address: Montreal, Quebec, Canada

Mail Us: info@dialcleaningservices.com

READ MORE
dial-tidy
Blog Uncategorized
By Fin Dittimi August 6, 2021

4 Easy Ways to Keep Your Home Clean and Tidy

Cleaning and tidying the house may seem like an onerous, daunting chore at times, and we prefer to put it off for as long as we can. Fortunately, our experts have chosen to provide four easy techniques to keep your house organized and tidy.

Remove the Packaging

Grocery packaging is usually rather large and takes up a lot of room in your home. Consider buying plastic or glass containers that can stack neatly on top of each other to keep your cabinets clutter-free and organized. And if you take an extra 5 minutes to label them, you’ll never have to wonder what’s inside again.

This strategy is effective not only for dry food, but also for cleaning detergents, pet food, tiny toys, office supplies, and other items. Getting rid of the original packaging offers one additional unanticipated benefit. Keeping everything in comparable (or the same type/size) containers provide a unified aesthetic and makes your storage areas appear more basic and organized.

Tidy-up in the Evenings

Waking up to a dirty, cluttered house may demotivate you for the rest of the day. Not to mention how time-consuming it may be to get ready for work if you have to spend half of the morning looking for your belongings. However, if you wait for all of your cleanings until the weekend, this is fairly common. Instead of devoting only one day a week to organizing and minor cleaning, we recommend attempting to do this task every evening. If this is not possible, every other evening will suffice. Set aside 15 minutes of your after-work time at home for cleaning. You’ll be surprised at how simple it is to maintain your house organized and friendly throughout the year.

home, house, sink

Don’t put off spring and autumn cleaning.

Even if you clean and tidy up regularly, dust, grime, and disorder will make their way into your house. Deep cleaning the house once a year, or better yet, twice a year can assist to keep it in good general shape. We’ve already discussed how important it is too deep clean your house in the spring and autumn. There are several wonderful things you can do for your personal comfort and safety by not neglecting these semi-annual clean-ups.

Reduce the Amount of Dirt Inside the House with Ease

We can’t help but carry dirt and muck inside the house while it’s pouring. There is, however, an easy remedy. Our house cleaning experts recommend keeping a few clean rags in an accessible location in your hallway. You may also use doormats to keep your carpets from becoming too dirty. If you use a doormat to clean your shoes when they are extremely wet and muddy, you will significantly reduce the amount of dirt inside. Another great method for preventing messy floors and carpets, especially for pet owners, is to place a tray or a placemat under your four-legged companions’ food and water containers.

Are you too tired or too busy to do your chores? We can assist! Contact us to schedule our home cleaning services today and enjoy a neat and clean home.

Contact us today for professional help

Call Us: 514.629.0841

Address: Montreal, Quebec, Canada

Mail Us: info@dialcleaningservices.com

READ MORE
toiletscrubbing_414422
Blog Uncategorized
By Fin Dittimi August 2, 2021

How to Get Rid of Limescale in Your Toilet

Oh, the simple lavatory. The place where we go to relieve ourselves, not just of our physical demands, but also of the tension of the day. The toilet, our dependable buddy and pal, is a great respite from the stresses of everyday life. That is why we must take care of it. Limescale is a sneaky little thing that lives in water. It has a penchant for gripping our gorgeous white toilet bowl, resulting in an unsightly discoloration of the porcelain over time. That is why we have chosen to compile a list of dos and don’ts for removing limescale from your toilet.

What exactly is limescale?

First and foremost, before you confront the beast, you must understand what it is. Limescale is a cunning tiny creature. It is a hard, chalky deposit composed primarily of calcium carbonate (CaCO3). It frequently accumulates in kettles, hot water boilers, and pipes, particularly for hot water. Limescale accumulates in areas where “hard water” evaporates. After that, the limescale generally develops a strange color. The colors span from off-white through greys, pinks, and reddish browns. In addition to being difficult to remove and unappealing to the sight, it may cause significant damage to plumbing and heating components.

How NOT to Get Rid of Limescale

Cleaning misconceptions abound, as they do with all cleaning procedures. That is why we have tried and tested such techniques, and we are here to share the findings with you. The following are the two most common limescale removal misconceptions we’ve discovered:

  1. Bleach: Bleach is one of the finest companions a home can have. It is capable of removing stubborn stains, brightening darkish surfaces, disinfecting, and killing almost anything. So it’s natural why so many people believe it works. The fact is that it does not effectively remove limescale. It just lightens the discoloration. In this situation, the limescale is more damaging since you can’t see it and aren’t aware of it.
  2. Coca-Cola – This myth holds that putting a bottle of Coca-Cola into the toilet bowl and leaving it overnight would dissolve the limescale. The acid in the cola is supposed to dissolve the limescale. This test yielded disappointing findings for us. We only received a cola-colored limescale stain.

How Do You Get Limescale Out of Your Toilet?

Now that we’ve dispelled those fallacies, let’s look at some DIY methods for descaling your toilet. You will require the following items:

  1. Vinegar, white
  2. Sandpaper

That’s all! Here are our two limescale removal methods:

How to Get Rid of Limescale with Vinegar:

  1. Fill the basin with 1 litre of undiluted white vinegar. Make sure you get all of the toilet bowl’s sides.
  1. It’s now time to wait. Allow at least 3 hours for it to sit.
  1. Scrub the toilet bowl with a toilet brush or cleaning sponge soaked in additional white vinegar.
  2. Flush to get rid of any leftovers.
  1. Repeat till your toilet shines like new!

How to Remove Limescale using Sandpaper:

  1. We propose utilizing two types of sandpaper for this job: medium-grain and fine-grain.
  2. Begin by sanding the interior of the toilet with medium-grain sandpaper.
  3. Continue until the bulk of the limescale has been removed, being careful not to scratch the bowl.
  4. Begin buffing the interior of the toilet with the fine-grain cloth until the discoloration is entirely removed.
  5. Flush the toilet to remove any residue before cleaning it as normal.

At Dial Cleaning Services, we are experts in house cleaning in Quebec, Canada. So you can contact us to have a clean space and create a more pleasant climate in your company.

Call Us: 514.629.0841

Address: Montreal, Quebec, Canada

Mail Us: info@dialcleaningservices.com

You may also like:

  • How to clean tall windows in 5 steps
  • How to clean your new home before moving in
  • 6 Tricks to keep the floor of your outdoor terrace clean
READ MORE
cleaning tools
Blog Uncategorized
By Fin Dittimi July 30, 2021

ESSENTIAL CLEANING TOOLS

In this article, we’d be discussing some materials that can be used all year long and are considered the best tools for general cleaning:

Cleaning Cloths

We adore good cleaning cloths since they can be cleaned and reused, and they clean better than wipes and paper towels while being eco-friendlier and more cost-effective. Generally, cleaning entails dusting, scrubbing, and wiping – you’ll need a good cleaning cloth for this!

Scrubbing Sponge

Whether you’re doing a basic clean or a deep clean, you’ll need a good scrubbing tool. Sponges are reusable and washable, making them ideal for cleaning surfaces. You’ll find yourself using them to clean counters, stoves, doors, and just about everything else that requires a quick scrape or wipe.

Extendable Duster

Keeping dust out of the house is essential for keeping it clean, especially if you have allergies. To dust vents, light fixtures, corners, and edges, use an extended brush or duster. Another alternative is to use a big floor/wall washer on the walls to quickly and simply dust and clean them since it also functions as a rapid floor washer.

Vacuum Cleaner with Attachments

carpet cleaning

Don’t worry if you don’t have a vacuum cleaner with attachments right now, but when the time comes to replace it, look for one that does. All year long, you’ll utilize the attachments to clean under appliances and furniture, vacuum furniture, vents, light fixtures, window treatments, and so much more!

At Dial Cleaning Services, we are experts in carpet cleaning in Quebec, Canada. So you can contact us to have a clean space and create a more pleasant climate in your company.

You may also like:

  • How to clean tall windows in 5 steps
  • How to clean your new home before moving in
  • 6 Tricks to keep the floor of your outdoor terrace clean
READ MORE
dial-caring-forMattress
Blog
By Fin Dittimi July 9, 2021

How to Keep an Odor-Free Mattress

Sleep is one of life’s most crucial factors. We spend one-third of our lives sleeping as a species. We don’t spend a lot of time investing in the upkeep of our bed places, given that it’s such a small percentage. Our bodies create more body odors when we sleep, such as sweat, drool, and other physiological fluids continuously seeping into our bedding.

It is critical to understand how to keep your mattress odor-free. This is because poor bed hygiene can create issues when sleeping, making you dissatisfied, weary, and unrested. In our mattress care guide, we’ve included standard cleaning activities to add to your routine, as well as a few methods for “freshening up” your sleeping habitat.

Tasks to Include in Your Regular Cleaning Routine

You may be asking why you would want to add MORE tedious cleaning tasks to your to-do list. Our expert mattress cleaners frequently emphasize that, in the long run, incorporating a few 10-minute activities into your routine may save you time, money, and sleep. When you ignore your mattress, many dust and body smell develop over time, attracting mites. Not only that, but improper hygiene might affect your sleep.

• This may seem simple, but changing your bedclothes regularly is essential for a good night’s sleep. It is advised that you exercise at least once or twice a week.

• Once a month, vacuum your mattress. When we sleep, we lose many dead skin cells, and dust builds quickly under those covers.

• Every six months, flip your mattress. This will assist in preventing one-sided degradation and will keep your mattress fresh for a longer period.

How to Keep Your Mattress Odor-Free

Our expert cleaners have compiled brief advice on how to keep your mattress odor-free. If you follow this simple process once a month, it will help keep your bed fresh and your nights restful.

Check out our House Cleaning, Office Cleaning, Commercial Cleaning Service In Quebec, Canada.

Here is a list of items you should prepare:

• A Vacuum

• 100g bicarbonate of soda and 100g cornstarch

• Essential oils (optional).

Now that you’ve gathered your mattress maintenance tools, let’s get started:

1. The first step is to remove your bedclothes and vacuum the top side of the mattress (you can worry about the bottom side when you next flip it).

2. Get your soda bicarb and cornstarch and combine them.

3. Sprinkle the dry component all over the surface of your mattress and let it sit for an hour. If your bed has an odor problem, consider leaving it for a few hours.

4. It’s time to vacuum. Make certain that you suck up all of the little particles. Because of their tiny size, the soda bicarb and cornstarch operate as a dry substance that may get between the fibers of your mattress. They absorb a lot of odors and microorganisms as a result. That is how it contributes to better mattress hygiene.

5. You may now add 20-30 drops of your preferred essential oils. Lavender is an excellent choice for a restful night’s sleep.

You may also like:

  • The Best Window Cleaning: Tools And Techniques
  • Carpet Cleaning Tips And Conservation
  • COVID-19 Disinfecting Services.

Contact Us! 

Call Us: 514.629.0841

Address: Montreal, Quebec, Canada

Mail Us: info@dialcleaningservices.com

READ MORE
5eco
Blog Uncategorized
By Fin Dittimi July 7, 2021

5 Eco-Friendly Carpet Cleaning Solutions And Techniques

The most prevalent chemicals in professional carpet cleaning solutions are dangerous, posing a severe hazard to the health of both humans and pets. Take a look at our recommendations below if you want to thoroughly clean your rugs and carpets and preserve their as-new appearance for a longer period. We’ve included 5 eco-friendly cleaning ideas to assist you to cope with carpet cleaning without spending hours of arduous effort or using hazardous carpet cleaning solutions.

Carpet Cleaning Solutions And Techniques

Vacuuming regularly

Dirt, dust, and debris find their way into our home quite easily. When you come in from the outside, or even when you open a window or door. Dirt collects deep into the fibers of your carpet, and vacuuming regularly is one of the most efficient ways to remove it. At least once a week for the entire property and 2-3 times a week for high usage areas – hallways, living looms, etc.

Spills should be cleaned up immediately

When a spill occurs, dealing with it as soon as possible eliminates the need to employ any harmful chemical products. The first step is to eliminate any excess moisture that has remained in your carpet. After that, clean the area with hand soap and water or one of the following common home product combinations: To remove oil, use salt or cornstarch; for coffee, red wine, or juice stains, use club soda. If you have a foul odor, sprinkle baking soda evenly on the afflicted area, wait 5-10 minutes, and then vacuum it up. A combination of 1 part distilled white vinegar, and 3 parts water works well for most stains and is a safe and environmentally friendly alternative to chemical products.

Detergent-Free Steam Cleaning

If you followed the suggestions above, you would need simple water to steam clean your carpets and rugs. The boiling water will loosen the built-in filth, allowing it to be readily sucked away. Because hot steam destroys germs, no detergent is required. You may put some white vinegar in the water tank if you like. Vinegar is an excellent natural remedy for rot and mildew. The vinegar scent will fade in less than a day, leaving your carpets clean and free of stains.

Check out our House Cleaning, Office Cleaning, Commercial Cleaning Service In Quebec, Canada.

Cleaning Products Made from Plants

It is convenient to have certain commercial cleaning products at home, but instead of purchasing harmful ones, use plant-based detergents. Read the labels carefully – some very decent green carpet cleaning products are safe for you and your family’s health. Also, if you rent a steam cleaner, make careful to clean the water tank before using it to eliminate any harmful residues left by the previous renter.

Employ a Professional Cleaning Service

Regardless of how hard you work to keep your carpets and rugs clean, hiring expert carpet cleaners once or twice a year is highly advised. Check to see if the business you wish to employ utilizes green solutions and detergent — many experts do these days, but double-check. Professional crews move heavy furniture and remove old spots and stains with care, saving you a lot of time and effort.

Cleaning using non-toxic solutions reduces the risk of asthma, allergies, and skin disorders for you and those around you substantially.

You may also like:

  • The Best Window Cleaning: Tools And Techniques
  • Carpet Cleaning Tips And Conservation
  • COVID-19 Disinfecting Services.

Contact Us! 

Call Us: 514.629.0841

Address: Montreal, Quebec, Canada

Mail Us: info@dialcleaningservices.com

READ MORE
  • 1
  • …
  • 6
  • 7
  • 8
  • 9
Featured author image: 9 HOUSEHOLD ITEMS YOU MIGHT OVERLOOK CLEANING

Faith Ileh

Hi! I am an author of this blog. Read Our Post

Recent Posts
  • The Best Carpet Cleaning Services in Montreal
    The Best Carpet Cleaning Services in Montreal
    August 14, 2023
  • Experience the Pinnacle of Cleanliness with Dial Cleaning Service
    Experience the Pinnacle of Cleanliness with Dial Cleaning Service
    August 13, 2023
  • Conquer Dusty Corners Like a Pro! ✨🌿
    Conquer Dusty Corners Like a Pro! ✨🌿
    May 31, 2023
dial 2D

Request A Callback

Quick Links

Menu
  • Our Blog
  • Deep Cleaning
  • Montréal
  • Commercial
  • Residential
  • Privacy Policy
  • FAQ

Get In Touch

514.629.0841

  • Business Hours:
  • 8:00 AM – 6:00 PM
  • 7 Days a Week
Copyright © 2026 Dialcleaningservices | design by fandfconsultancy