logotype
  • About
  • Residential
    • Special Cleaning
    • Carpet Cleaning
    • Window Cleaning
    • Deep Cleaning
    • Apartment Cleaning
      • Sofa Cleaning
      • Yard Cleaning
      • Roof Cleaning
      • Carpet Cleaning
    • Duct Cleaning
    • Upholstery Cleaning
    • Pool Cleaning
    • After Party Cleaning
  • Commercial
    • Office Cleaning
    • Hotel Cleaning
    • Hospital Cleaning
    • Mall & Shops Cleaning
    • Industrial Cleaning
    • Pharmacy Cleaning
    • Premises Cleaning
    • School Cleaning
  • Our Locations
    • Montréal
    • Westmount
    • Ottawa
    • Toronto
  • Contact
CALL US TODAY
  • About
  • Residential
    • Special Cleaning
    • Carpet Cleaning
    • Window Cleaning
    • Deep Cleaning
    • Apartment Cleaning
      • Sofa Cleaning
      • Yard Cleaning
      • Roof Cleaning
      • Carpet Cleaning
    • Duct Cleaning
    • Upholstery Cleaning
    • Pool Cleaning
    • After Party Cleaning
  • Commercial
    • Office Cleaning
    • Hotel Cleaning
    • Hospital Cleaning
    • Mall & Shops Cleaning
    • Industrial Cleaning
    • Pharmacy Cleaning
    • Premises Cleaning
    • School Cleaning
  • Our Locations
    • Montréal
    • Westmount
    • Ottawa
    • Toronto
  • Contact
logotype
logotype
  • About
  • Residential
    • Special Cleaning
    • Carpet Cleaning
    • Window Cleaning
    • Deep Cleaning
    • Apartment Cleaning
      • Sofa Cleaning
      • Yard Cleaning
      • Roof Cleaning
      • Carpet Cleaning
    • Duct Cleaning
    • Upholstery Cleaning
    • Pool Cleaning
    • After Party Cleaning
  • Commercial
    • Office Cleaning
    • Hotel Cleaning
    • Hospital Cleaning
    • Mall & Shops Cleaning
    • Industrial Cleaning
    • Pharmacy Cleaning
    • Premises Cleaning
    • School Cleaning
  • Our Locations
    • Montréal
    • Westmount
    • Ottawa
    • Toronto
  • Contact

Tag: house cleaning tips

terrfied-mixed-race-family-couple-point-into-distance-see-amazing-thing-notice-something-terrible-sit-comfortable-sofa-with-dog-change-place-living-surrounded-with-packages-personal-stuff 1
Blog House Cleaning
By Fin Dittimi January 13, 2023

Your Home Is A Living Space Not A Storage Space.

Introduction

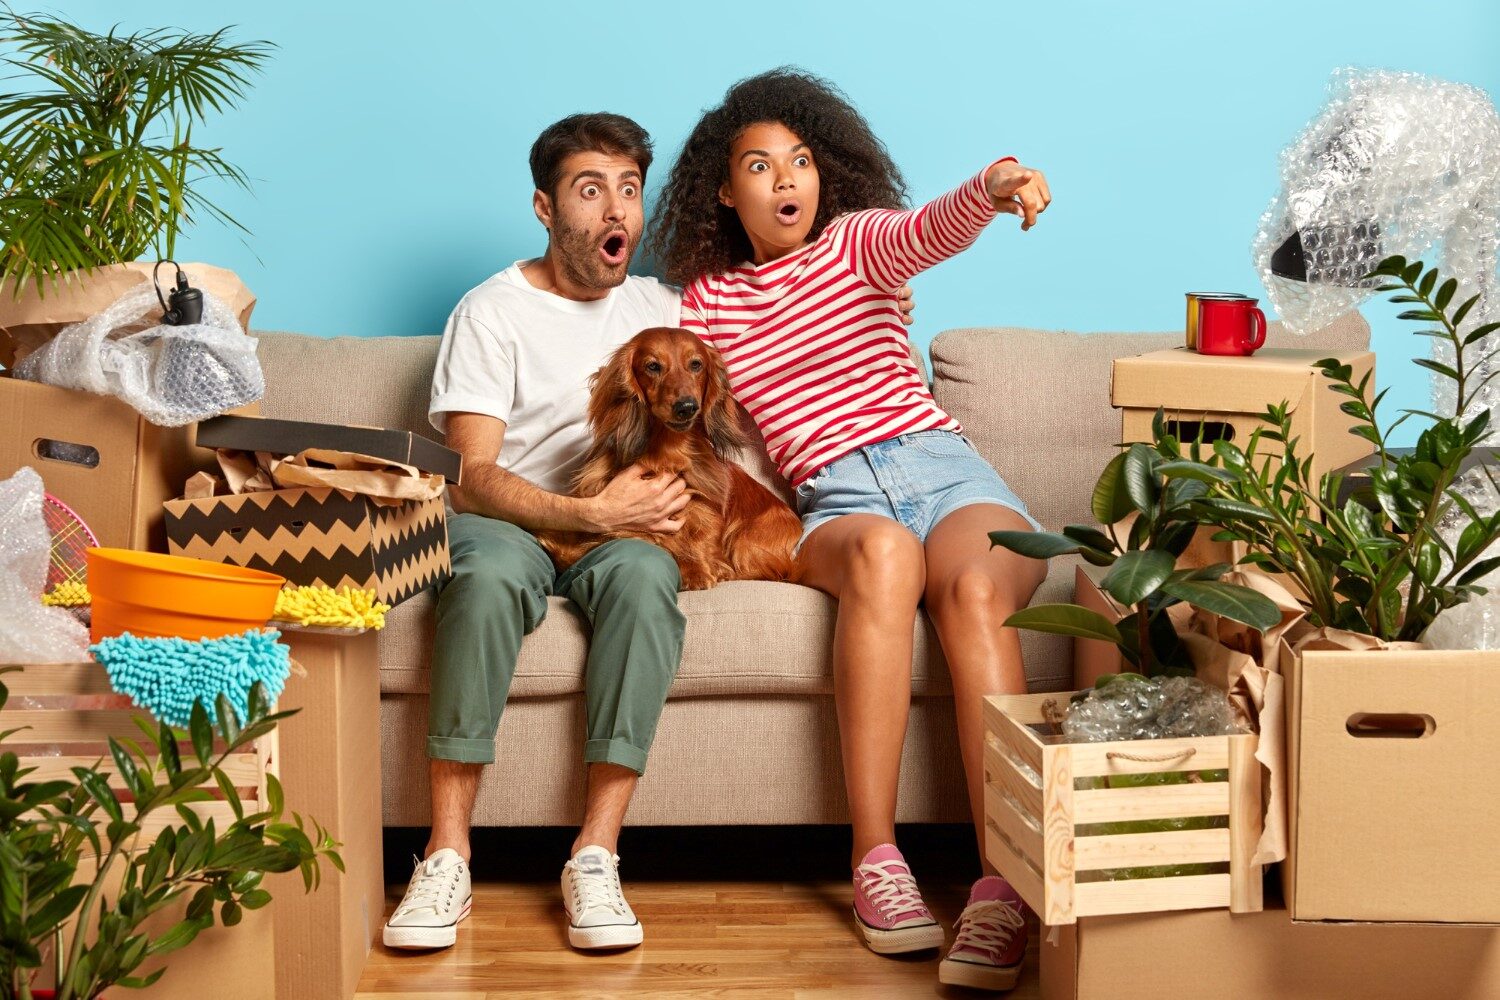
The primary function of a home is to provide a comfortable and safe living environment for its inhabitants. When a home is used primarily as a storage space, it can become cluttered and overwhelming, making it difficult to move around and even harder to relax and enjoy the space. Additionally, a home that is filled with clutter can negatively impact one’s mental and physical health.

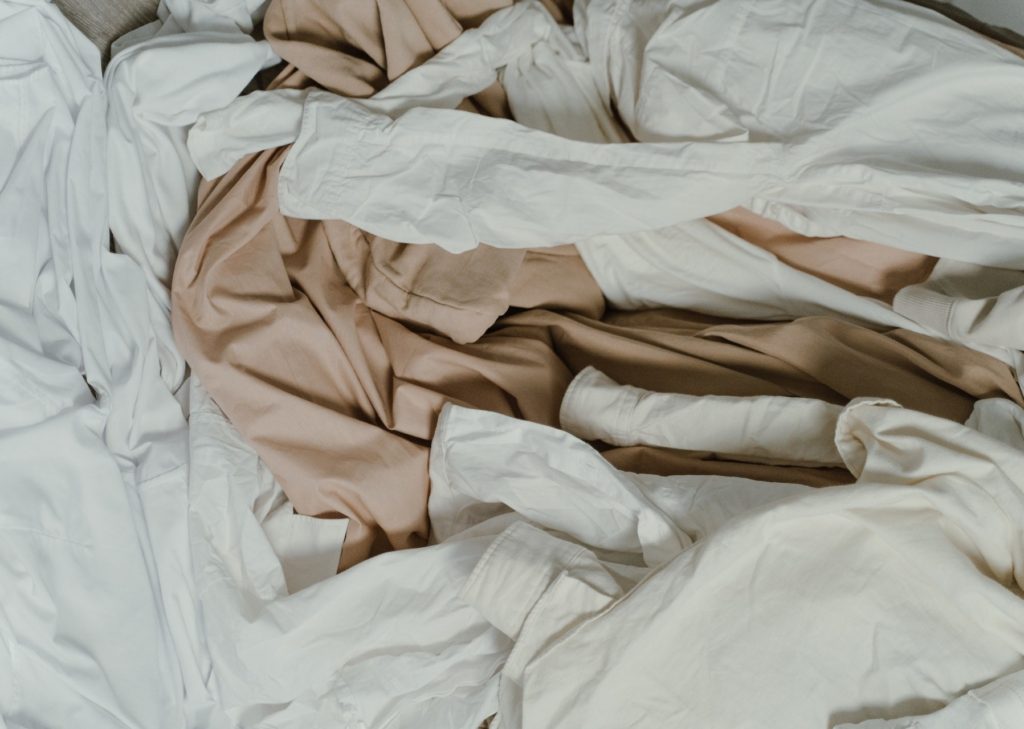
  • One way to use your home as a living space instead of a storage space is to declutter regularly.

This can be done by going through your belongings and getting rid of items that you no longer need or use. This could include clothes that no longer fit, old paperwork, or broken items. Donating or selling these items can not only free up space in your home but also be beneficial for others.

  • Another tip for creating a living space instead of a storage space is to be mindful when purchasing new items.

Ask yourself if you really need an item or if it’s just something you want. Try to avoid impulse buying, and consider the space you have available in your home.

  • You also can maximize the space that you have by organizing your possessions.

Use shelves, drawers, and other storage options to keep your items neatly in their place, and consider items like furniture with hidden storage compartments. This can help to create the illusion of more space and also makes it much easier to keep everything tidy.

Finally, try to create different areas for different activities within your home. This could include a reading nook, a workspace, or a TV area. This allows you to better use the space that you have and makes it easier to relax and enjoy your home.

In summary, using your home as a living space instead of a storage space is important for both the physical and mental well-being of its inhabitants. Regularly decluttering, being mindful when purchasing new items, maximizing space through organization and creating different areas for different activities are all ways to achieve this goal.

  • Another way to use your home as a living space instead of a storage space is to create a minimalist aesthetic.

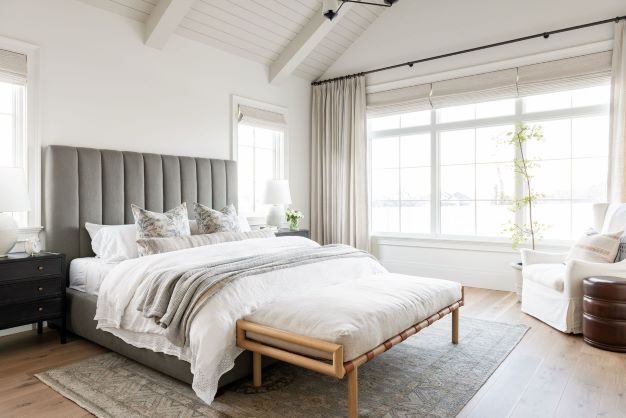
This means that you should aim to have a simple and uncluttered design throughout your home, with only a few key pieces of furniture and décor that are both functional and beautiful. This approach can help to create a sense of calm and tranquility in your home, which is essential for a comfortable and relaxing living space.

  • Another way to make your home more of a living space and less of a storage space is to incorporate plants.

Not only do plants help to purify the air, but they can also bring a sense of life and energy to your home. Indoor plants are a great way to incorporate a touch of nature into your living space and they also help to create a natural and inviting atmosphere.

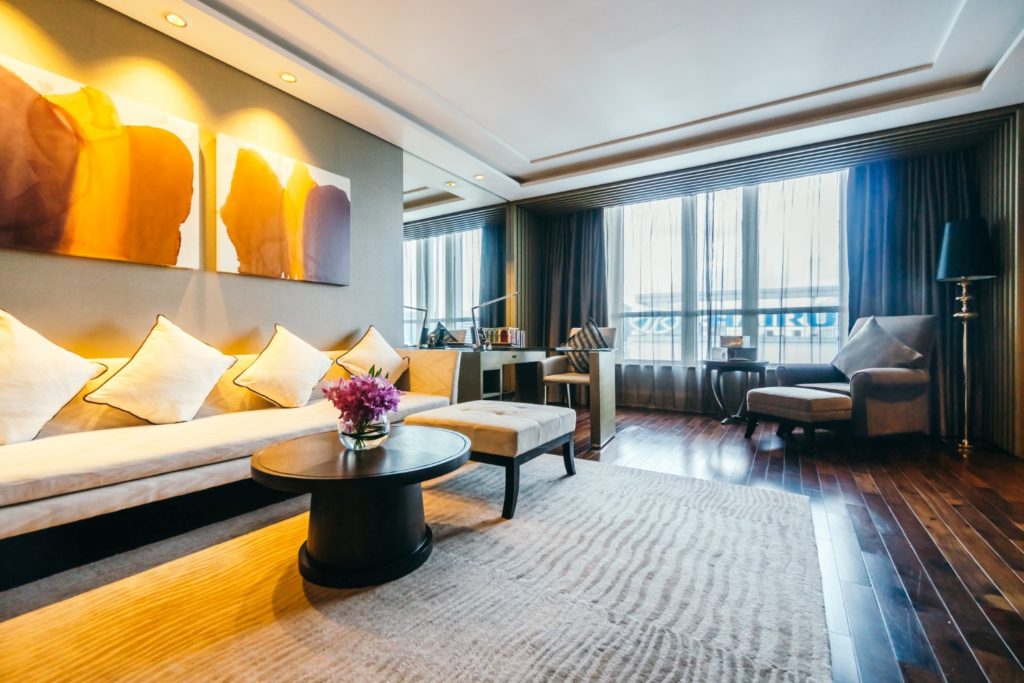
  • Lighting is also an important aspect of creating a living space.

Natural light is best, but if this is not possible, the use of various lighting sources can help to create different moods and ambiences in your home. Consider using floor lamps and table lamps to create a warm and inviting atmosphere, or overhead lighting to create a bright and functional workspace.

Creating a living space also means to be thoughtful of the colors you use. Color has a powerful impact on our emotions and can affect our moods, so it’s important to choose colors that are relaxing and calming. Opt for soft, muted colors like pastels, or cool colors like blue, green, or gray that are known for their soothing effects.

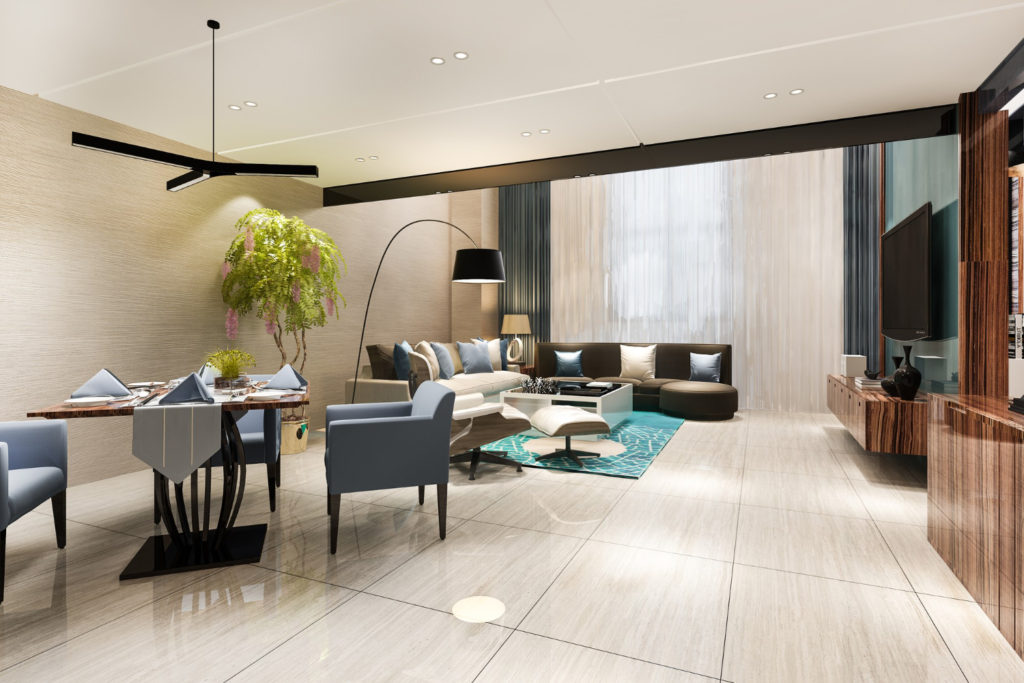
In addition, consider the overall layout of your home when trying to make it a living space. An open-plan layout is an ideal way to create a spacious and airy feeling in your home, as it allows light to flow freely throughout the space. This type of layout also makes it easier to connect different areas of your home, such as the kitchen, living room, and dining room, which is perfect for socializing and entertaining.

In conclusion, creating a home that is a living space instead of a storage space is essential for our overall well-being and happiness. To achieve this, consider decluttering regularly, being mindful when purchasing new items, maximizing space through organization, creating different areas for different activities, incorporating a minimalist aesthetic, adding plants, paying attention to lighting, color scheme and overall layout of the home. These tips can help you to create a comfortable, relaxing, and inviting home that you will love to spend time in.

READ MORE
laundry-4017609_640
Blog House Cleaning
By Fin Dittimi June 2, 2022

The Surprising Truth About Baking Soda: Can You Use It For Cooking?

Baking soda is one of those ingredients that most of us have in our pantry, but we’re not really sure what to do with it. We know it’s great for baking, but what else can it be used for?

As it turns out, baking soda has a lot of different uses, both in the kitchen and out. Here are some of the surprising ways you can use baking soda:

Make a natural cleaning solution.

Baking soda is a great natural cleaning agent. Just mix equal parts baking soda and water to create a paste, and use it to scrub away dirt and grime.

Unclog your drains.

If you’ve got a clogged drain, try pouring a cup of baking soda down it, followed by a cup of vinegar. Let the mixture sit for a few minutes, then flush with hot water.

Freshen up your laundry.

Add a cup of baking soda to your laundry load to help eliminate odors. You can also sprinkle some baking soda in your shoes to help absorb any unwanted smells.

Get rid of garden pests.

Mix together equal parts baking soda and flour, and sprinkle it around the base of your plants. This will help deter pests like slugs and ants.

Make a homemade fire extinguisher.

If you’ve got a small fire, you can extinguish it by pouring baking soda on it. Just make sure you have a box or two on hand, as you’ll need a lot of baking soda to put out a bigger fire.

Treat bug bites.

If you’ve been bitten by a mosquito or other insect, make a paste of baking soda and water and apply it to the bite. This will help to reduce swelling and itchiness.

Soothe sunburns.

Make a paste of baking soda and water and apply it to sunburned skin. This will help to relieve pain and irritation.

Deodorize your fridge.

If your fridge is starting to smell, place a bowl of baking soda inside. The baking soda will help to absorb any unwanted odors.

Clean your jewelry.

Make a paste of baking soda and water, and use it to clean your gold and silver jewelry. This will help to remove any build-up of dirt and grime.

whiten your teeth.

Mix together a small amount of baking soda and water, and use it to brush your teeth. This will help to remove any stains and whiten your teeth.

If you’re looking for a safe and natural way to clean your cooking tools and surfaces, baking soda can be a great option. It’s gentle enough to use on non-stick surfaces, and can even help to remove stubborn stains.

So, the next time you’re in the kitchen, don’t forget about baking soda. It’s a versatile ingredient that can help you create delicious, flavorful, and healthy dishes.

Ready to schedule a service? Call 514-629-0841 to speak with our friendly customer service representatives. Or SCHEDULE A FREE ESTIMATE today!

READ MORE
pexels-rodnae-productions-5591930
Blog House Cleaning Uncategorized
By Fin Dittimi April 29, 2022

Easy Steps To Clean Your Fridge

Few large kitchen appliances get such frequent use as refrigerators, so it’s crucial to keep them clean. A fridge exterior can help brighten your whole kitchen, while a clean interior looks great, uses space more efficiently, and can help you keep food fresher. These are easy steps on how to clean your fridge inside and out. 

Step1: Take everything out of the refrigerator

In order to properly deep clean a refrigerator, it needs to be totally empty, which means taking everything,  Stash highly perishable foods like milk or raw chicken in a cooler, to avoid spoiling.

Once you’ve taken out the food, remove any detached shelves, drawers, and door inserts.

Step2: Throw out old and spoiled food

As you transfer food from the refrigerator to the cooler or freezer, check for spoiling and throw away anything that’s gone off, or that you simply know you will not use. If your refrigerator is home to a lot of leftovers in food storage containers, this is a good time to review the contents and throw out any food that you know you will not consume. Disposing of leftovers can be an unpleasant task, but donning a pair of rubber household gloves can help to make scooping old food out from storage containers a less disgusting job.

Step3: Wash shelves and drawers

Start by washing the shelves, drawers, and/or door inserts you removed from the refrigerator, which can be done just like you wash dishes, using a sponge and dish soap. If the refrigerator shelves are made of tempered glass, a bit of caution is required when cleaning them. Priyanka Rathore, a communication manager for KitchenAid, says, “It is important not to clean glass shelves or covers with warm water when they are cold. Shelves and covers may break if exposed to sudden temperature changes or impact, such as bumping.”

Step4: Clean the interior of the refrigerator

When it comes to choosing a solution for cleaning the interior of a refrigerator, there are a number of options, and personal choice should certainly play a role. If using a disinfectant like diluted bleach solution makes you feel more comfortable, that is a fine choice. If using bleach in the place where you store your food makes you feel uncomfortable, that is also okay.

There are, however, some products to avoid when cleaning a refrigerator, Rathore says. “Do not use abrasive or harsh cleaners such as window sprays, scouring cleansers, flammable fluids, cleaning waxes, concentrated detergents, or cleaners containing petroleum products on plastic parts, interior, and door liners or gaskets.” After scrubbing with a sponge, use a microfiber cloth or paper towels to give the interior of the refrigerator a going-over. Use an old toothbrush to reach tight or oddly-shaped parts and a thin cloth for cleaning the rubber seal around the door.

Step5: Treat stubborn spills and stains with these tricks

To remove a stubborn, stuck-on mess, wet a sponge or rag with very hot water, wring it out and press it on the spill just as you would a compress, repeating as needed and being careful not to burn yourself with the hot water. The heat and moisture will reconstitute the dried-on mess, making it pliable and easy to wipe up.

Young worker woman wearing rubber protective yellow gloves cleaning the fridge with rag and spray bottle detergent. Home, housekeeping concept. Lifestyle

Step6: Clean the exterior

The exterior of plastic refrigerators can be cleaned in the same way as the interior, using a microfiber cloth or sponge with a mild cleaning solution. Stainless steel refrigerators can be wiped clean using a microfiber cloth; very dirty exteriors may require a stainless steel cleaner, though typically one is not needed. If fingerprints and smudges often show up on your stainless steel appliances, a wax-based cleaner can help to prevent them. Regardless of material, don’t overlook the top of the refrigerator when cleaning its exterior as it is likely very dirty.

Fridge Cleaning Hacks

  • Wipe up spills and stains as soon as they happen since, the longer they sit, the harder they’ll be to remove. 
  • Make sure containers are clean going into the fridge. A jam jar or ketchup bottle with residue on the outside will make your fridge sticky. 
  • When thawing items such as frozen meat, place them on a rimmed plate or baking sheet to control spills or leakage.
  • Soak cotton balls in vanilla extract and leave them in the fridge for a few hours to provide a pleasant aroma. 
  • Clean the refrigerator door seal with a toothbrush and a mixture of bleach and warm water. Wipe with a dry cloth.
  • Try scrubbing tough stains with a mildly abrasive toothpaste.
  • Place a crumpled piece of brown paper in the fruit and vegetable drawer to absorb odors over time.
  • Don’t overfill your refrigerator. Fridges cool more efficiently if air has room to circulate, and it’ll be harder to see or clean up stains if it’s overcrowded.

READ MORE
cleaning-air-duct
Blog House Cleaning
By Fin Dittimi March 17, 2022

Cleaning And Disinfecting Your Air Conditioner Vents

You need to clean your air vents on a regular basis, depending on how quickly they get dirty. Your air vents collect a lot of dust, dirt, and other particles floating around in the air. They get dirty quickly, and dirty air vents could negatively impact your indoor air quality. What do you need to do to clean your vents, and how should you do it? 

What You Need To Clean Your Air Conditioner Vents

  • Vacuum with a hose
  • Screwdriver (type of screwdriver depends on your vents)
  • Dish soap
  • A scrubbing brush
  • Gloves
  • A bucket 
Horizontal photo of vacuum cleaning inside heater floor vent with Red Oak Floors in background

Steps To Clean Your Air Conditioner Vents

These steps will work for floor vents, wall vents, and ceiling vents. It doesn’t matter where your vent is mounted, these steps will work for any of them. These instructions are general and may not work for all types of vents; however, most residential vents should be relatively simple to clean. 

Before cleaning anything, turn your air conditioning system off! You should be able to do this through your thermostat, but you can also turn them off manually

Remove the vents.

Some vents can be easily pulled off, but many require a screwdriver. Take your vents off and put them to the side.

Vacuum the ducts.

Your ducts will likely be dirty, so take your vacuum’s hose and let it run! Get as much dust and dirt as you can out of the ducts. Don’t go too deep into the ducts: there’s no reason to clean out the entire duct at this stage, just the area near the vents.

Dust off your vents.

Use a duster and get all the extra dust and dirt off of your vents. Take this dust and throw it in the trash: try not to get too much of it in the air! Preferably, dust off your vents inside a garbage bag so that the dust doesn’t fly up into the air and up your nose!

Prepare some soapy water.

Get some warm water and mix in some dish soap. Make sure the water has a good deal of lather in it: this way, you know the water has been sufficiently soaped.

You want to do this in your bathtub, but if you don’t have a bathtub, a washbasin, or a bucket will do just fine.

Soak your vents for up to 15 minutes.

This is where the real cleaning happens. You want to soak your vents in the tub or basin for 10 to 15 minutes. It’s not necessary to let them soak for longer than 15 minutes, and if your vents are made of iron or non-stainless steel, it may cause them to rust.

The reason we soak the vents is to get rid of any grease or gunk that allows dust to collect on the vents. This way, when you put them back, you won’t have to clean them again for a while.

Dry your vents with a towel and put them back on.

Putting your vents on should be as simple as taking them off, however, ceiling vents might be a little annoying. It’s okay if your vents are still a little wet: they won’t cause any issues with your HVAC system. Try your best to get them as dry as possible though.

Replace your air filter & turn your system back on.

Go to where your furnace is and replace the air filter. If you’ve been having a problem with dusty vents, you’re likely dealing with a clogged filter.

If you find the filter to be clear, then you don’t have to replace it.

Congratulations, you’ve cleaned your vents and you shouldn’t have to do it again for several months!

READ MORE
3d-rendering-luxury-modern-bathroom_105762-675-1
Blog House Cleaning
By Fin Dittimi March 15, 2022

How To Deep Clean Your Bathroom

 You could get professionals to deep clean your bathroom, or you can choose to do it yourself. If you’re about to take on this task, read on for tips for deep cleaning your bathroom.

What do you need to deep clean your bathroom?

For those of you who are new to the concept of deep cleaning, it includes the regular cleaning you do on a weekly or daily basis, as well as reaching the deep, disgusting parts of your bathroom that aren’t normally covered or thought of.

Things you need

  • All-purpose cleaner (if you are looking to disinfect surfaces, make sure and use EPA-approved cleaners)
  • Glass cleaner
  • Baking soda and vinegar
  • Tile and grout cleaner
  • Double-sided bucket
  • Grout and toilet brush
  • Microfiber towel and mop
  • Gloves
  • Broom and extendible duster
  • Vacuum

Here are some of the areas you will have  to deep clean list:

  • Shower, bathtub, grout
  • Showerhead
  • Shower doors and handles
  • Bathroom sink and counters
  • Inside and outside the toilet
  • Mirrors
  • Light fixtures, switches, and vents
  • Floors
  • Bath mats and rugs
  • Trash can

Steps to deep clean your bathroom

Shower and bath

  1. Pour enough vinegar in a plastic bag to submerge your showerhead with vinegar. Tie the bag, leaving it overnight to soak. The next morning, remove the bag and run the water to rinse.
  1. Wash all shower curtains with some old towels and hang to dry.
  1. For glass shower doors, mix 1 part distilled white vinegar with 3 parts distilled water in a bowl and microwave for 60 seconds. Pour the solution into a spray bottle and spray onto glass, letting it sit for 3 to 5 minutes. Then, use a microfiber cloth to wipe dry from top to bottom.
  1. For grout, you can use a special tile and mildew spray. Alternatively, mix ½ cup baking soda, ¼ cup hydrogen peroxide, 1 teaspoon dish soap. Spoon the mix onto the grout and let sit for 5 to 10 minutes. Scrub hard with a grout brush.
  1. For a bathtub, first pour hot water from a bucket all over the tub. Sprinkle baking soda on all surfaces. Fill your bucket with a half gallon of hot water and two tablespoons of dish soap. Then use a stiff brush or sponge to dip into the bucket and scrub the tub. If your tub is really dirty, use a store bought tile cleaner.

Tiles, walls, and ceilings

Spray all surfaces like countertops, tile, walls, and the ceiling with an all-purpose cleaner. Run the shower for five minutes to build up steam. Shut the door and let the steam and cleaner mix for 20 minutes. Then wipe down all surfaces with a clean cloth. For walls and ceilings, you can use a microfiber mop to reach the high spaces.

Bathroom sink

First, pour vinegar or baking soda down the drain and rinse with hot water. Use disinfecting wipes for the handles and faucets in order to prevent the transfer of bacteria from other parts of the bathroom (like the toilet). Use floss to clean the base, where the faucet and taps are flush with the sink.

Toilets

Coat the entire toilet bowl with a toilet cleaner — preferably one with bleach. Scrub the bowl hard with a toilet brush and let it sit for 5 to 10 minutes. While that is sitting, wipe down the outside of your toilet with a disinfectant wipe, as well as the outer lid, and then the inner lid. Then, use a bathroom specific disinfectant spray and leave it on for as long as the cleaner recommends (usually 10 minutes). Don’t forget to spray the flush handle. Then wipe everything down with clean clothes.

READ MORE
unpleased-slavic-cleaner-man-holding-cleaning-equipment-toilet-brush_141793-124856
Blog House Cleaning
By Fin Dittimi March 14, 2022

How To Clean The Toilet Brush And It’s Holder

The toilet brush and its holder get no respect. This housekeeping tool tackles one of the germiest spots in the home with very little praise or care. When was the last time you cleaned or retired your toilet brush? It’s time to take action.

How Often to Clean a Toilet Brush and Holder

     Ideally, the toilet brush and holder should be cleaned after every use and disinfected at least monthly. If the brush is allowed to dry completely before replacing it in the holder, then the holder should only need a thorough cleaning monthly. However, if the brush is not cleaned or allowed to dry after each use, then the holder should be cleaned at least weekly.

Steps to clean and disinfect your toilet brush and holder

  • Once you have finished cleaning the toilet, you can do a quick clean of the toilet brush using a disinfectant spray and disinfectant wipe.
  • After cleaning, flush the toilet and rinse the toilet brush in the water. Hold the handle with the brush head directly over the bowl of the toilet.
  • Generously spray the brush head with a disinfectant spray or 3 percent hydrogen peroxide, turning it so that all sides are sprayed.
  • Use a disinfectant wipe to wipe down the handle. Use a second wipe to clean the holder inside and out. The surfaces should remain wet for at least 10 minutes.
  • Balance the toilet brush handle between the toilet bowl rim and the lowered toilet seat to dry.
  • Dry the holder with a microfiber cloth. Allow the brush to air-dry thoroughly before placing it into the holder.

When to Replace a Toilet Brush

If you are using a nylon-bristle toilet brush, it should be replaced when the bristles become smelly, discolored, flattened, brittle, or begin to fall off the head while toilet brushes with a silicone head are usually more durable and should be replaced if the head becomes loose or damaged. With proper cleaning, they should last at least one year. A toilet brush’s longevity depends on how frequently it is used, but most brushes should be replaced every six to eight months.

Five Tips to Help Your Toilet Brush and Holder Last Longer

  1. Rinse the toilet brush in clean water after every use.
  1. Allow the brush to air-dry completely before storing.
  1. Do not allow a messy soup of bacteria-laden water to pool and dry in the bottom of the holder.
  1. Choose a holder that keeps the brush head off the bottom of the holder to prevent bending and breakage of the bristles.
  2. Use a toilet wand with disposable heads. Simply use a disinfecting wipe to clean the handle after each use and allow it to air-dry. The handle can be stored under the sink or from a hook—no need for a holder.

READ MORE
dial-b
Blog House Cleaning Upholstery Cleaning Window Cleaning
By Fin Dittimi February 28, 2022

STEPS TO WINDOW CLEANING

The fastest way to wash your windows with crystal clear, streak-free results.

Basic Window Washing Equipment

When cleaning windows, remember that the same high-quality window washing tools the pros use are readily available online, at home centers, and in full-service hardware stores. Here’s what you need:

  • 10 or 12-in. squeegee.
  • A scrubber or a sponge.
  • A bucket (a 5-gallon plastic bucket will work).
  • Dish soap
  • Lint-free rags or small towels.
  • A ladder and a ladder stabilizer 

Keep your squeegee fitted with a sharp, new rubber blade. Purchase two or three extra rubber blades to have on hand. You can get a little more mileage out of blades that aren’t nicked or sliced by simply reversing them to expose a fresh edge. When you store the squeegee, make sure nothing touches the blade.

DIY Window Cleaning Solution

The best homemade window cleaning solution is to just mix two gallons of water and about a teaspoon of dishwashing liquid together in your bucket. Some people also opt to use vinegar and water to clean windows.

In warm weather, you’ll get a little more working time by using cool water. If you’ve procrastinated so long that you’re washing windows in below-freezing temps, add windshield washing solution until the water doesn’t freeze on the glass.

  1. Scrub the Glass

The first step in the exterior window cleaning process is to scrub the glass, working at all angles to clean the edges. Make sure to cover every square inch of the glass. This technique allows you to get great results immediately. We’re moving the squeegee horizontally across the glass, but vertical strokes will work too. If you work vertically, angle the squeegee to direct excess water toward the uncleaned area.

  1. Clean a Starting Strip

Tip the squeegee so that only the corner contacts the glass. Then, starting at the top corner of the glass, clean a narrow strip of glass from top to bottom on one side. This clean strip makes it easier to start the horizontal strokes.

  1. Squeegee Across the Top

Press the squeegee blade against the glass in the upper corner and pull it steadily across the window. Concentrate on keeping the top of the squeegee in contact with the top edge of the window.

  1. Wipe the Squeegee Clean

Wipe the blade on the clean towel in your front pocket or wipe it across the scrubber to remove dirt and excess water.

  1. Work Down the Window

Start again, with the top of the squeegee overlapping the previous stroke about 2-in. Pull the squeegee across the window at an angle to direct excess water down. Wipe and repeat.

  1. Wipe Off Excess Water

The next step in exterior window cleaning is to use the rag in your pocket to wipe up excess water along the bottom edge of the window. Then poke your finger into a dry spot on a separate lint-free rag and run it around the perimeter of the window to remove any remaining suds. Wipe off any streaks using a clean area of the lint-free rag. Change rags when you can’t find any fresh, clean areas.

Tips for Hard-to-Clean Windows

Remove paint specks and labels with a razor blade mounted in a holder. Always use a new blade to avoid scratching the glass. Wet the window first and push the blade across once. Rinse the blade and repeat on the next section to avoid trapping debris under the blade that could scratch the glass. Don’t use a razor blade on tempered glass.

  • Remove tree pitch or bug droppings with a fine (white) nylon scrub pad. Wet the glass first and rub in an inconspicuous area to make sure you’re not scratching the glass.
  • Clean tough glass stains and built-up mineral deposits from shower doors and other glass surfaces using mild household abrasives and an ordinary power drill. Here’s how.
  • Use this glass cleaning solution for tough spots: Add 1/2 cup of ammonia per gallon of water to help remove greasy dirt for a DIY window cleaner
  • Loosen sticky residue left from labels or tape by soaking it with a specialty product like Goof Off. You’ll find Goof Off in the paint department at hardware stores and home centers. Then scrape off the residue with a razor blade

READ MORE
bed
Blog House Cleaning Uncategorized
By Fin Dittimi February 28, 2022

Easy Steps To Deep Cleaning Your bedroom

A messy bedroom makes it hard to find what to wear, and it can even interfere with your sleep.

Your bedroom is a sanctuary, a safe space to go at the end of the day to rest, recharge, and revive yourself. A clean and clutter-free bedroom promotes better focus, increased productivity, and better sleep. A cluttered room is a cluttered mind, and a cluttered mind isn’t going to fall asleep easily.
Here are seven easy steps on how to deep clean your bedroom.

Bedroom cleaning essentials

Cleaning your bedroom without using harmful cleaning products is easy. Here are a few cleaning essentials to get your bedroom clean as a whistle naturally.

Microfiber cloth
Natural laundry detergent
Dryer balls
Baking soda
Vinegar
Natural all-purpose cleaner
Duster

  1. Tidy up, and dust

Start your bedroom-cleaning odyssey with the very basics. First, gather up all the cups of stale water, half-empty cans of soda, and late-night snack bowls you’ve accumulated, and take them to the kitchen. Toss out your bedroom trash, put your dirty clothes in the laundry bin, and hang anything that’s clean. Put any other items that are out of place back in their spots. Now you’re ready to get down and dirty!

Dusting the stuff that’s easiest first might seem like the path of least resistance, but it actually means that all the dust from your ceiling fan is going to cover the dresser you just wiped down. Start from the top, and work your way down for the best results. Grab your duster, and hit the ceiling fan, ceiling and corners, and light fixtures first, then the windows, nightstand, dresser, and whatever other furniture you have. Don’t forget to dust your (fake?) plants!

  1. Spray and wipe down surfaces

After you’ve dusted, take a damp microfiber cloth and your all-purpose cleaning spray to surfaces that see a lot of use, like night tables, the dresser, and your bookcases or shelves. Wipe off any spills, stains, or sticky spots the duster didn’t take care of, and scrape off hardened candle wax with a blade. Scrub your door handles and the places on your doors you touch the most — these areas are prone to a build-up of dirt and oils that make them look grimy over time. They’re also probably rife with bacteria. Your baseboards are another place that gathers dirt, dust, and dead skin like no one’s business, so give ‘em a little microfiber love before you move on.

  1. Wash the sheets, duvet, and pillows

Sheets get mightily gross with all your dead skin and body fluids, so wash your sheets and pillowcases at least every two weeks.

A duvet is bulkier than your bedsheets and takes a bit more finessing to get it really clean. Check the tag for fabric care instructions, then read up on how to wash your duvet for step-by-step directions for getting yours super fresh and cozy again.

Down and feather pillows last longer and are easier to clean than typical poly-fill pillows. Surprisingly, down pillows are generally machine washable and dryable, and also surprisingly, it’s not rocket science. Wash your down pillows every 6 to 12 months.

  1. Clean your mattress

You’ve probably heard by now that humans spend a third of our lives sleeping, which means you spend about six to ten hours on your mattress every day. That’s a lot of time for sweat, dust, drool, dead skin cells and bacteria to seep into your cushy mattress, where millions of dust mites feed on each night’s bounty.
Clean your mattress every six to twelve months. Vacuum it first, then sprinkle the whole thing liberally with baking soda. Let it sit for a few hours to soak up moisture and odors. Vacuum again, and if it’s time, flip and rotate the mattress

  1. Vacuum

Now that all the dust from your ceiling fan and the crumbs from your nightstand and bedsheets are on the floor, it’s time to vacuum them up. Don’t just vacuum the floor you can see— suck out all of the dust and detritus that’s accumulated in the nooks and crannies of your bedroom, too, like the insides of your dresser drawers or nightstand, your windows frames, and between the window and the screen. Dust bunnies love to reproduce in small, dark places like under your bed, dresser, and bookcase, so scoot your furniture out of the way, and give those oft-neglected areas some attention, too. Then, attach the upholstery brush and vacuum your curtains.

  1. Remake the bed

There’s nothing quite as satisfying as hopping into a bed with clean sheets. After you’re done cleaning your bedroom, grab your freshly laundered bedding, and make

the bed. Pro tip: It’s always a good idea to have a backup set of bed linens for those days when you’re doing a deep clean and your regular set of sheets or comforter aren’t out of the dryer by the time you’re ready to hit the sack.

  1. Clean the closet

You only have to go as crazy here as you want to. If your closet is in pretty good shape, just make sure your clothes are hanging properly in the right place and in the right direction. Organize your shoes, and straighten up anything that’s gone topsy-turvy.
If your closet is a disaster in need of an overhaul, fear not. We’ll do this gently. First, get a couple of boxes or a roll of trash bags, and sort your clothes into three piles: donate/sell, recycle, and keep. Put the donate/sell items in one container and the ones you’ll recycle in another (you may need to take them to a facility that accepts textiles.) Hang up the items you’re keeping. A good rule of thumb is if you haven’t worn it in at least three months, you probably don’t need it.

READ MORE
newsinner_20200729133534_1
Blog House Cleaning Uncategorized
By Fin Dittimi February 28, 2022

TIPS FOR HEALTHY FEET AND SHOE HYGIENE

Ways To Treat Your Feet and Footwear Right.

With the outbreak of Covid-19 and the number of coronavirus cases on the rise, it is a timely reminder to maintain proper hygiene for a healthier environment. While washing and keeping our hands clean is vital, here are five tips to minimize and keep your exposure to bacteria and viruses to the minimum for healthier feet.

Tip #1: Do Not Wear Your Shoes Indoor

    There are two types of people – those who wear their footwear indoors and those who do not. While seemingly harmless, it’s worth noting that an average shoe sole carries 421,000 different kinds of bacteria including faecal bacteria, E.coli, and many more. Here’s the disturbing and gross fact why you must stop wearing your shoes in your home – poop transfer. 

It has been found that 93 percent of shoes that are worn more than a month contain faecal bacteria on the outsoles. This should not be a surprise as we step on pet waste on public grounds and step on splashes from the washrooms on public restroom floors. 90 percent of these bacteria and other microorganisms are transferred to clean floors instantly when you step into the comfort of your home. Shoes are home to bacteria and can lead to the accumulation of dirt and grime in confined spaces like our home. For parents with small kids crawling around and sticking things into their mouths, it pays to err on the safe side.

While some shoes can be disinfected if they are washable as per the care instructions, let’s face it, how many of us wash our shoes to simply walk indoors.

Solution: Practise a shoeless home and keep them outdoors! Designate an area by your house porch to drop your shoes before entering the house. Invest in a shoe rack to keep things tidy too. If you are still adamant to wear your shoes indoors whatever the reason is – convenience etc, consider investing in an antimicrobial doormat that clears most of the debris and germs on the outsoles.

 Tip #2: Clean Your Shoe Closet

Shoes should be stored in a cool, dry place. Do not literally wait till spring cleaning! It is vital to give your wardrobe (be it a clothes wardrobe or shoe closet) an occasional good clean, declutter and reorganize your footwear. Accumulating a messy pile of shoes attracts germs and here are some hacks on how you can Marie Kondo your shoe wardrobe.

How to clean your closet in 4 steps:

  1. Vacuum the floor around your wardrobe.
  2. Remove all shoes or clothes and perform your KonMari.
  3. Wipe shelves and racks with a microfiber cloth lightly sprayed with water.
  4. Clean your shoes and stuff tissue paper or shoe trees to keep them from sagging or losing their shape over time.

Tips #3: Clean Your Shoes

It can be a hassle when caked-on dirt and loose dirt get stuck on our shoes and just won’t budge, especially on rainy days or if we step over mud.

 Here’s the right tool for everything to get that stubborn dirt off.

  •  Slap the shoes together outdoors to remove loose dirt. Use a toothbrush to brush the dirt off and a butter knife or key to scrape set mud in grooves of your shoes
  • Mix a tablespoon of baking soda (abrasive) and laundry detergent (bleaching agent) and scrub the rubber parts clean with this mixture. Rinse off with water and it will look sparkling clean as before!

If you are looking beyond the general shoe care guide of your shoes, here are some bonus simple cleaning hacks without the expensive products for different types of footwear material.

Note: Always read your shoe care instructions that will provide a more detailed maintenance guide specifically for the shoes.

 Tips #4: Wear Your Socks!

Wear socks made of cotton, wool, or bamboo as they help to absorb moisture and prevent abrasion from the shoes. Plus, It keeps your feet warm and comfy.  Who says you can’t wear socks with sandals or slides? Socks’ fashion is huge these days – you can grace the streets in cute printed socks and team it up with your favorite breezy airy sandals. It protects your feet from dirt too!

READ MORE
high-angle-woman-with-face-protection-cleaning-tables
House Cleaning
By Fin Dittimi January 18, 2022

Reasons why you should hire a professional cleaner to clean your homes

 Hiring a cleaning service to clean your home can make your life easier and relieve you of daily chores and also gives you the opportunity to do fun things that you would love to do. You will no longer have to worry about making time to get chores done during your busy day. Once you assign the cleaning job to a cleaning service, there is no need to spend time dusting, washing, or vacuuming.

  1. Preventing Dust Allergies

   Dust allergies are a major problem in homes. Many children and adults have developed allergies to dust. It’s a common allergen that causes itchy eyes, sneezing, and a runny nose. When you hire a professional cleaning service to keep your home clean, they will make use of a High-Efficiency Filter vacuum cleaner to get rid of as much dust as possible from your home. Not only will they clean the rugs, carpets, and floors, but the filters are able to get rid of most of the dust hovering in the air. You can stay outside while cleaners get rid of the dirt and dust in your home.

2. Deeper Clean

Professional cleaners can deep clean your bathroom and kitchen and get rid of harmful bacteria. Our cleaning service uses the right tools such as vacuum cleaners, long dust extractors, sponges, and mops to reach tough areas. They use the best disinfectant to disinfect and cleanse contaminants from your home and surroundings. The vacuums they use will remove dust, dead skin, and debris from carpet and cracks. This will allow you to breathe better and have a dust-free atmosphere.

Cleaning services have experience with leaving bathrooms, kitchens, hallways, and other rooms in exceptional condition. They clean window blinds, ledges and they are careful when cleaning woodwork. They clean mirrors, clean tiles, bathtubs, and showers. They dust furniture, picture frames, and shelves and make sure cobwebs and fingerprints are gone. Your home will receive an intense clean because professionals have years of cleaning experience. They know which cleaning product to use at every time and will leave your home sparkling.

Close up of unrecognizable worker wearing protective suit cleaning floor with chemicals during disinfection indoors, copy space

3. Reduce Fatigue and Stress

  Dealing with your everyday routine and balancing your work and home life can become stressful. After working a full day and then coming home to carter for the needs of your family, not much time or energy is left to work on cleaning your home. Overworking yourself can have a serious impact on your health, including fatigue and stress. When you hire a  professional cleaner to help you out around the house you will find that you have more downtime, and are able to actually relax and bond with your loved ones.

When you allow professionals to do the cleaning, you can relax while they do all the work. There is no need for you to overwork yourself or get stressed out from performing chores. Professional cleaning services can utilize special techniques to get rid of microscopic organisms in your home that cause sickness and infections.

4. Keep Bathrooms and Kitchens Hygienic

When cleaning your bathroom, professional cleaners are sure to get rid of bacteria, fungi, and mold. They also clean and remove viruses and any organisms living on the bathtub, toilets, and sink surfaces. They know how to mop the floors in your kitchen and bathroom to wipe out stains. Since these two areas house the most germs, cleaners focus on cleaning hard-to-reach places.

When a professional service cleans your bathroom, they are sure to wipe down your valves and sinks and thoroughly disinfect your toilet, counters, and your bathtub. If you are concerned about germs, there is no need for you to encounter these microbes. A professional cleaner is not afraid of germs and will do a better job at sanitizing the area.

5. Trained and Skilled Staff

Professional cleaning firms have highly qualified personnel. Their employees are professional and have attended long hours of training. They have unique training to clean all commercial environments and will be able to deliver cleaning results efficiently. All of their staff are security vetted and background checked so that you are confident that they are hiring only the best teams of people.

6. Deliver Exceptional Results

   The most noticeable overall benefit to your home will be the physical transformation. You will be surprised at just how much of a difference a professional cleaning services provider can make to the look of your home. Your home will be gleaming and will become a very welcoming environment. With our professionally trained personnel, superior work, and quick response times, you should be 100% satisfied with the appearance of your home. A superior cleaning routine leaves a great impression every single time.

READ MORE
  • 1
  • 2
  • 3
  • 4
  • 5
  • 6
  • …
  • 8
Featured author image: Your Home Is A Living Space Not A Storage Space.

Faith Ileh

Hi! I am an author of this blog. Read Our Post

Recent Posts
  • The Best Carpet Cleaning Services in Montreal
    The Best Carpet Cleaning Services in Montreal
    August 14, 2023
  • Experience the Pinnacle of Cleanliness with Dial Cleaning Service
    Experience the Pinnacle of Cleanliness with Dial Cleaning Service
    August 13, 2023
  • Conquer Dusty Corners Like a Pro! ✨🌿
    Conquer Dusty Corners Like a Pro! ✨🌿
    May 31, 2023
dial 2D

Request A Callback

Quick Links

Menu
  • Our Blog
  • Deep Cleaning
  • Montréal
  • Commercial
  • Residential
  • Privacy Policy
  • FAQ

Get In Touch

514.629.0841

  • Business Hours:
  • 8:00 AM – 6:00 PM
  • 7 Days a Week
Copyright © 2026 Dialcleaningservices | design by fandfconsultancy